
We have previously explained how to use a tool called Phoca Downloads to allow your website visitors to download PDF and other files with the click of a button. Here we will explain how to use Phoca Cart to allow your customers to download PDF and other files by making these files Phoca Cart Products.
Advantages of Downloads as Phoca Cart Products
The primary advantage of using Phoca Cart Products to download PDF and other files is that displaying Downloadable Files as Products is much more appealing and informative that just displaying a list of Downloadable Files. Here is the Phoca Cart Category page with two downloadable files:
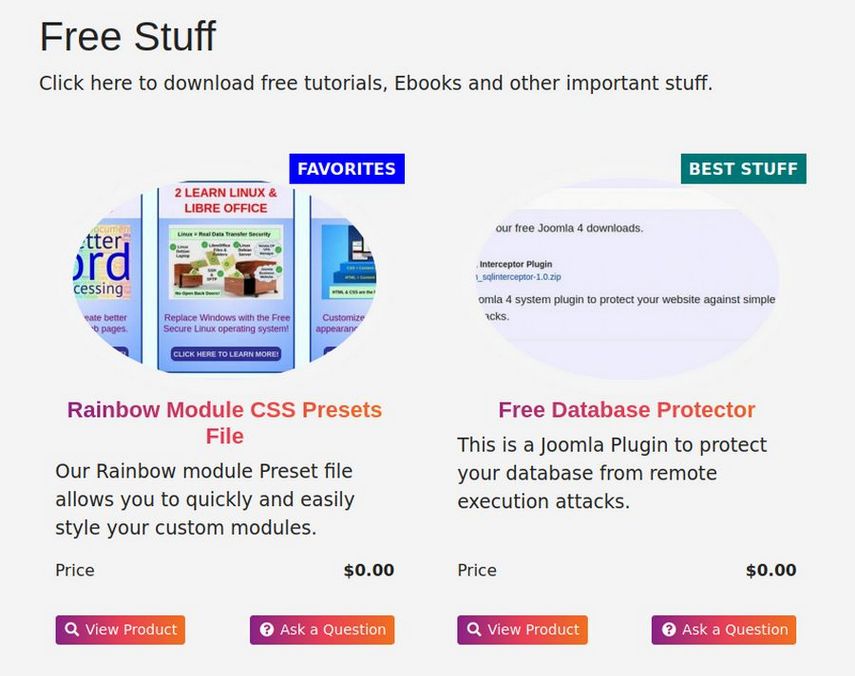
The appearance of the Phoca Cart Product View page can also include much more information including an Ask a Question button as well as a Detailed Description box, a Features box and a Video box.
A second major advantage is that Phoca Cart downloads can also be set up as PAID downloads – replacing the public download button with an Add to Cart button.
Customers are automatically sent an email with a Download link after their payment has been confirmed.
If you are only selling digital products, which do not need to be shipped, you can simplify the Checkout page so that your customers only need to enter their email address and payment information:
The primary drawback of using Phoca Cart instead of Phoca Download to offer free downloads is that it takes more time to set up each download with Phoca Cart than it does to set up downloads with Phoca Downloads. This is because each Phoca Cart product requires a Product image in addition to the Product description. More time is needed if you want to add a Detailed Description, Features, Video and Label for each Download.
Ultimately, whether setting up Downloads as Phoca Cart products is worth the extra time will depend on your ultimate goals. If you do not intend to offer paid downloads, and or if you have hundreds of free downloads, then using Phoca Downloads may be your best bet. But if you want to offer a combination of free and paid downloads, then using Phoca Cart instead of Phoca Downloads may make more sense in the long run.
Folder Differences between Phoca Downloads and Phoca Cart Downloads as Products
With Phoca Downloads, all of the PDF files are stored inside of a folder called phocadownload which is outside of your website images folder. In this folder, you can create folders for each of your categories and then place files in each of these folders.
With Phoca Cart, there are two types of downloads. These are FREE public downloads and PAID downloads. These two types of downloads are stored in different download folders. Free downloads are stored in a folder called phocacartdownloadpublic. Paid downloads are stored in a folder called phocacartdownload. Inside of the phocacartdownload folder are additional folders which use randomly generated licensing keys which you can require customers to enter in order to download the files in these folders.
Phoca Cart Downloads also have several settings called Options that are much different from Phoca Download Options. We will look at these Option settings next.
Phoca Cart Download Option Settings
From the Phoca Cart Control Panel, click Options in the upper right corner. Then in the Display tab, scroll down to Category View. Change Add to Cart, Category Items View from Yes to No. Our goal is to only have the Add to Cart button appear on the Product pages and only on the Product pages that have a price other than free. Then scroll down to Item Product View.
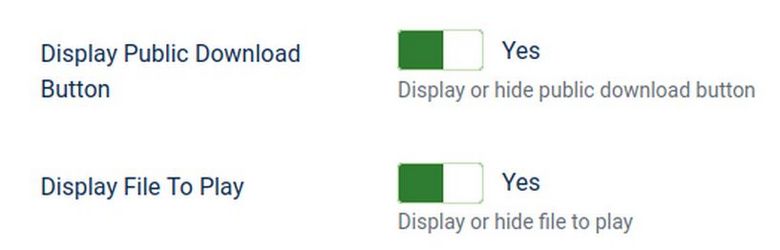
Here you can display or hide the public download button and or the File to Play button. For now, we will leave both set to Yes. Then scroll down to Checkout View. Assuming that you are only selling digital products and not physical products, change Zero Shipping Price to Hide Completely. Also change Display Zero Total to No. Change Zero Shipping Price to Display Free Text. Zero Shipping Price Calculation, change to Display Free Text. Zero Payment Price, change to Display Free Text.
Then scroll down to General Display Options. Change Hide Add to Cart Button (zero price) from No to Yes. Then click Save to save all of these changes in the Display tab.
Next, in the Calculation tab, scroll down to the Checkout section. If you are only selling digital products, you can use these settings to skip the shipping method step during checkout:
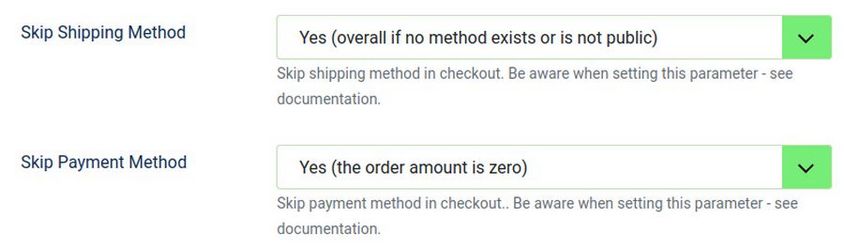
Change Skip Shipping Method to Yes (overall if no method exists or is not public). Note: You should also go to Phoca Cart Shipping Methods and delete all of the shipping methods). Also note: if you sell a combination of digital and physical products, then do not delete Shipping Methods. Instead, change Skip Shipping Method to Yes (all products are downloadable). This will hide shipping methods for Digital Only orders but display shipping methods when physical products are ordered.
Change skip payment method to Yes when the order amount is zero. This means the payment method is skipped for free downloads. Also change default order status for Free Downloads to Confirmed:

This order status for free downloadable products is set when all products in the cart are downloadable (digital) products and the order amount is zero. This means that you will not need to change the status to confirmed before your customers can download free downloads.
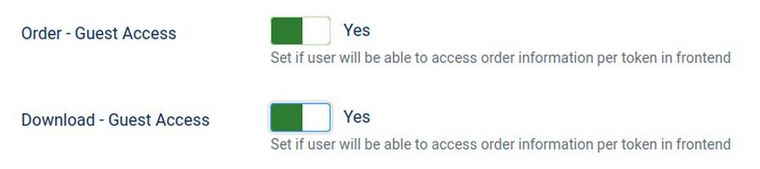
Next, in the User tab, Download, Guest Access by default is set for No. Change this to yes so that guest users will be able to access Download order information per token in front end.
Then still in the User tab, scroll down to the Download area:
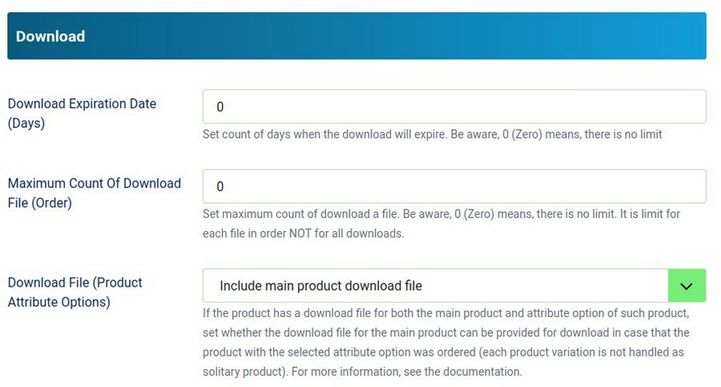
If the product has a download file for both the main product and attribute option of such product, this will set whether the download file for the main product can be provided for download in case that the product with the selected attribute option was ordered. Leave this at the default setting.
Also in the User tab is a setting for changing the Absolute Path to the Downloads Folder. This can be a path outside the public_html folder. This option is slightly more secure than leaving the Downloads folder inside of the public-html folder. However, there are several problems with doing this. First, you need to go into your Hestia Control Panel User Dashboard to create the folder outside of the public folder. Second, the folder must have proper permissions. We will therefore not change the absolute path for the Phoca Cart Downloads folder. Click Save and Close to close the Options screen.
Create Two Free Download Products
Next, we will look at the Download settings in the Product New screen. To show the difference between FREE public downloads and PAID downloads, we will first create two free download products and then create two paid download products. We have previously created a category called Free Stuff. We will now add two products to this Free Stuff category. Click Products, New.
General Options Tab
On the General Options tab, give the new product a Title and select the category Free Stuff. Then scroll down to Public Download File.
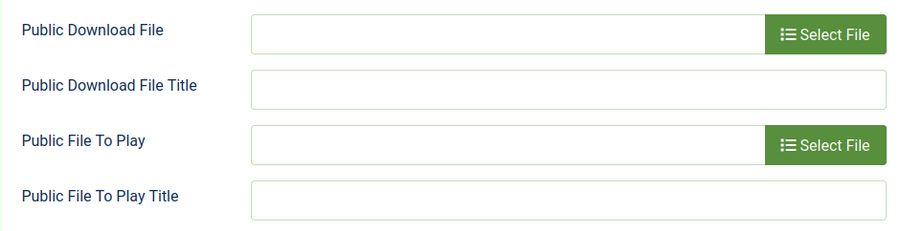
Click Select File.
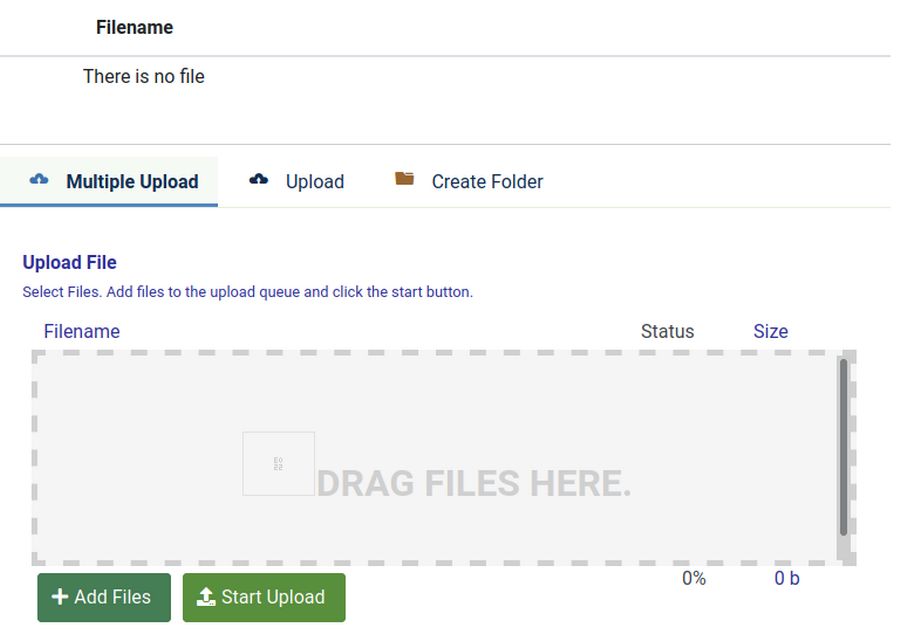
Click Upload. Then click Browse and select the file to upload. Then click Start Upload. Then click on the Filename to select the file. You can add a file directly here. Or if you have a lot of public download files, you can create one or more folders and then click on the folder to upload a file to that folder.
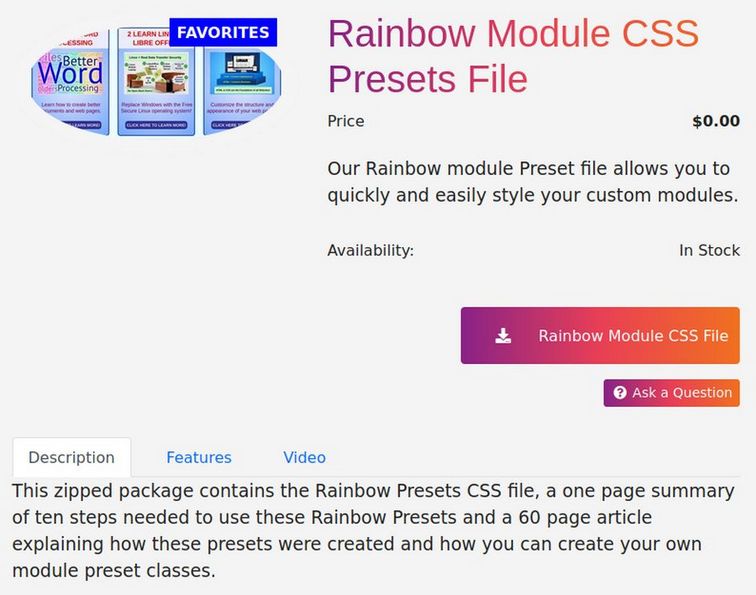
Public File to Play opens the same screen and places files in the same phocacartdownloadpublic folder. Below this is an area where you can enter a short and long description for the free download just like it was any other product.
Give the Public Download File a title and a description. Consider adding a Long Description and a List of Features and a Video – all three of which will appear on the Product page below the Product image. Then click on the Images Options tab and click Select Image. Create a folder called Free Downloads. Then click this folder and upload a Product image. Finally, click the Publishing Options tab and change the Product Type from Physical Product to Digital Downloadable Product. Also consider clicking on Labels and adding a Label. Then click Save and Close. Repeat to create the second Free Download called Free Database Protector.
Create Two Paid Download Products
Before adding the two Paid Download Products, we need to create an image for the Paid Downloads category and then create a category called Paid Downloads. Here is the Description for our Paid Downloads category: Help support our project by downloading PAID downloads. These are the same as our FREE downloads except that they cost a small amount of money and thus help us keep our project going so we can offer even more free and low cost downloads in the future!
Add the Category image. Then click Save and Close. Then we can create two Paid Download Products which will be the same files as the Free Downloads but charge $5 and placed in the Downloads folder rather than in the Public Downloads folder.
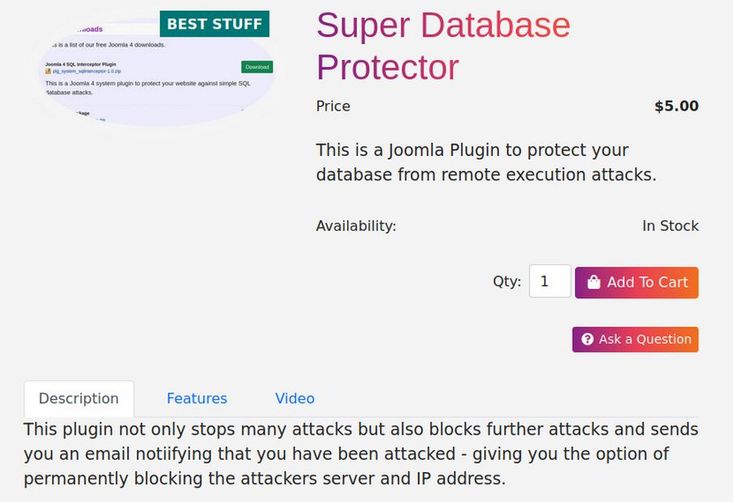
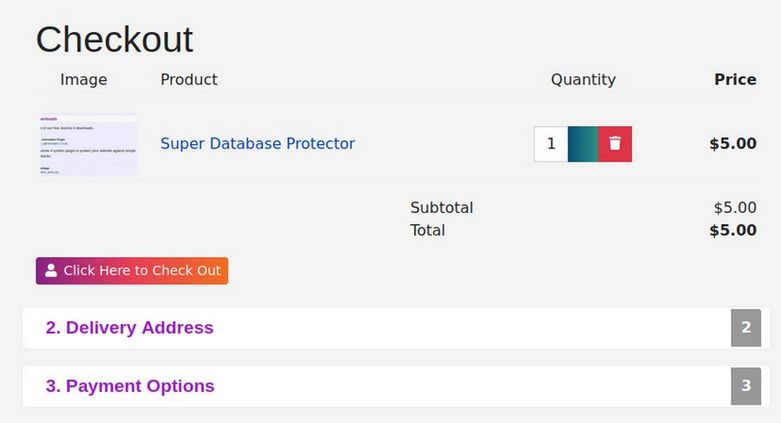
For the first PAID download, add a Product called Super Database Protector change $5 and explain that it is the same product as the Free Database Protector. But it is in the Downloads folder instead of the Public Downloads folder and costs money which therefore will display the Add to Cart button.
To create a Paid Download Product, click Products, New. Give the Product a Title such as Super Database Protector and a Price of 5 dollars. Assign it to the category Paid Downloads and give it a description, a detailed description, a Features description and a video. But do not upload the file to the Public Download File. Instead, click on the Download Options tab. This tab is used for Paid Downloads which are placed in special folders and associated with unique tokens or download keys. You can change the Download token to whatever you want.
Then on the Download File line, click Select File. Click Upload and upload the file. Then click on the file to select it.
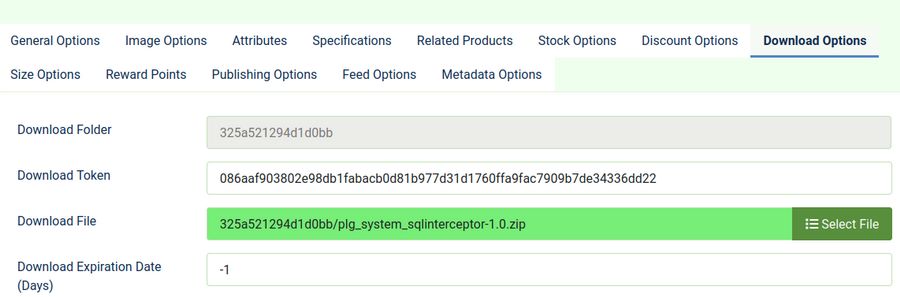
There is also a setting to limit the Expiration Date or period of time in which a person can download the file. The setting -1 means that the Global setting will be used. The setting 0 means that there is no time limit for downloading the file.
There is also a setting for Additional Download Files. This allows you to have more than one download file for the given product.
Then click Publishing Options and change the Product Type from Physical to Digital. Perhaps give it a Label. Then click Save and Close. Repeat to add a second paid product.
PAID Downloads Order Process
Go to a PAID Download Product page and click Add to Cart. Then select Proceed to Checkout.
Note that we have changed Shipping and Billing Address to Delivery Address using a Language Override. Go to System, Manage, Language Overrides, Site and click New. For Search Text, type Billing and Shipping Address.
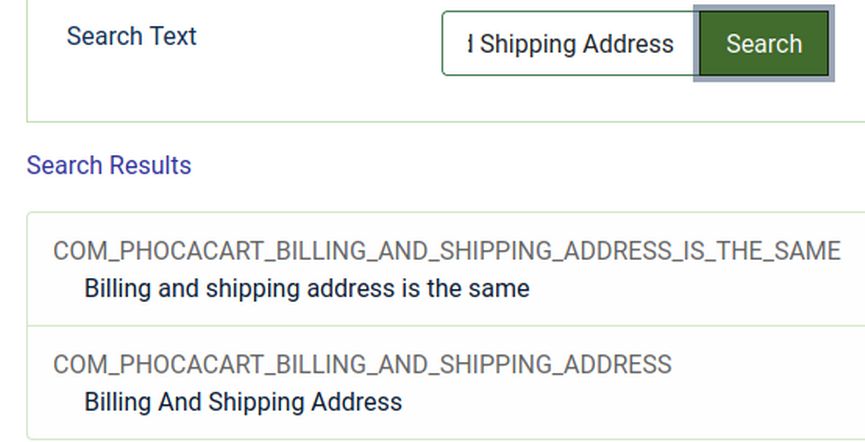
Click on the second option to select it. Then change the text to Delivery Address.
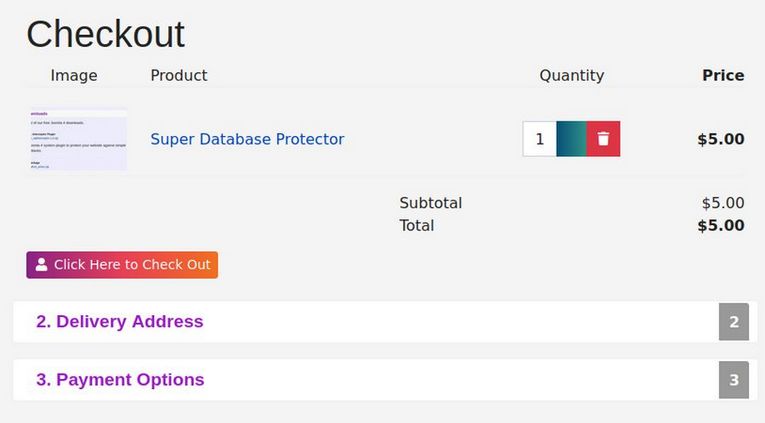
Going back to the PAID Downloads Order Process, click Click Here to Checkout.
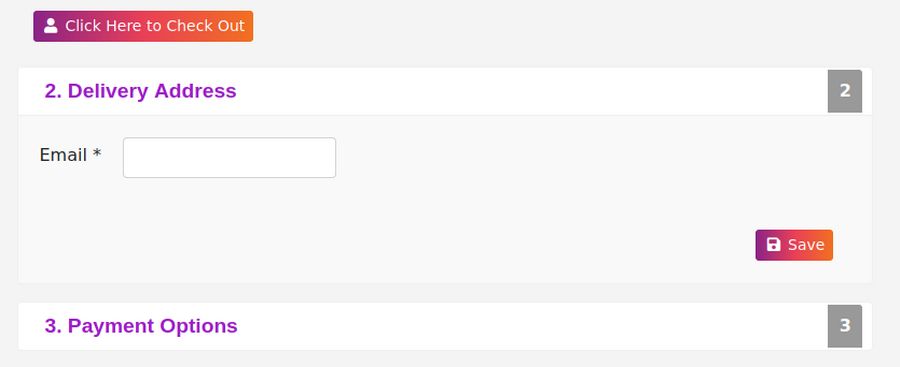
We have hidden the normal name, city, state and zip code fields in Phoca Cart Form Fields because we are not going to be shipping any physical products. If you are offering both physical and digital products, then these fields will need to remain enabled so you will know where to ship the physical products. For now, type in an email address and click Save.
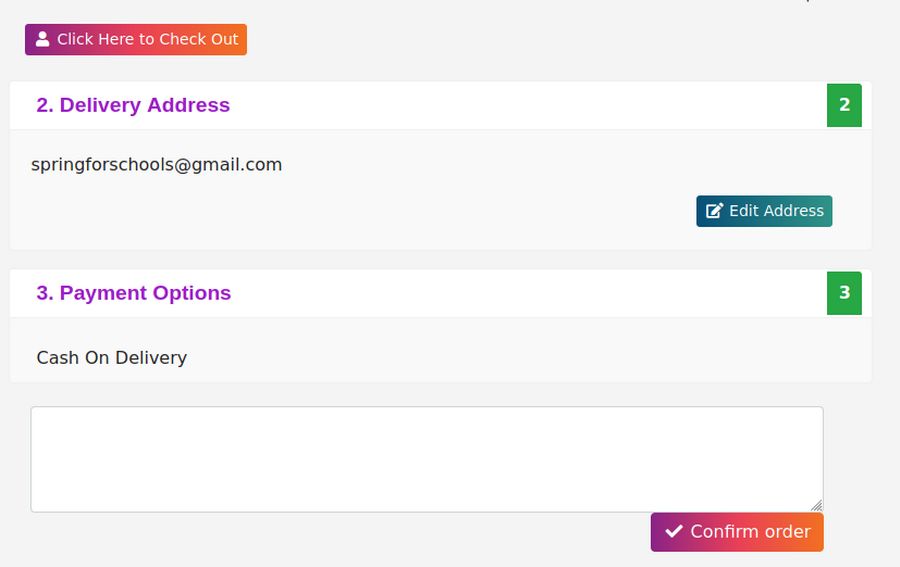
For Payment Options, the only current option is Cash On Delivery. However on a real store, we would replace this payment method with a Stripe Payment method which we reviewed earlier. Click Confirm Order.
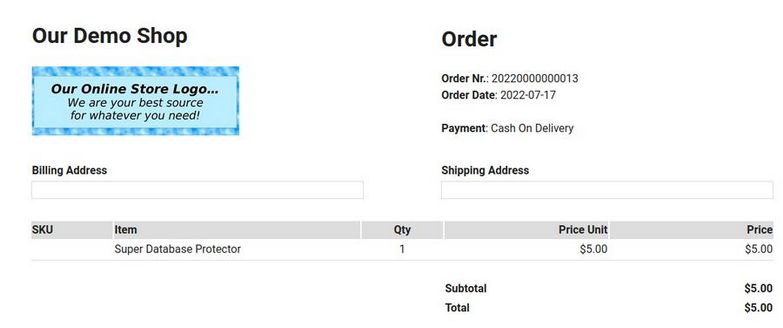
We have changed our Thank You screen to read: Thank you for your purchase! You should receive an email confirming this order with information about how to download the product if it is a virtual product or how to track the shipping of the product for all other products. If you have any questions about your order, feel free to email us at this special email address: orders (at) ouronlinestore (dot) com
Next, open the automatic email sent for the Pending Order:
There is no download link to the Pending Order form. This is because we do not know if the payment has been made yet. Once we have confirmed the payment, go to Order Statuses and click on the Confirmed Status to edit it.
In the General Options tab, change Download from No to Yes.
In the Email Options tab, change the email to the following:
{name}
We have received payment for and confirmed your order.
{orderlink}
We should have your order shipped very soon. We will send you an email when the product is shipped with the shipping tracking number. If you product is a Downloadable File, click on the following link to download your file:
{downloadlink}
Thank you for your business!
Sincerely, The Team at Your Online Store
Then click Save and Close.
These changes only need to be done once. Then for each Paid but Pending Order, go to Orders and click Edit Status. Change the Status from Pending to Confirmed. Then click Edit Status. Then close the screen. Next check the customer email again. There will hopefully be a Download link. Click on it which will bring up this screen:
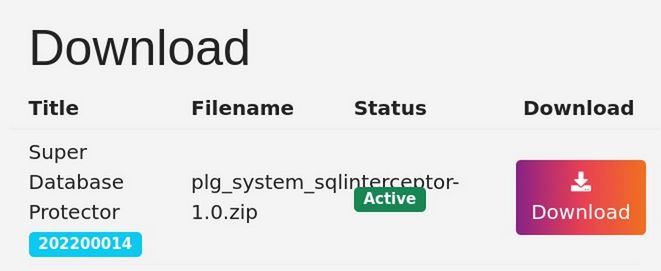
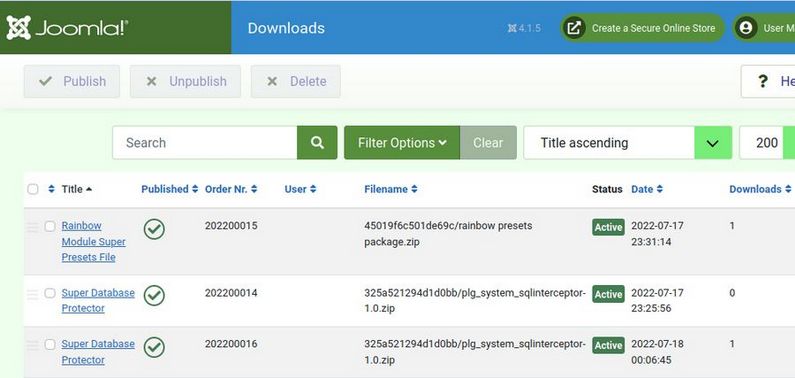
Click Download to download the file. To see the Status of all of the Paid Downloads, click on Phoca Cart Control Panel. The click on the Downloads Icon:
Phoca Cart Member Downloads
In addition to free downloads and paid downloads, Phoca Cart has a complete system for Member Downloads. This requires that customers fill out an Order Registration form rather than checking out as Guests. In our case, this would require undoing the template override we created to hide the registration form at checkout.
You would also need to create a Phoca Cart Download Layout Menu Item to allow members to see the history and status of all of their orders for both physical and digital products. I think that most online shops will benefit by keeping the order process as simple as possible – which is why we are not covering this option in our course.
Phoca Cart Subscriptions
The most requested new feature mentioned in the Phoca Cart forum is the ability to accept monthly or annual subscriptions. Subscriptions allow you to assign different groups of customers to different areas of your online store with different downloadable content based on the group access purchased by the subscription. This can technically be done right now but each person would have to be assigned to a group and tracked manually. It is likely that Phoca Cart will be offering a subscription system some time in the next year.
Using Phoca Cart to Manage Payments for an Online School
In a future article, I will go into more detail about how to use Phoca Cart to manage payments for an online school. However, the initial steps include creating a language override to change the term “Manufacturer” to “Instructor”. The courses and materials can then be displayed as products with the general subjects being used as categories. Note that it is possible to have a single product include both a physical product such as a book and a digital product such as a PDF copy of the book included for free when a person orders a physical copy of the book.
What’s Next?
In the next article, we will review how to set up a video conference appointment calendar to allow your customers to schedule an appointment to speak with you via a Jitsi video conference.