
In our last article, we placed an order for a Large Blue T Shirt. In this article, we will review the default customer order process and how you can customize it to create your own customer order process.
The Default Order Process
There are 7 steps in the Phoca Cart default order process.
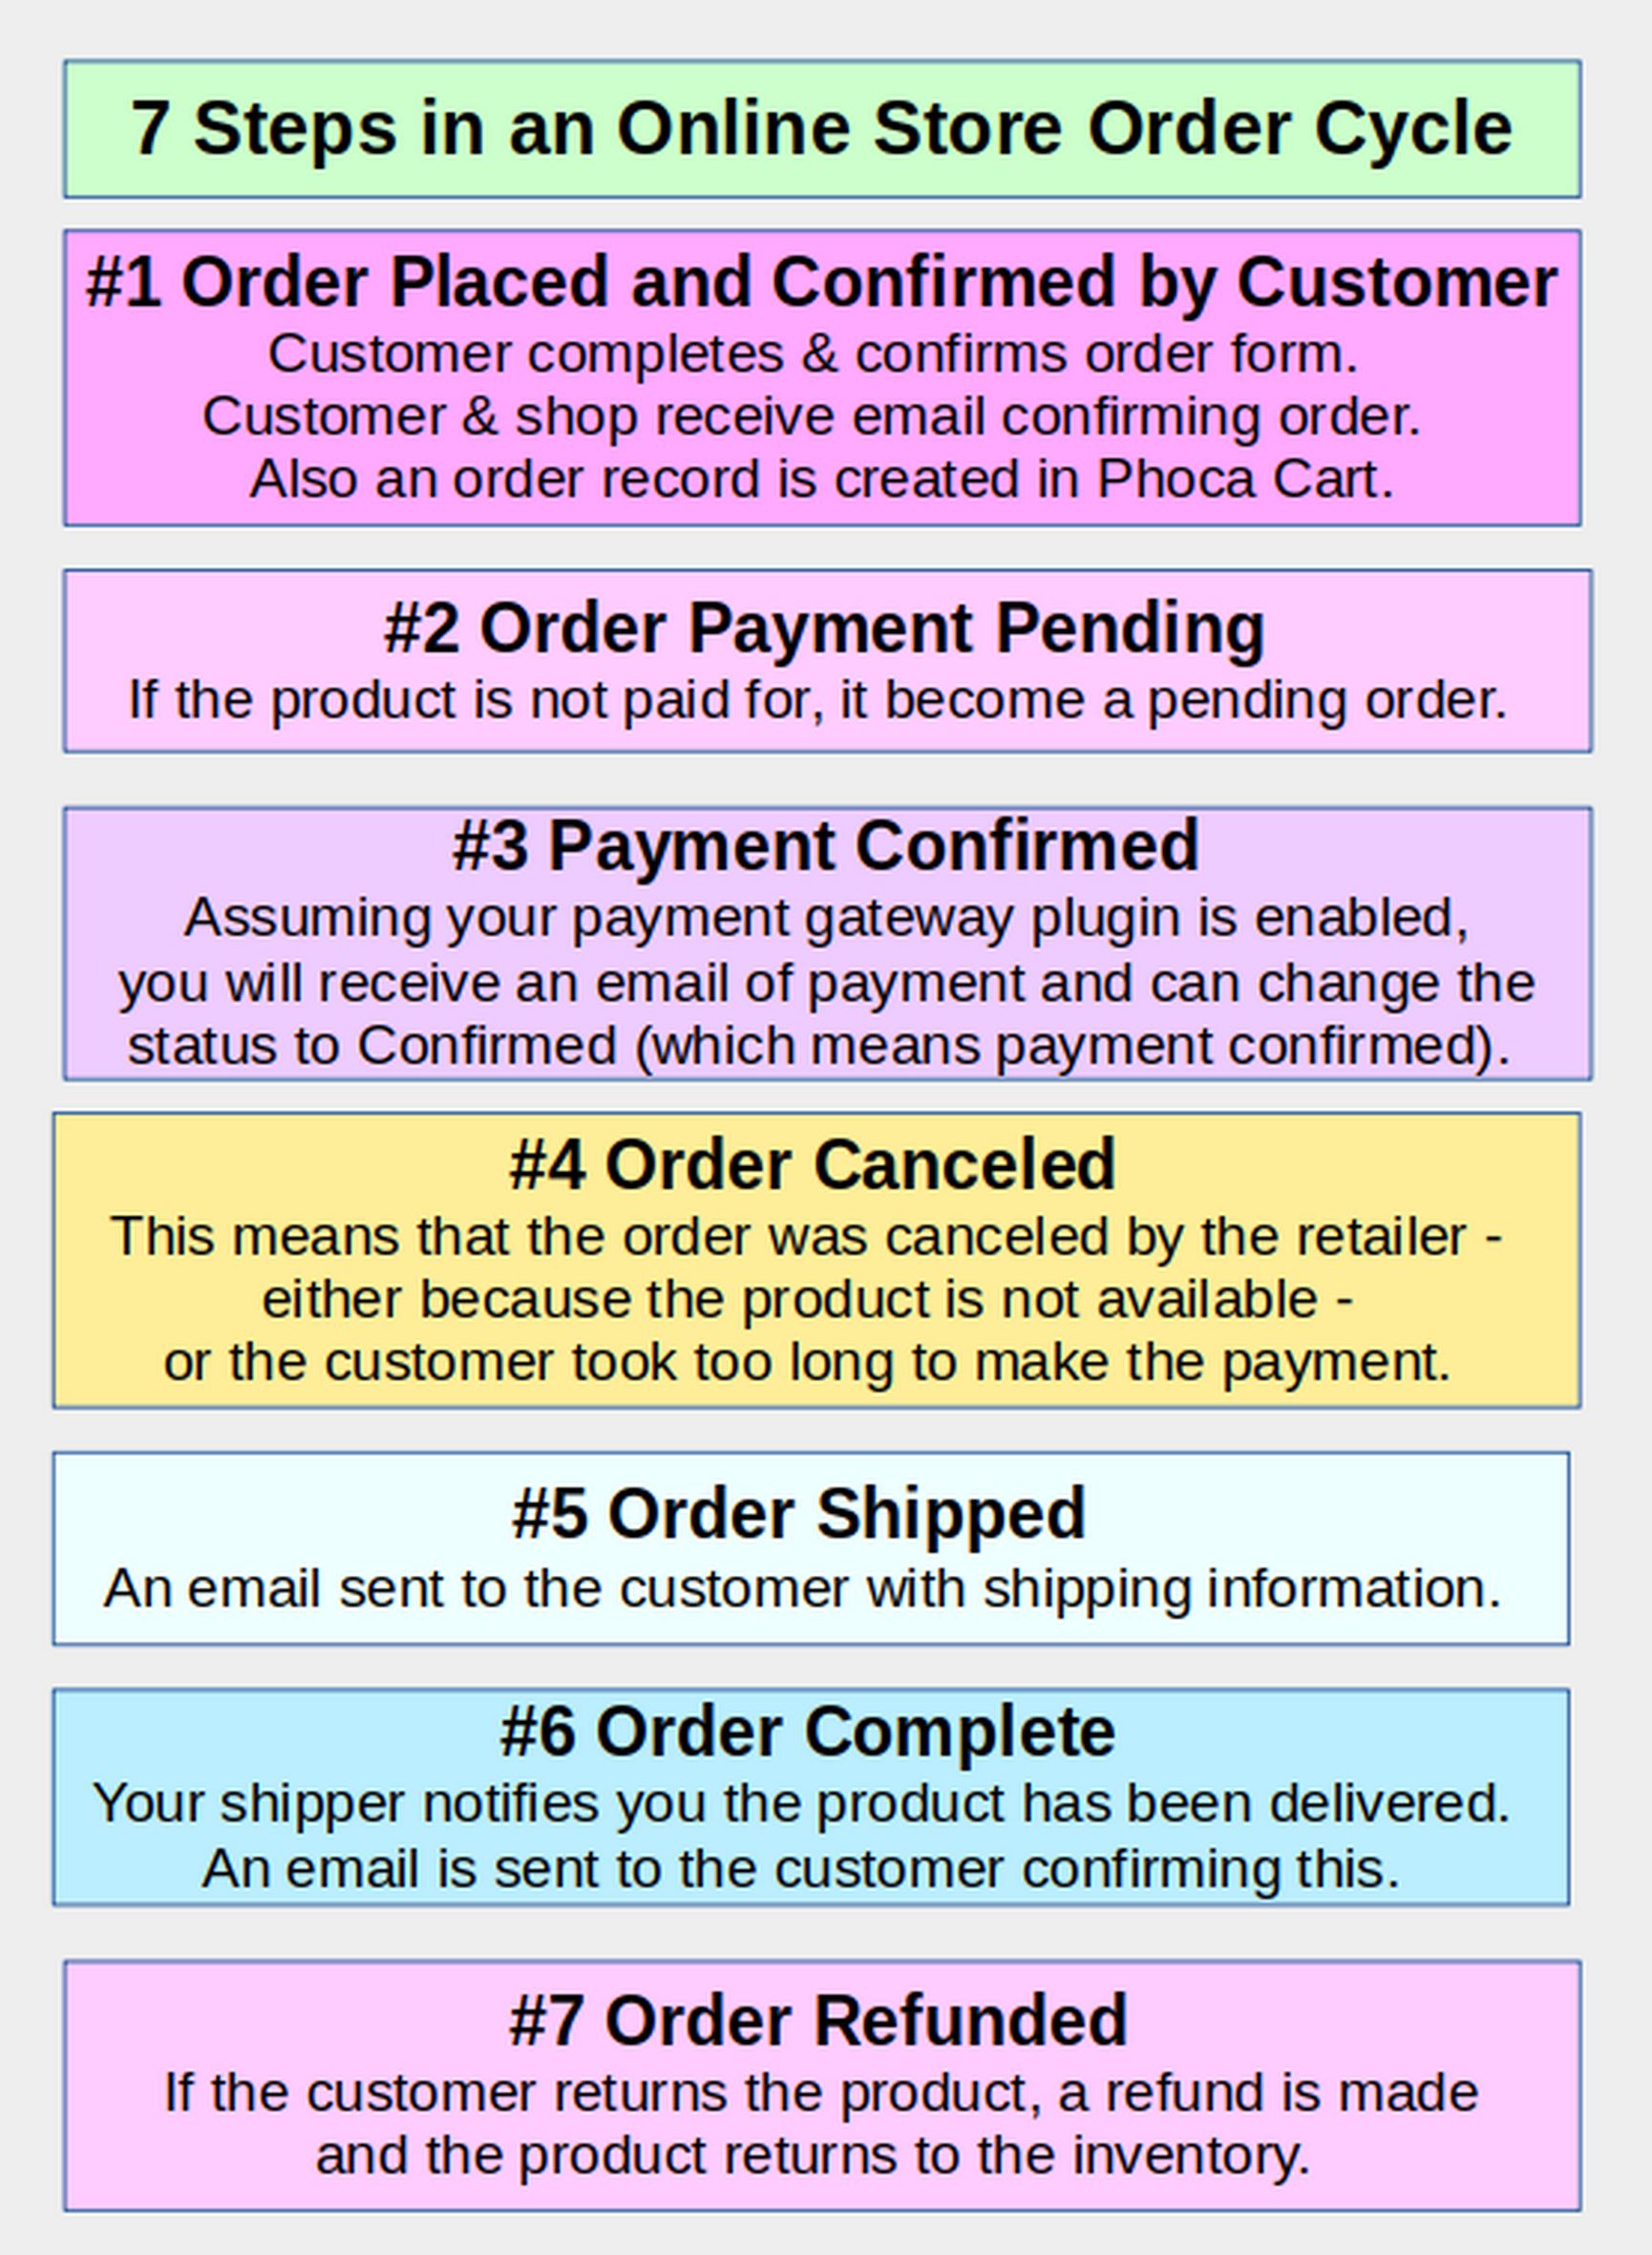
The customer placed and confirmed the order in the last article. In this article, we will look at the remaining steps.
Click on Orders to view the current orders:
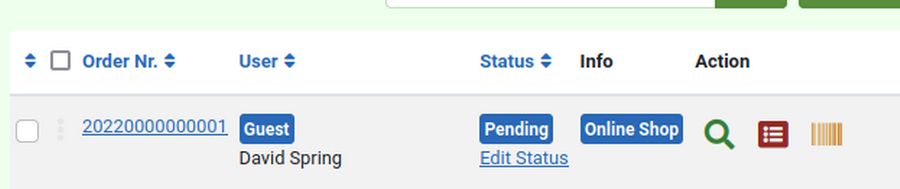
Each order has a unique order number a user name, a status of Pending and three action icons, which are View Order, View Invoice and View Delivery Note.
How to Change the Status of an Order
Some order status changes and inventory changes happen automatically – especially with processing of virtual products. However, with normal products, it is more common that it will be up to you, or whoever ships the products for you to manually change the status of the product and send the customer a confirmation email at the time that the product is shipped. The easiest way to change the status of a product in Phoca Cart is in the Order Edit screen.
Order Edit Screen
Select the first order and click Edit.

There are 8 tabs. The first tab is Order Options. The order status is Pending. Other Order Status options are Confirmed, Canceled, Shipped, Refunded and Completed.
The billing and shipping address tabs are self evident. The Shipment Tracking Options tab has space for the Date Shipped and the Tracking Number. The Ordered Products tab has a complete breakdown of what was ordered and what prices were applied.
Edit Status
Go back to the Orders screen and click on blue Edit Status link which is just below the Status Pending icon.
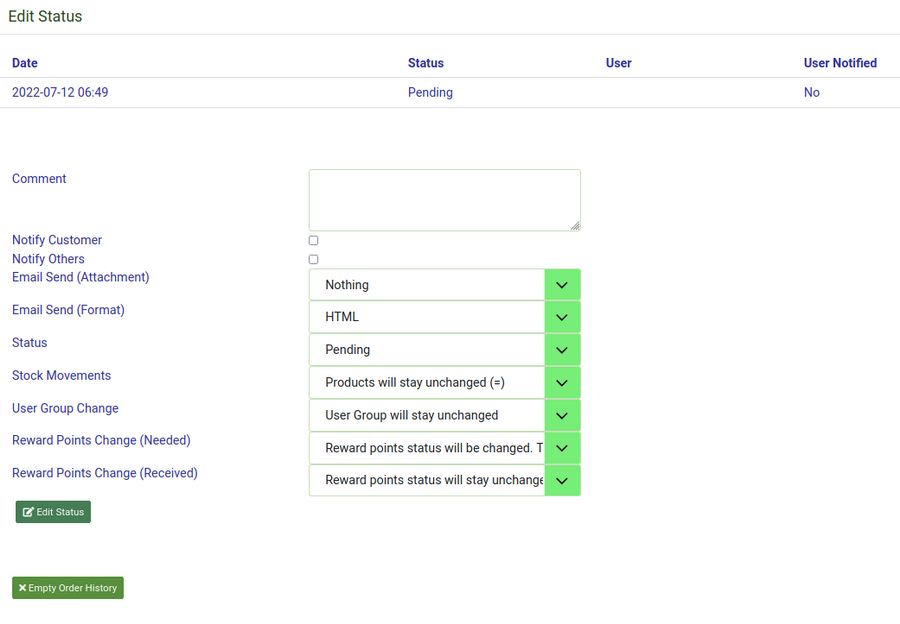
Click the Status Dropdown arrow

The initial status is Pending – which means that the product has been ordered but not yet paid for.
Once the product is paid for and the payment has been confirmed, the status will change to Confirmed – which means that the payment was confirmed.
Once the product is shipped, the shipper can change the status to Shipped. If an email process has been set up, the customer will receive an email letting them know that the product was shipped and what their order tracking number is.
Once you receive notice from the shipper that the product was received, the status can change from shipped to completed and if an email process was set up the customer will receive another email.
Change the Order Status to Confirmed
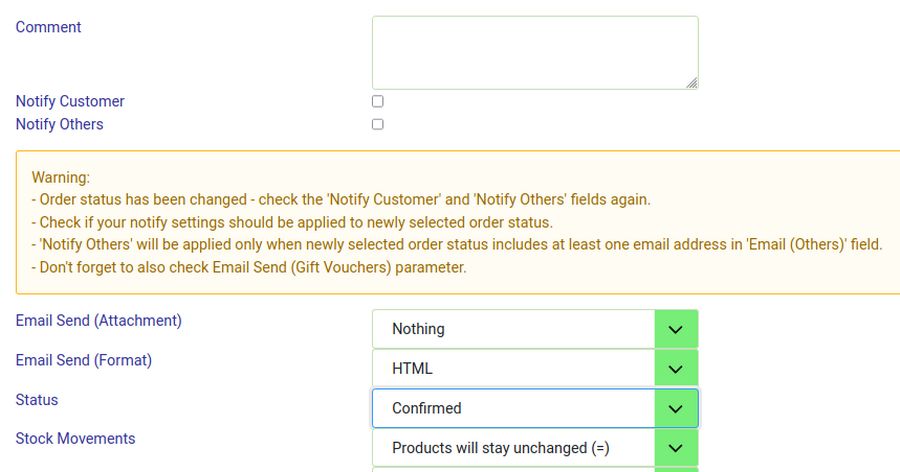
This warning will appear: Warning: Order status has been changed - check the 'Notify Customer' and 'Notify Others' fields again. Check if your notify settings should be applied to newly selected order status. 'Notify Others' will be applied only when newly selected order status includes at least one email address in 'Email (Others)' field.
Check Notify Customer (assuming you are using a real server and have set up a website email address).
Then click Edit Status. The status table will be updated:
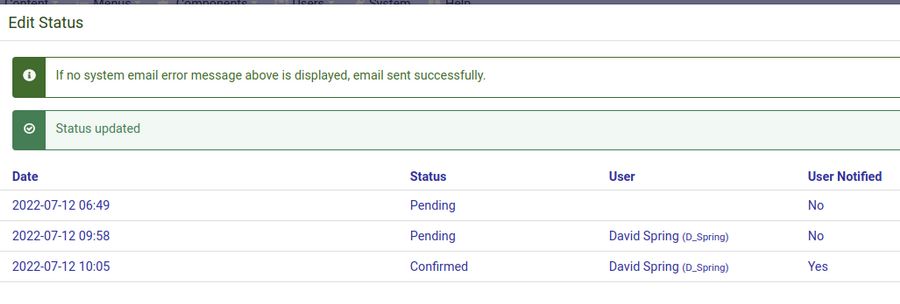
Close the Edit Status screen and you will now see the first order has a status of confirmed. You can click Status again and Edit it to change it to Shipped or even Completed.
Customize Your Order Process
From the Phoca Cart Control Panel, click on Order Statuses.
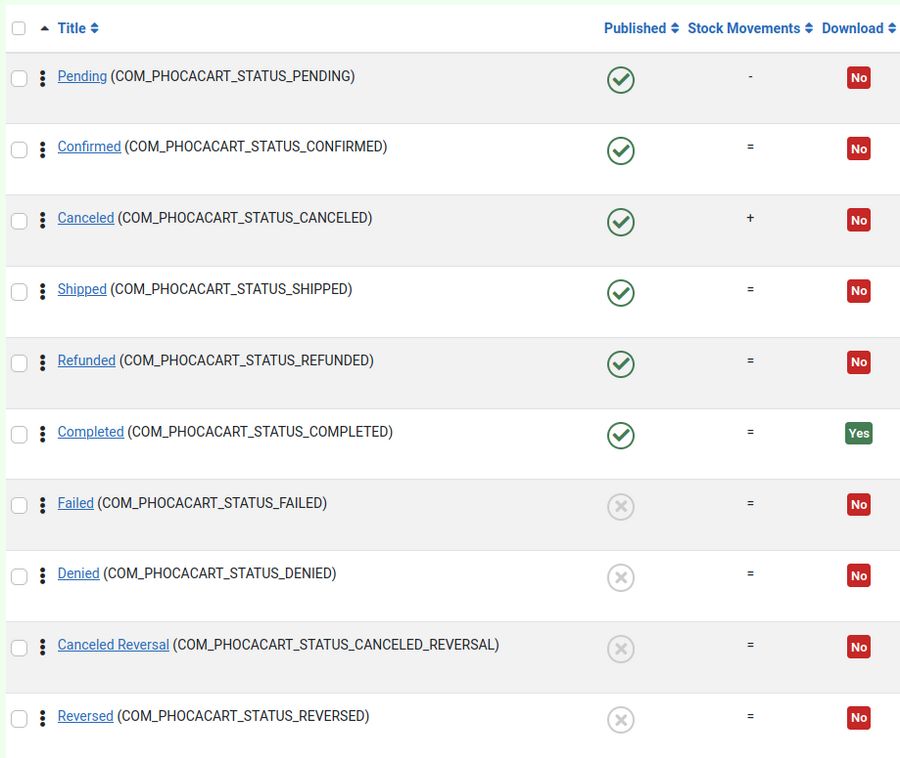
There are 6 active Order Status stages and 6 additional but inactive stages.
Add Automatic Emails when Order Status Changes
By default, none of these 6 processes are set up to send an email to the customer when the status changes. To fix this problem, click on each status and click on the Email Options tab. Then add a subject, change email to yes and add text to the email.
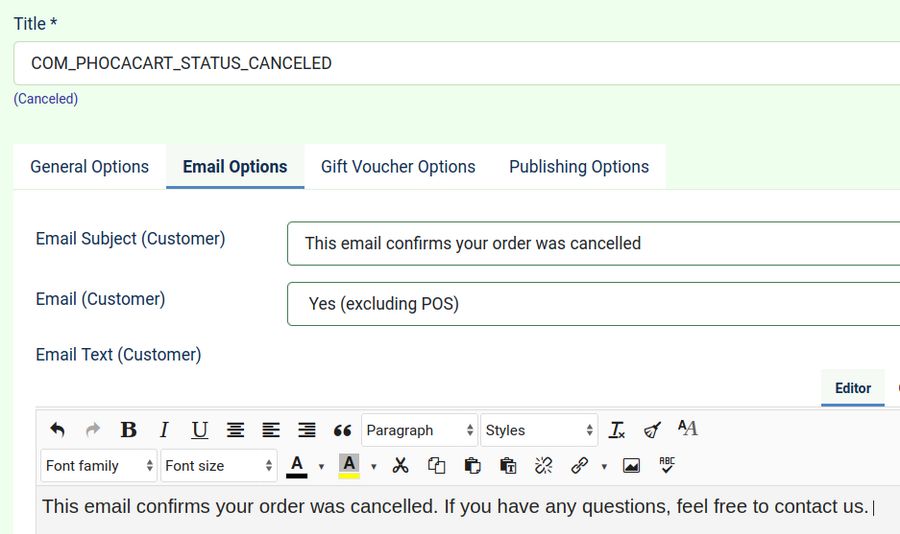
For example, copy paste: This email confirms your order payment has been completed. You will be notified shortly when it is shipped. If you have any questions, feel free to contact us.
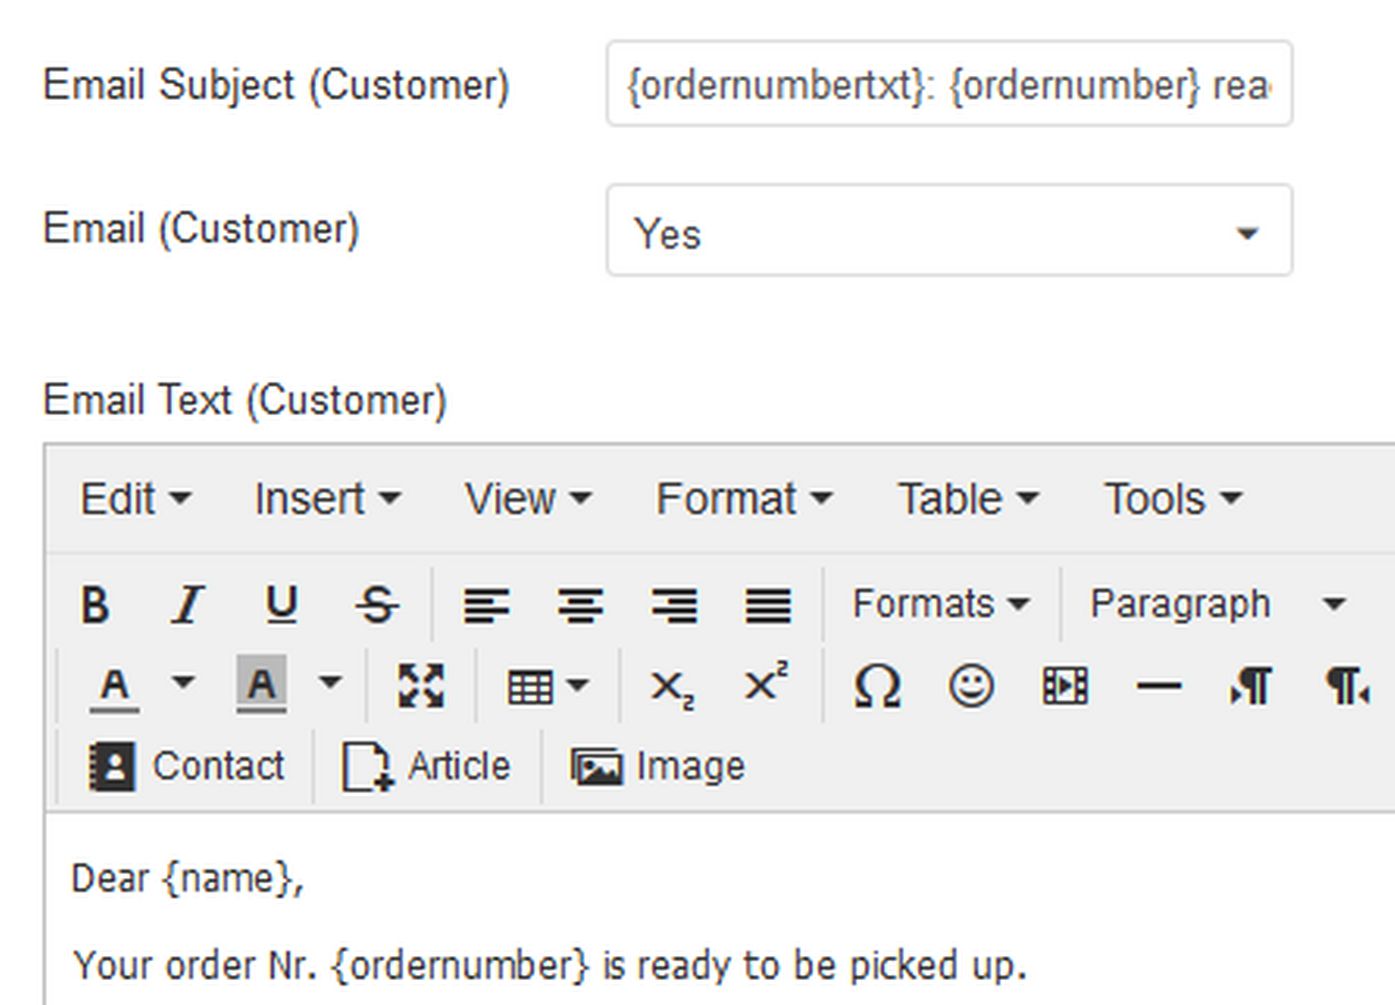
Here are some of the values you can insert into your status emails.
{name}
{email}
{emailothers}
{downloadlink}
{orderlink}
{orderlinktoken}
{ordertoken}
{trackinglink}
{trackingnumber}
{trackingdescription}
{shippingtitle}
{paymenttitle}
{dateshipped}
{customercomment}
{websitename}
{websiteurl}
{orderid}
{ordernumber}
{invoicenumber}
{receiptnumber}
{queuenumber}
{paymentreferencenumber}
{invoiceduedate}
{invoicedueyear}
{invoiceduemonth}
{invoicedueday}
{invoicedate}
{invoiceyear}
{invoicemonth}
{invoiceday}
{invoicetimeofsupply}
{invoiceyear}
{totaltopay}
{orderdate}
{orderyear}
{ordermonth}
{orderday}
{ordernumbertxt}
{bankaccountnumber}
{iban}
{bicswift}
{totaltopaynoformat}
{currencycode}
{openingtimesinfo}
{vendorname}
{vendorusername}
Body (email text) of an email can be extended through following variables.
Items from Billing Address:
{b_name_first}
{b_name_middle}
{b_name_last}
{b_name_degree}
{b_company}
{b_vat_1}
{b_vat_2}
{b_address_1}
{b_address_2}
{b_city}
{b_zip}
{b_country}
{b_region}
{b_email}
{b_email_contact}
{b_phone_1}
{b_phone_2}
{b_phone_mobile}
{b_fax}
{b_test}
{b_countrytitle}
{b_regiontitle}
{b_countrycode}
Items from Shipping Address:
{s_name_first}
{s_name_middle}
{s_name_last}
{s_name_degree}
{s_company}
{s_vat_1}
{s_vat_2}
{s_address_1}
{s_address_2}
{s_city}
{s_zip}
{s_country}
{s_region}
{s_email}
{s_email_contact}
{s_phone_1}
{s_phone_2}
{s_phone_mobile}
{s_fax}
{s_test}
{s_countrytitle}
{s_regiontitle}
{s_countrycode}
Custom Items from Billing and Shipping Address:
If you create own form field, for example: my_custom_form_field, such can be transformed in email through following variables:
{b_my_custom_form_field} ... field stored in Billing Address
{s_my_custom_form_field} ... field stored in Shipping Address.
Variables can have more formats. See example:
{b_name_first} ... First name set in billing address is displayed.
{s_name_first} ... First name set in shipping address is displayed.
{bs_name_first} ... First name set in billing address is displayed. If it does not exist then first name set in shipping address will be displayed.
{sb_name_first} ... First name set in shipping address is displayed. If it does not exist then first name set in billing address will be displayed.
Such variables will be transformed to data stored in current order.
Variables can be even used in order, receipt or invoice documents - in description. In Phoca Cart options, you can create articles which can be displayed in such documents - in top, middle or bottom position. Or in billing or shipping address.
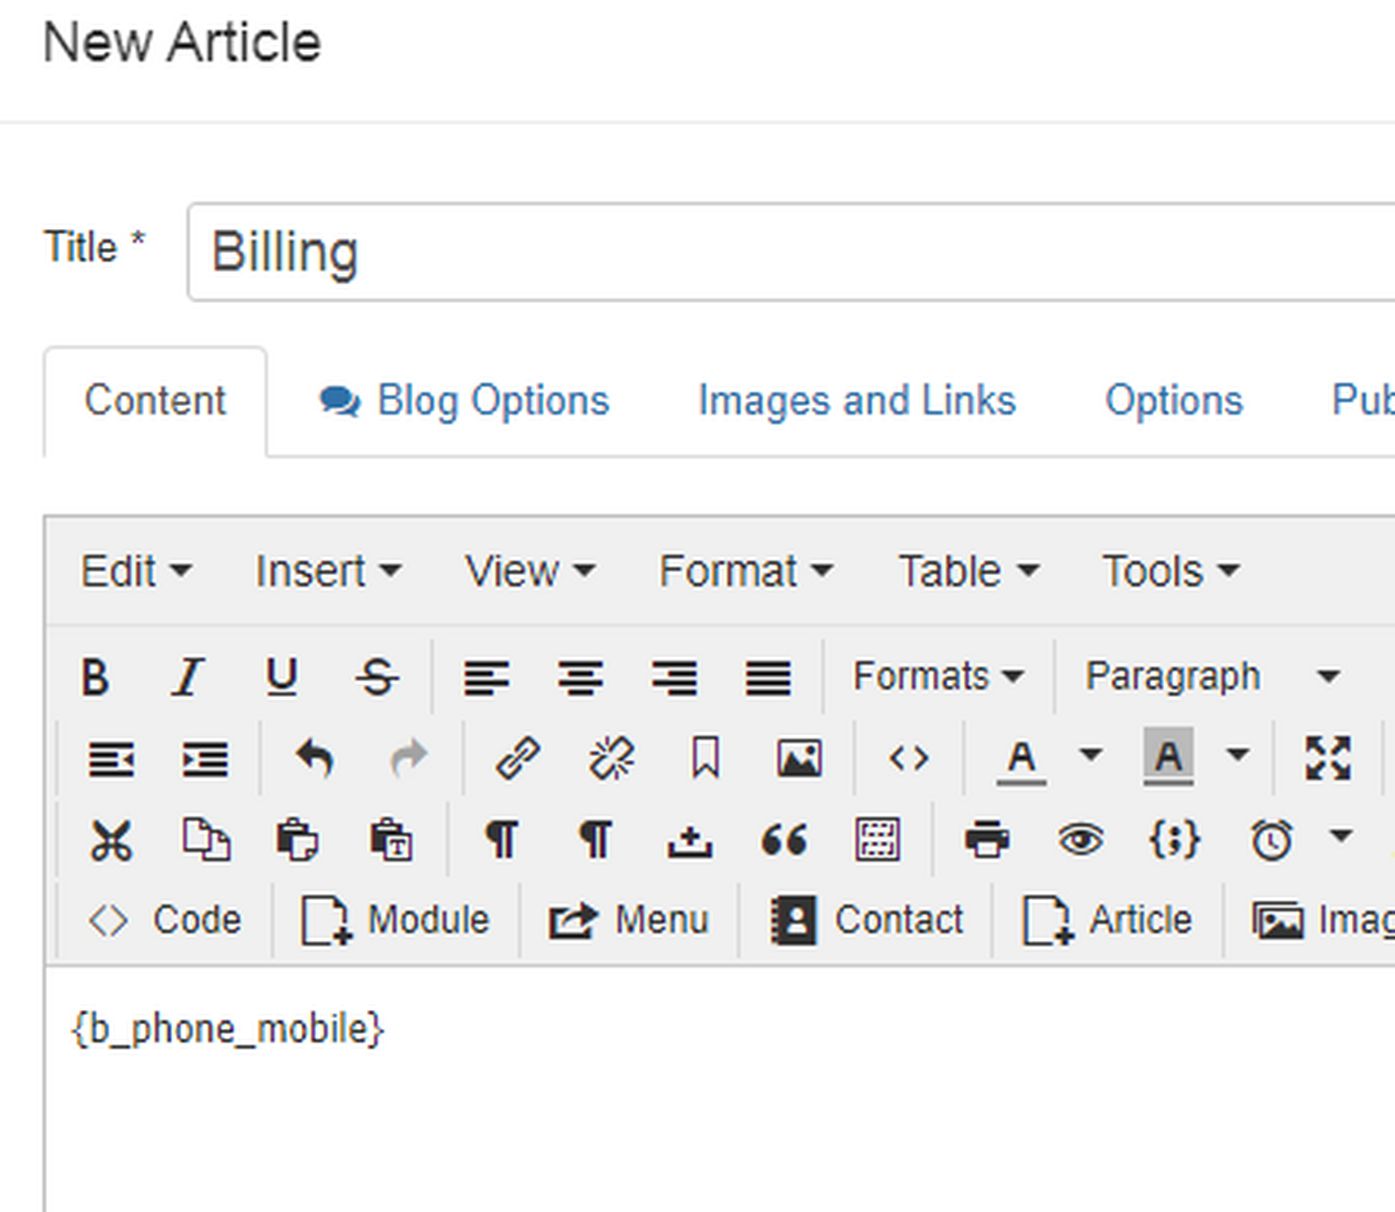
Example
Example: Displaying mobile phone information set in billing address in delivery note. In options, create an article for Order, Invoice, Delivery Note Global Billing Description parameter. Paste following variable into this article: {b_phone_mobile}
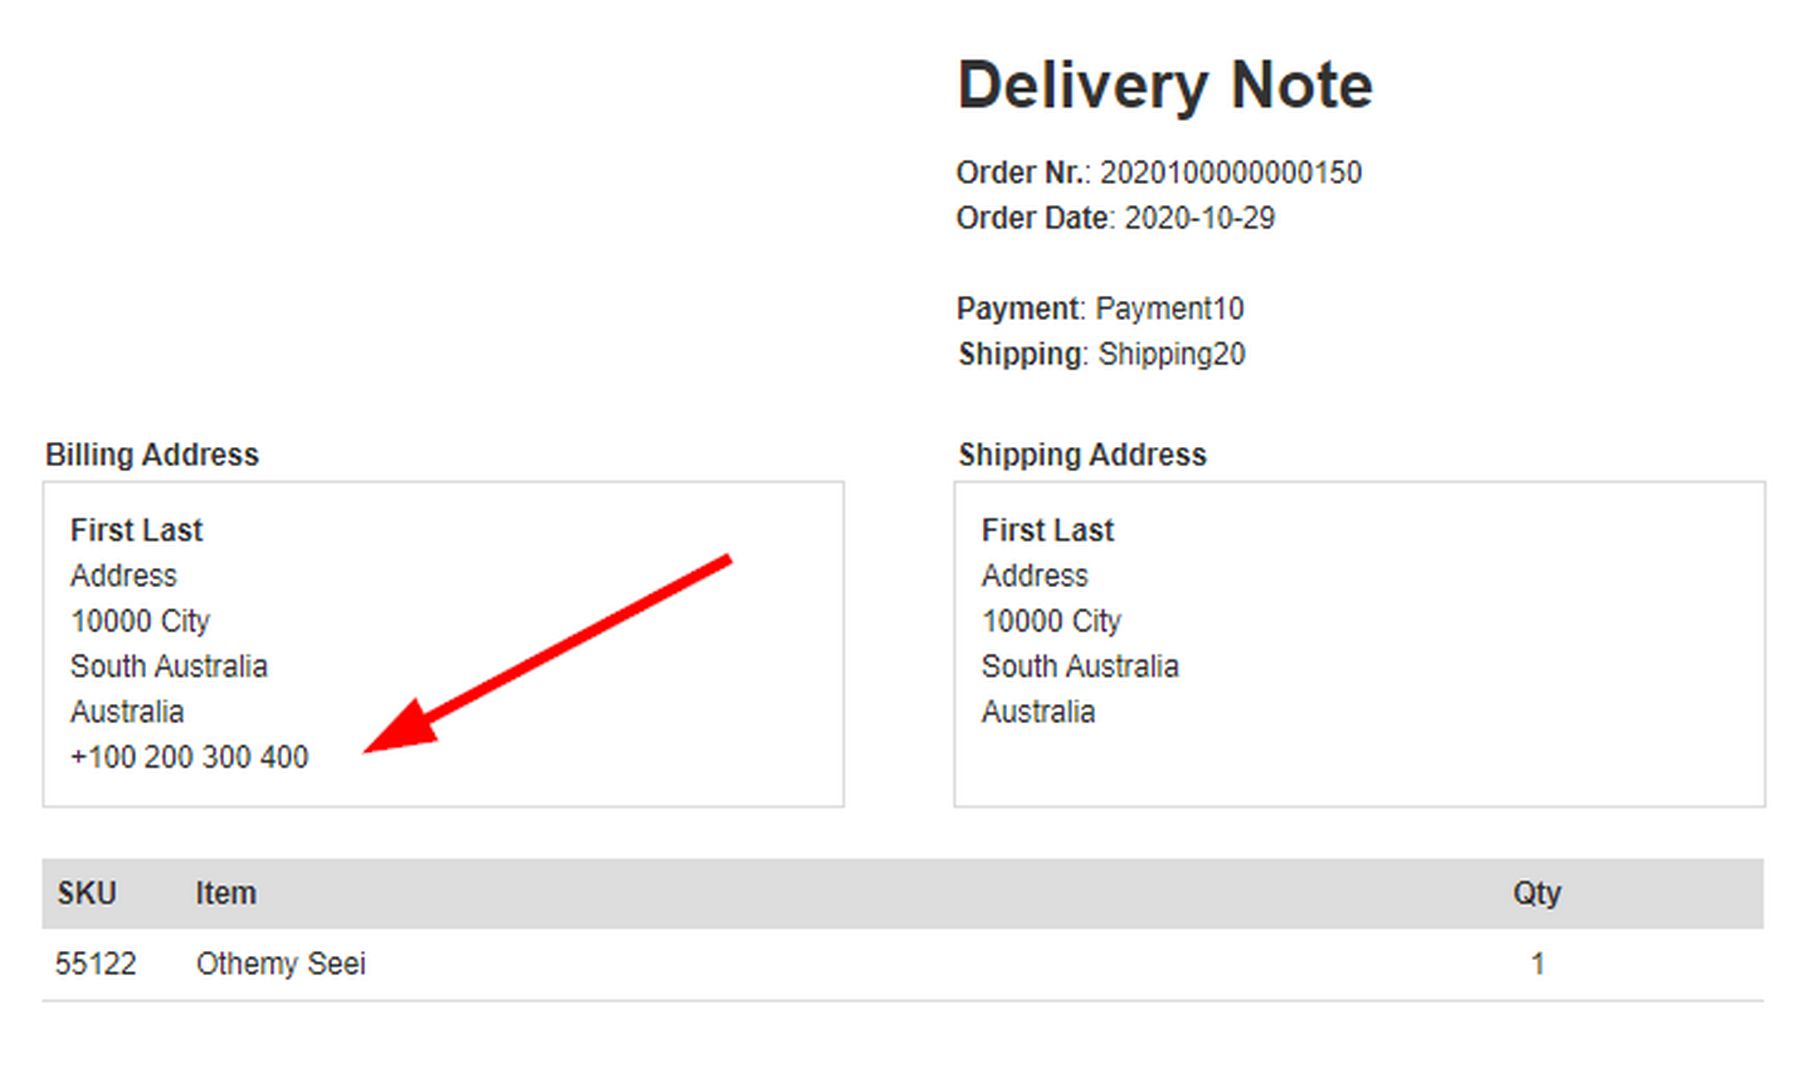
If customer adds his/her mobile phone when ordering, it will be displayed in the documents:
Variables are part of description which can be set for:
Top of the document
Middle of the document
Bottom of the document
Billing address
Shipping address.
Change Currency
Click on Currencies. By default, the currency is set for the Euro. Click New to add the dollar as a currency option:
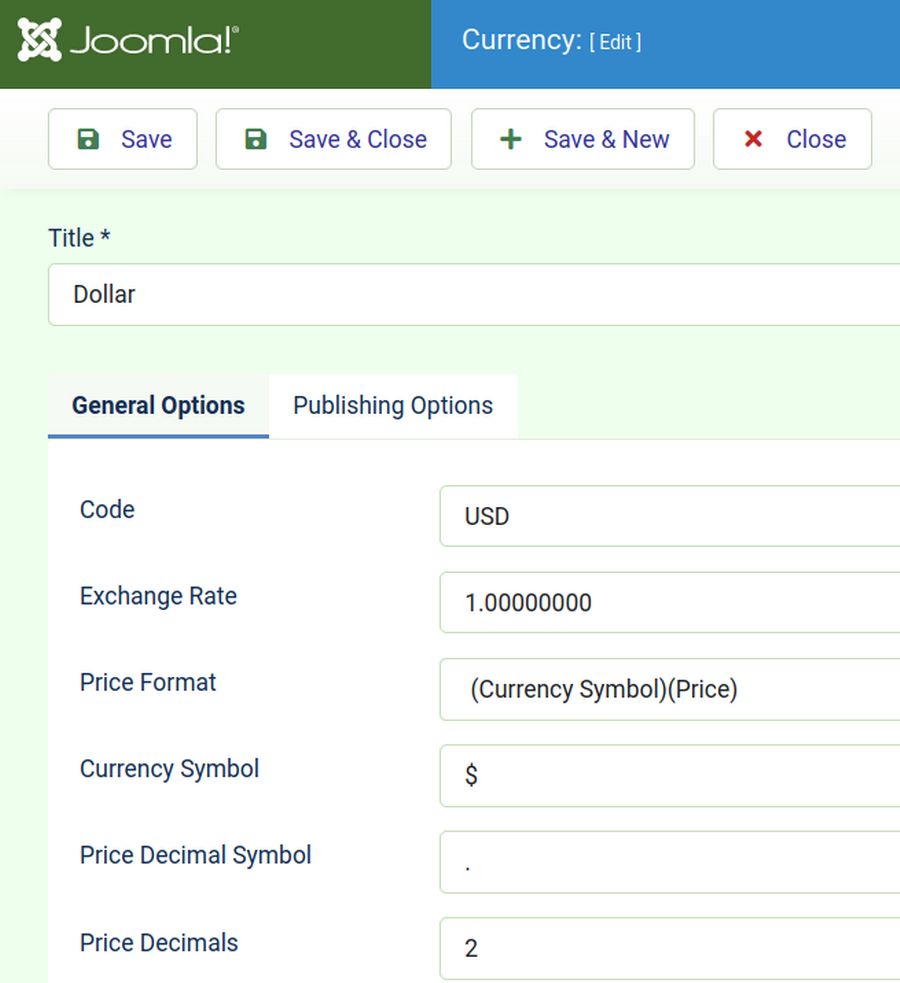
Give it a title and set the code for USD. Then change the format to (currency symbol)(price). Then add the dollar symbol and change the comma to a period. Then set the decimals for 2. Then click Save and Close. Then to hide the Euro currency, simply select it and unpublish it or select it and delete it. To confirm that the price was changed from Euros to Dollars, click on the Better Word Processing book:

Note: If you only need one currency (US Dollar) just set USD Exchange Rate to "1" and delete the Euro or set Euro to the right Exchange Rate value and unpublish it. If you need two or more currencies, then set the USD Exchange Rate to "1" and other currencies to the right Exchange Rate value.
Options, Billing
Go to the Phoca Cart Control Panel Options screen and click the Billing tab then scroll to the bottom to see several ways to add forms for Invoices, Orders and Deliveries:
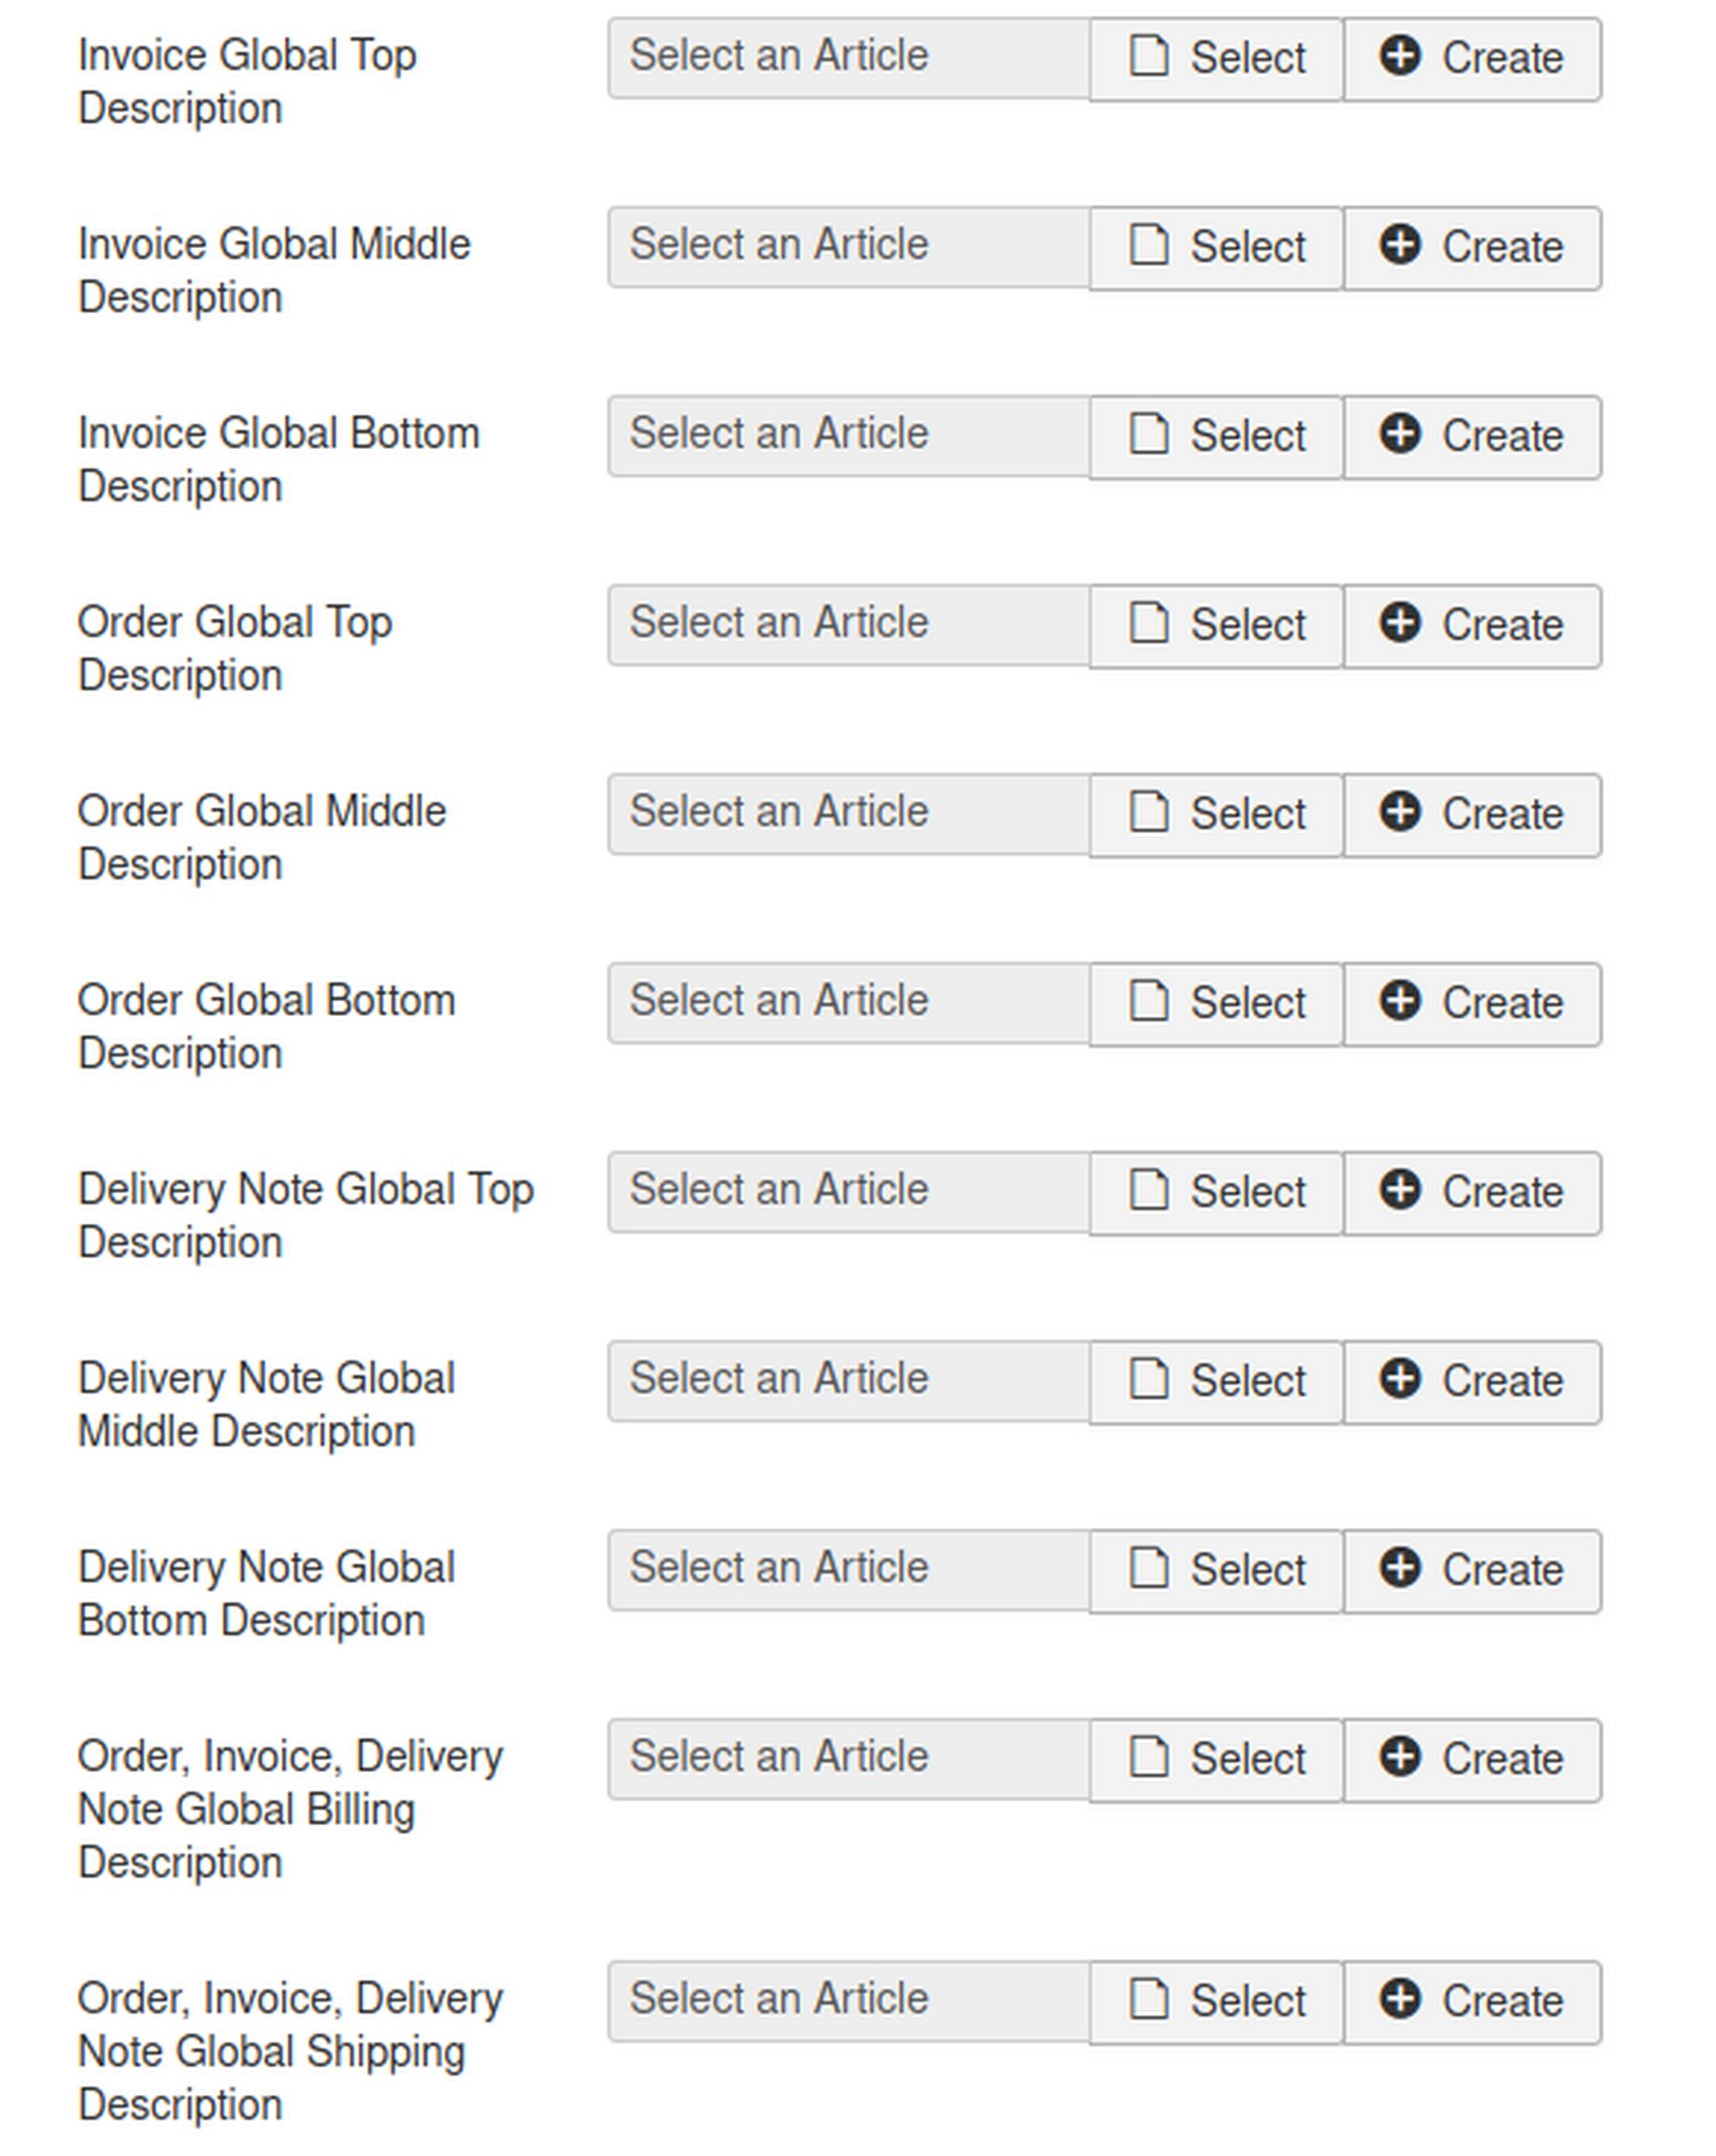
Note that each form has a Top, Middle and Bottom section. As a homework exercise, create an article for the Order form Top, Middle and Bottom sections. Feel free to add your company logo and other information. Then place an example order to see the result.
What’s Next?
In the next article, we will take a closer look at Shipping and Tax processes.