
Unless you make your own products, you will buy products from manufacturers (also known as vendors) at a bulk or wholesale price and then sell these products to your customers at a retail price that is often close to twice the wholesale price. It is common for an online store to work with ten or more manufacturers. In this article, we will describe the process for setting up a system of manufacturers -each with their own block of stock keeping units (SKUs) – which are then used to track inventory and generate new vendor orders.
Stock Keeping Units
In order to keep track of your inventory, each product (and each color and size of a product) should be assigned a Stock Keeping Unit also known as an SKU. Sometimes Stock Keeping Unit numbers are assigned by the vendor. But it is more useful for you to create your own stock keeping unit system.
EXAMPLE of a Custom Stock Keeping Units System
When I started my outdoor store, we built relationships with four major clothing manufacturers, two boot manufacturers, a couple of tent manufacturers, one backpack manufacturer and one sleeping bag manufacturer. These ten large ticket item manufacturers represented the bulk of our sales and were the key to our success. Each Manufacturer was assigned to a particular category and a range of SKU numbers. Some manufacturers had more than 100 SKUs. For example, the clothing manufacturers were assigned the numbers C1, C2, C3 and C4. Their products were further divided into several categories, such as (1) for mens clothing, (2) for womens clothing and (3) for childrens clothing. So a product with an SKU of C1.1.x was an item of mens clothing from manufacturer C1.
Set Up Vendor Accounts
In order to have a useful SKU system for our online store, one of the first things we will need to do is to set up our system of Manufacturers. This needs to be done before we even check in or create our first real product! To set up your manufacturers, go to the Phoca Cart Control Panel and click on the Manufacturers Menu item. Here you will see six example manufacturers:
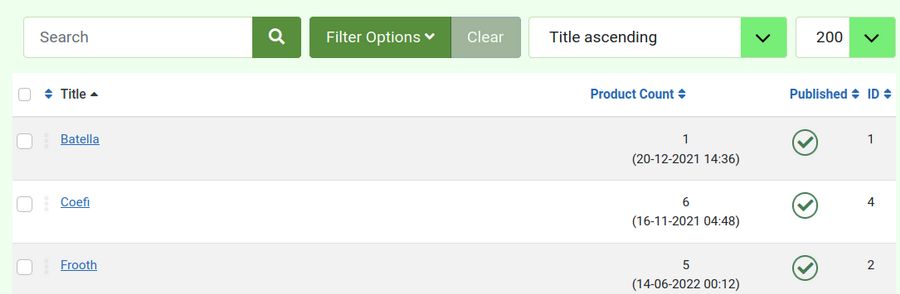
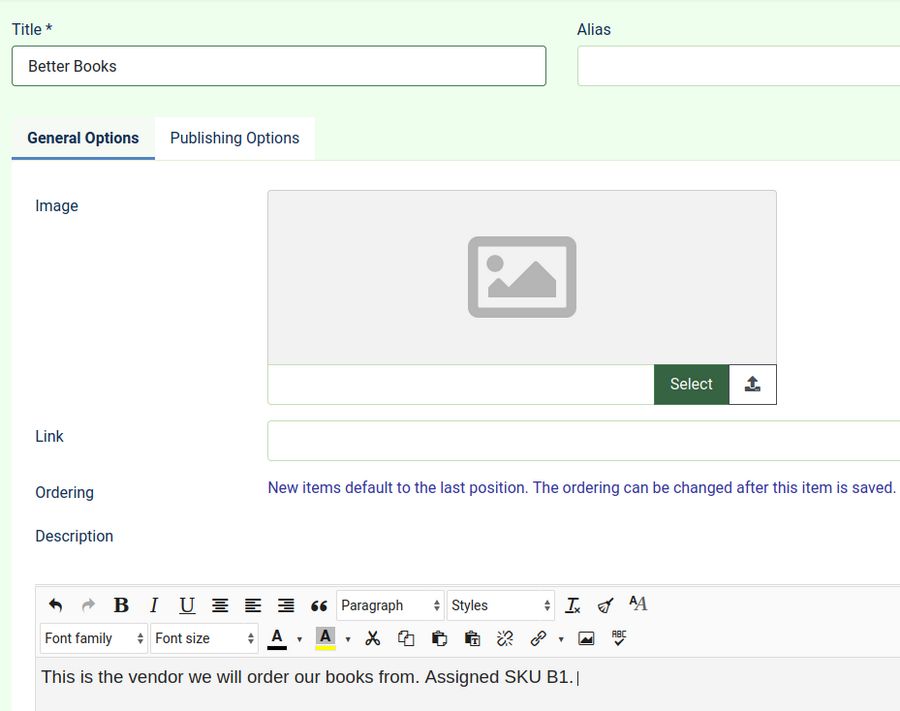
Each Manufacturer shows the number of products assigned to it. Click New to add a new manufacturer. Give the vendor a title and a description. Include the SKU assignment in the description:
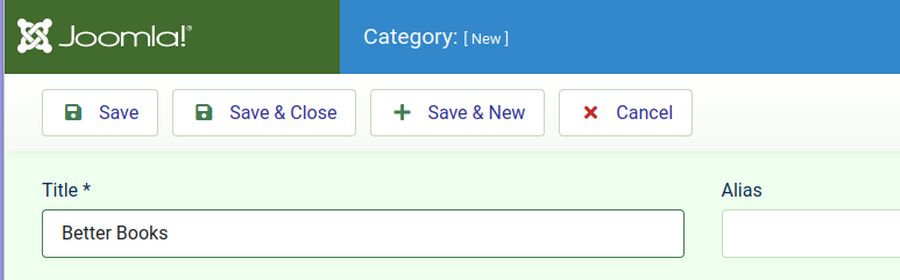
Then click Save and Close.
Create a Category for each Vendor
Initially, a vendor does not have any products. It is a good idea to create a category for each vendor so that you can show products by vendor.
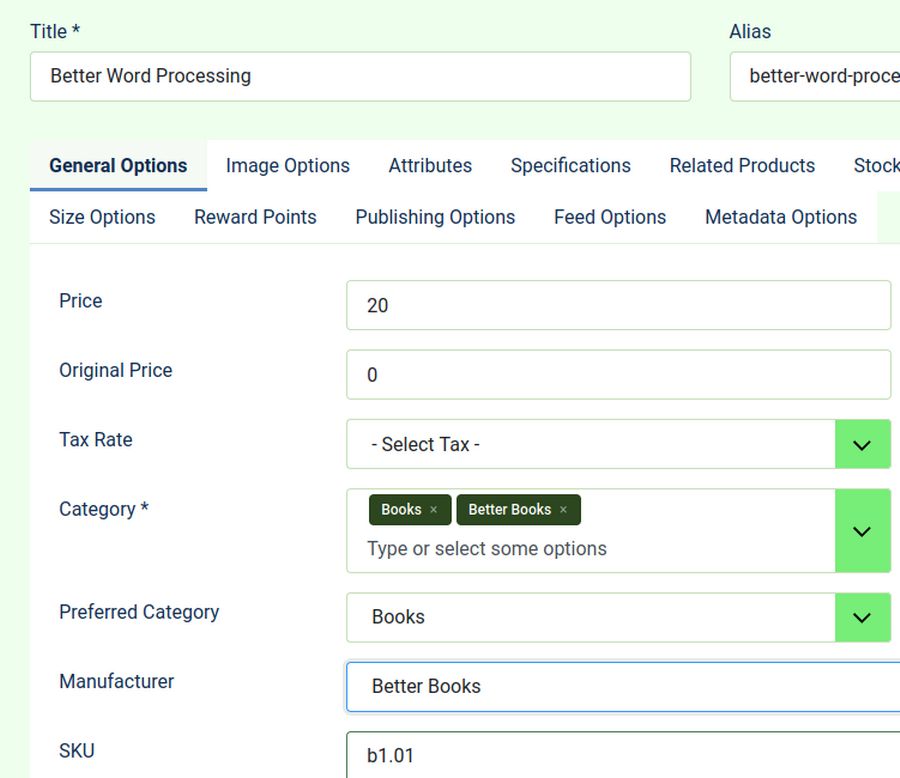
Add the Vendor and Vendor Category to Each Product
When you add a new product, each product should be associated with a vendor and a vendor category in addition to a topic category. Each product should also be given a Stock Keeping Unit number.
Inventory Control Process
While on the Product page, click on the Stock Options tab:
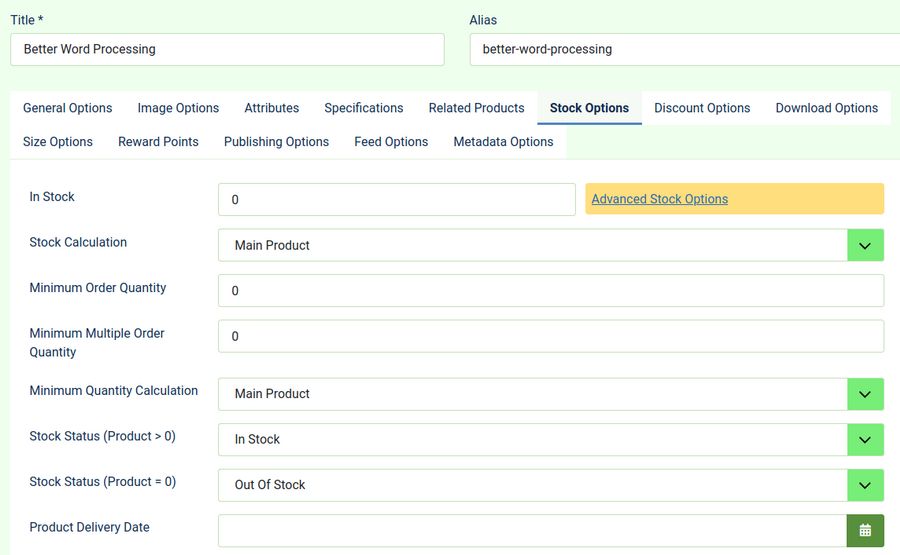
Assuming that the product does not come in sizes or colors and does not have any other “child” products, you can enter the number of products from the initial order. For example, set the In Stock number to 10. If the product has been ordered from the vendor, but not yet arrived, you can set the product delivery date which can then be shown to customers on the Product page.
If the product comes in colors and/or sizes, then change the stock calculation from Main Product to Advanced Stock Management. Then click Save and Close.
Inventory Control Process Advanced Stock Options
To see how this works, we need to open a product that comes in sizes or colors. Click on the College in the Clouds T Shirt which comes in two colors and three sizes. Then click on Stock Options, Advanced Stock Options.
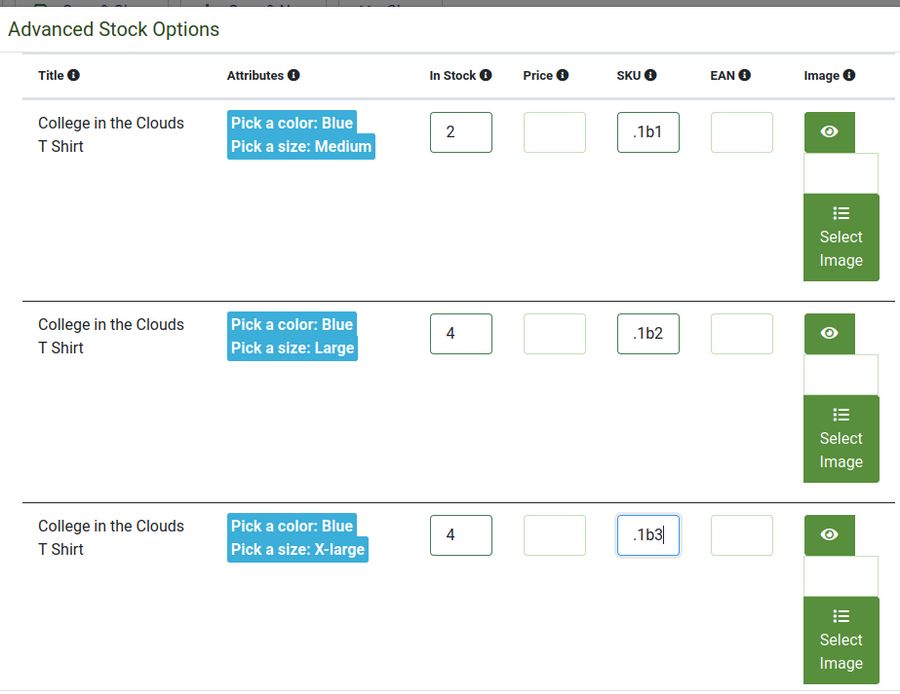
Above, we have given the medium blue T Shirt a stock of 2 and the large blue T Shirt an initial stock of 4. The medium blue version has an SKU of c1..1b1 and the large blue T Shirt has an SKU of c1.1b2. Be sure to scroll down to the bottom of the screen and click Save and Close at the bottom of the page. Then enter the total number of T Shirts in the In Stock section of the Stock Options page. Then click Save and Close to close the product edit page. The total number of products by model is shown on the Product Table.
Test your Inventory Tracking System
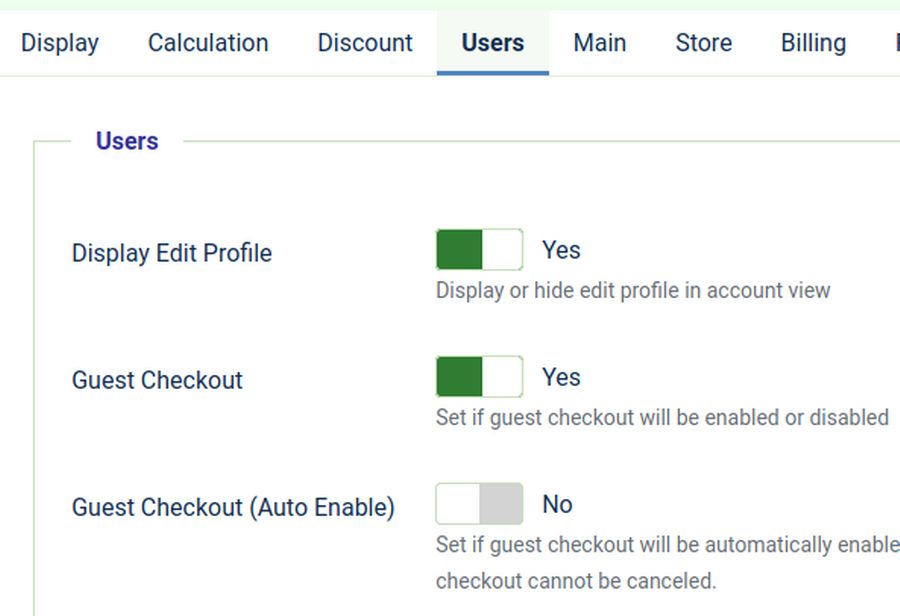
Before we go to the front end and make a purchase of a large blue T Shirt, we need to add Guest Checkout to our Checkout page.
Change from Register to Guest Checkout
Go to the Phoca Cart control panel and click Options. Then click on the Users tab. Change Guest Checkout from No to Yes. Then click Save and Close.
Hide the Country and Region from the Checkout Form
Go to the Phoca Cart Form Fields. Click on the country field and unpublish it and make it not required. Also unpublish Region. Also unpublish company.
Hide the Coupon Code
From the Control Panel, click on Coupons. Then unpublish the coupon if there is one there. Also in Options, Display tab, scroll down to Checkout View, Display Coupon and change Coupon and Reward Points to After login form. Also on the Calculations page, change Enable Coupons and Reward Points from Yes to No.
Hide Captcha
With a pretend account, we can not register with a captcha form. Therefore, we will hide it by going to Options, Display, Checkout and change Enable Captcha to No.
Hide Checkout Terms Box
Go to Options, Store and change Display Checkout terms to No. Then click Save and Close.
Order a Large Blue T Shirt
Now order a Large Blue T Shirt. Click Add to Cart. Then go to the VIEW CART Checkout page:
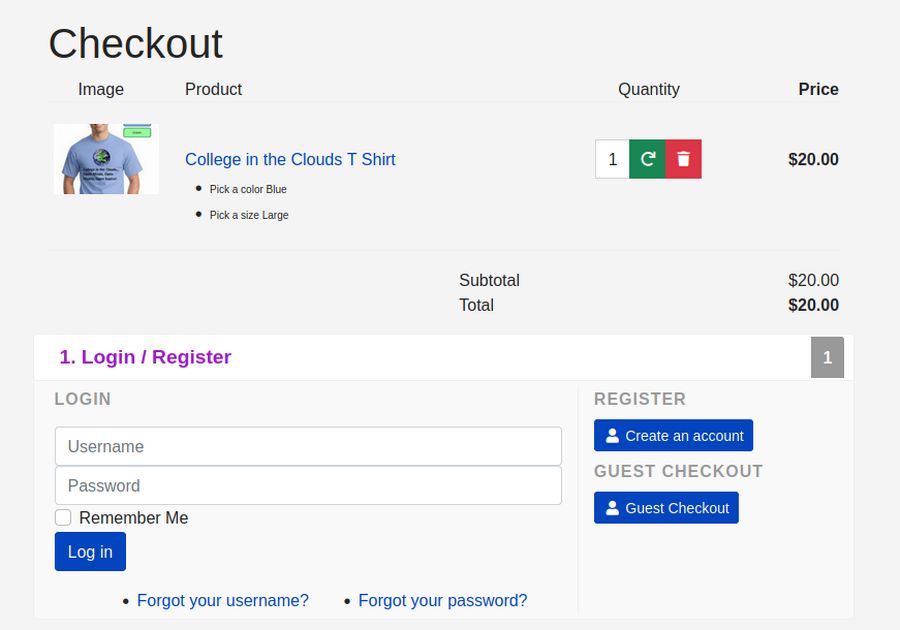
Click Guest Checkout. Then enter your name, address, zip, city and email address. Check Shipping and Billing address are the same. Then click Save. Then check Standard Shipping and Save. Then click Cash on Delivery. Then click Save. Then click Confirm Order.

Changing the Order Success Info Title and Content
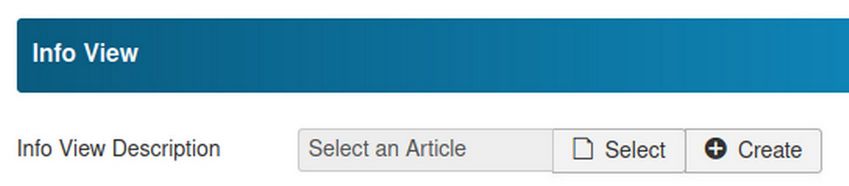
Go to Options, Display, Info View to set a custom message:
You can also use a language override to change the language strings (in file or in language override in Joomla administration)

The language strings can be managed even with different strings for different by payment plugins. Also the view itself can be overridden by a template override.
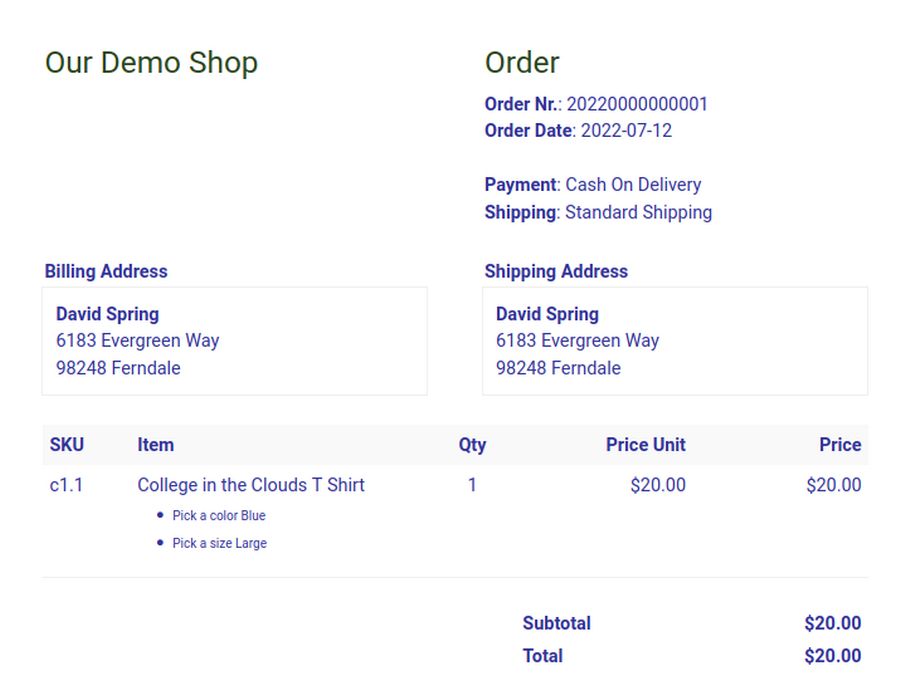
View the Order
To view the order, go to Phoca Cart, Orders.

The order status is Pending. Click the Magnifying Glass (View Order).
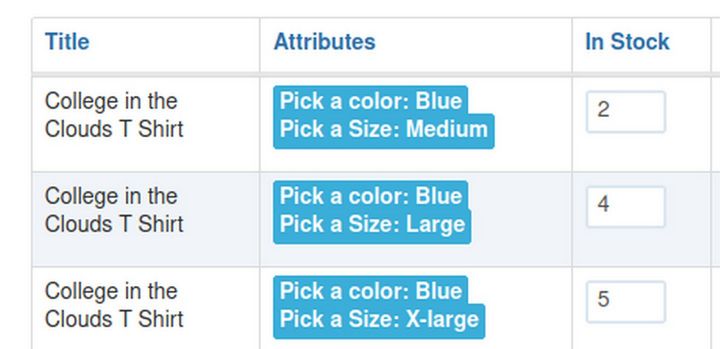
To view the Inventory, click Products, College in the Clouds T Shirt. Go to Inventory, Advanced Inventory options. It now shows 3 large blue T Shirts.
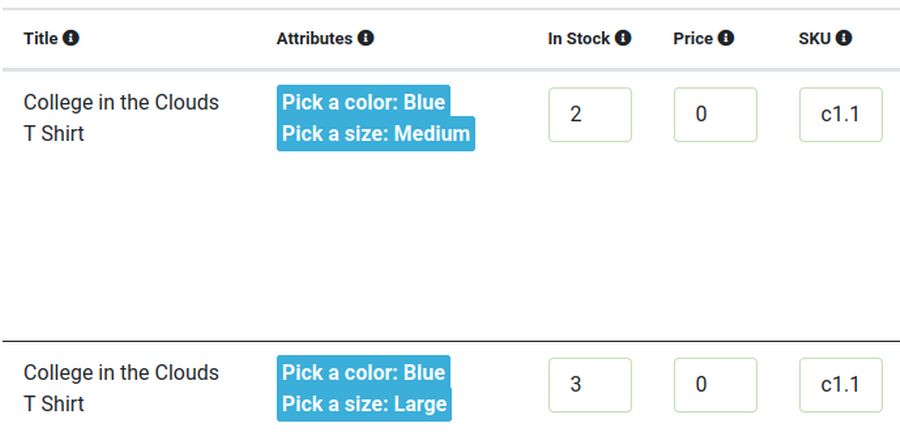
Note to show the above Table version of the inventory, you need to widen the screen to at least 1200 pixels.
How to use a Model Stock System to Set Inventory Levels
One of the most important tasks of any successful store manager is to precisely control inventory. Even an apparently busy store can lose money if the inventory gets too high. And you can lose sales if the inventory gets too low. One way to control inventory is to establish a Model Stock System. We will first describe this system. Then we will show you how Phoca Cart Inventory tools can help you implement and manage this system.
To learn how to use Phoca Cart Attributes to control inventory, we will add a line of Tee Shirts to our online store. The purpose of offering these tee shirts is not merely to create additional revenue, but also to build a sense of community and promote the importance of Open Source software and educational products to the spreading of knowledge. Our shirts will also promote our College in the Clouds. Below is our product image.

The T shirts come in two colors, blue and green, and three sizes, Medium, Large and X Large. Let’s assume we are selling tee shirts at the rate of one per day. This is 30 tee shirts per month and 360 tee shirts per year. With a minimum order of two dozen shirts, we can get a wholesale price of $10 per shirt for a retail price of $20 per shirt. But because we are offering free shipping and have to cover insurance and a host of other costs, our net margin is only 10% - meaning we only make $2 per shirt. What is important is to not lose money. This is determined by the “inventory turnover.”
Because inventory costs money, the rule of thumb is we need at least two inventory turns per year just to break even. We will set a goal of 3 turns per year which is 360/3 = 120 shirts for an average inventory. If we sell twice as many blue shirts as green shirts, this is a goal of 80 blue shirts and 40 green shirts for our Model Stock program.
The size distribution of T shirt sales is pretty odd. With most products, we would expect to sell twice as many large as medium or X Large. The model stock distribution for 40 green shirts (M-L-XL) would be 10-20-10. But with tee shirts, folks tend to buy XL - so the actual distribution is 10-10-20. Thus, on any average day, we should have 20 XL green shirts on hand in order to turn the XL green shirt inventory over 3 times a year.
The real question is what should the minimum and maximum inventory of XL green shirts be? We should not let the inventory drop down to zero because then we would be losing sales. On the other hand, if we let then inventory get too high, then we would go out of business – which is even worse than losing sales.
The solution to this Goldie Locks problem is to understand the order cycle. When we place an order, it may take an entire month to get the product delivered and checked into our system. We should therefore have at least a one month supply as a minimum. If the ideal or model stock inventory of XL green shirts is 20, and the inventory turn is 3, then we sell 60 XL green shirts per year and the monthly sales of XL green shirts is 5.
Unfortunately, T shirt sales (like everything else in our online business) are seasonal. So a better minimum number is 10 – or half of the model stock number. For everything to average out, the maximum number should be 30 (so that the average number will be 20). In addition, the maximum number is half of the total sales for that size and color in order to insure at least 2 inventory turns. During the Christmas season, when half of all retail sales occur, we can order up to the maximum number. On the other hand, during the dead days of summer, we might only keep the minimum number on hand. Therefore, the model stock distribution for all of our tee shirts is:
|
SKU |
Product Title |
Color |
Size |
Yearly Sales (YS) |
Model Stock (YS/3) |
Min Stock |
Max Stock (YS/2) |
Current Stock (CI) |
Next Order MS-CI |
|
C01.01 |
T Shirt |
Blue |
M |
60 |
20 |
10 |
30 |
20 |
0 |
|
C01.02 |
T Shirt |
Blue |
L |
60 |
20 |
10 |
30 |
15 |
5 |
|
C01.03 |
T Shirt |
Blue |
XL |
120 |
40 |
20 |
60 |
30 |
10 |
|
C01.04 |
T Shirt |
Grn |
M |
30 |
10 |
5 |
15 |
9 |
1 |
|
C01.05 |
T Shirt |
Grn |
L |
30 |
10 |
5 |
15 |
5 |
5 |
|
C01.06 |
T Shirt |
Grn |
XL |
60 |
20 |
10 |
30 |
15 |
5 |
|
# |
Total/Ave |
|
|
360 |
120 |
60 |
180 |
94 |
26 |
T Shirt Manufacturers generally have a minimum order of 24 shirts. Assuming we sell 30 shirts per month, we should be able to meet this minimum order and place a re-order at least once per month.
How to Use Phoca Cart Advanced Inventory Management to Control Inventory
The above table makes it clear that to have a successful business, we need to control not just the total number of tee shirts we have. We need to control the number of shirts in each color and size. We also want to allow our customers to decide what color and size they will purchase. Because this is such a common need, Phoca Cart has developed a special Advanced Inventory management tool just to help us deal with this issue. To use this tool, we need to create our Clothing category and create our first T Shirt product to place in this category. Then we need to set up our two Color Attributes for this product and then our three size attributes. This will seem like a lot of work. But when we are done, we can copy these attributes for other clothing products that come in colors and sizes. Our new product is called College in the Clouds T Shirt. Here is the Attributes tab:
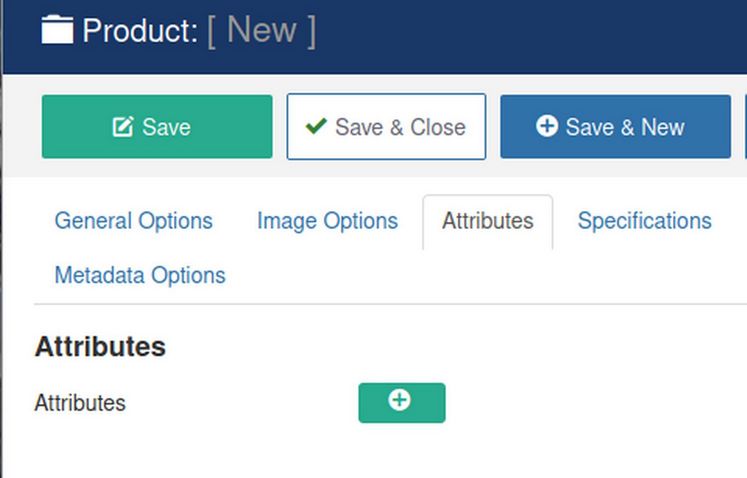
Click on the Plus sign to add a new attribute:
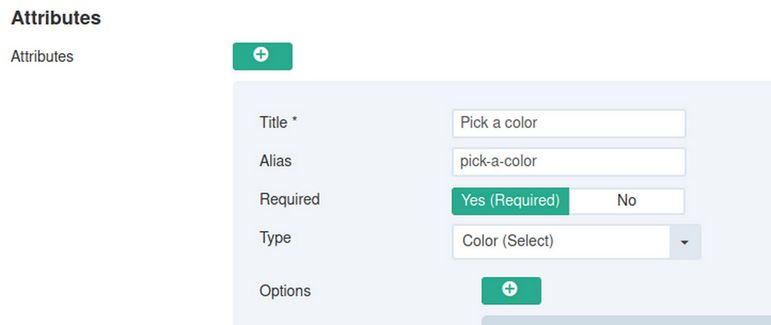
We will call the attribute Pick a Color. Make it required and for type, we will use Color (Select). Select means that only one option is permitted to be selected. Do not use Checkbox as that means more than one option can be selected.
Then click on the Options plus sign. For Title, we will call the first option Blue. Since the T shirts are all the same price, just add a color to the color box (#AAAAFF) and make Blue default:

Notice that there are two plus signs in the bottom corner of the Options box. The inner plus sign it to add a new option. The outer plus sign is to add a new attribute. Click on the inner plus sign to add the Green option. Then click on the outer plus sign to add a new attribute.
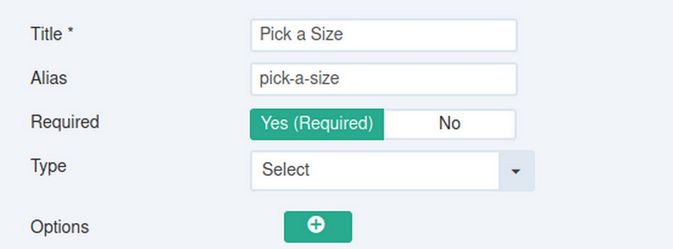
Call this attribute Pick a Size. Make it required and for type, choose Select - which means only one option can be selected. Do not use Checkbox as that means more than one option can be selected.
Make the first option Medium. Make the second option Large and default. Make the third option X-large. Then click Save.
Then click the Stock Options tab. We will start with an initial order of 24 T Shirts. Change Stock Calculation to Advanced Stock Management. Then click on Advanced Stock Options.
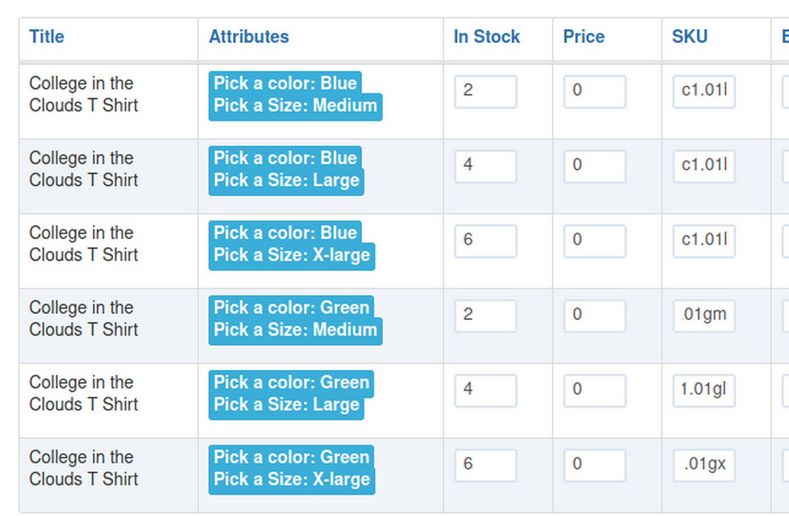
Set the initial inventory for Blue to 2,4, 6 and the same for Green. Then save and close and view the result in the front end of your shop. Order an XL Blue shirt. Then go back to the Product Edit page and click on Stock Options. Hopefully, you will have one less blue XL shirt in stock.
Congratulations! We now have a product which can be ordered by Size and Color.
What’s Next?
In our next article, we will look at Customer Order Processing