
In our previous articles, we installed a Joomla foundation on our business website. In this article, we will first download and install Phoca Cart. We will then take a tour of the Phoca Cart Back End and Front End to gain a better understanding of how Phoca Cart works.
Download Phoca Cart Component, Modules and Demo Data
Go to the Phoca Cart Download page:
https://www.phoca.cz/download/category/100-phoca-cart-component
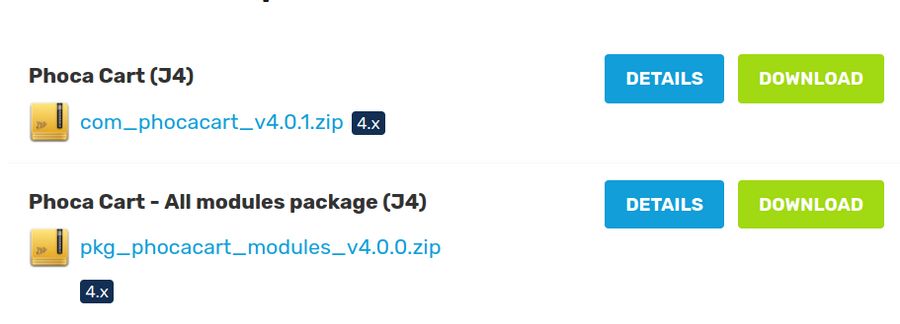
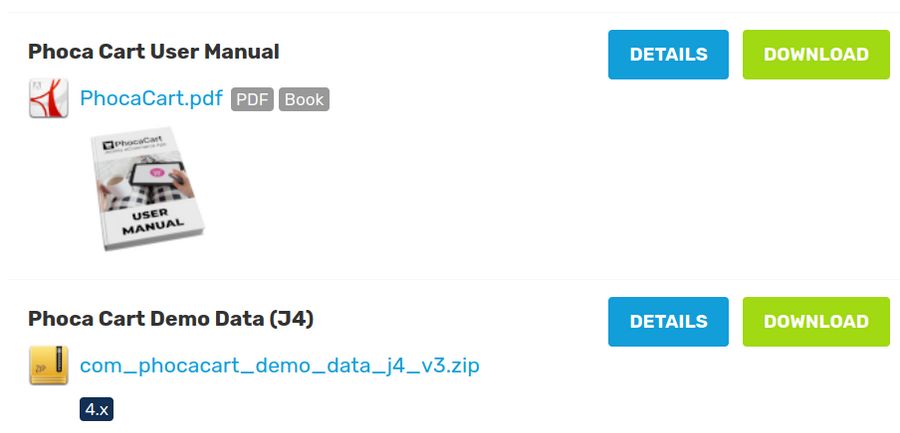
Version 4.0.1 added support for Joomla Custom Fields. Click on the green Download button to download the component and the Modules package. Also scroll down the page and download the Phoca Cart Users Manual and J4 Demo Data:
Warning: Do not download any Developer version as these may cause problems for your website database!
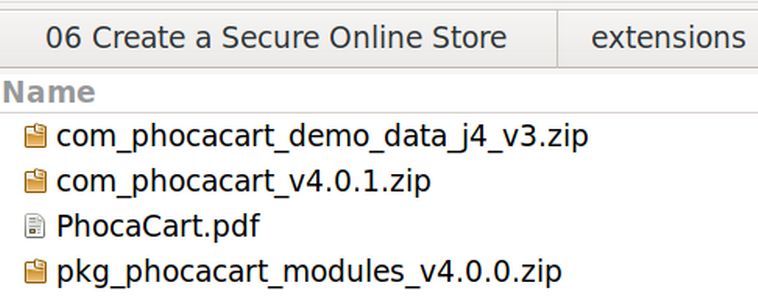
Transfer all of these zipped folders from your Downloads folder to your Joomla business website Extensions folder.
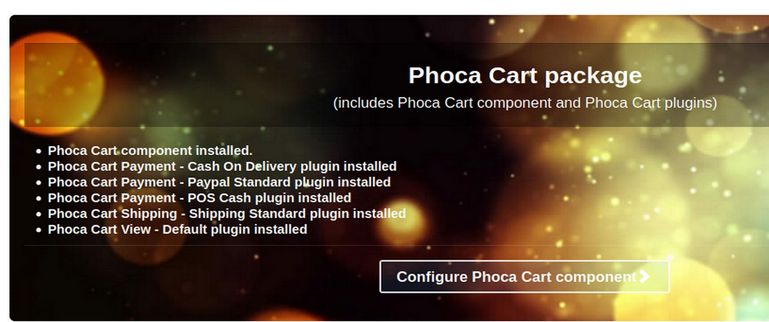
Then open your Joomla Dashboard and go to System - Install – Extensions- Upload Package File - to install the main Phoca Cart component which includes basic payment plugins and shipping plugins.
Here are the two installation success screens:

and
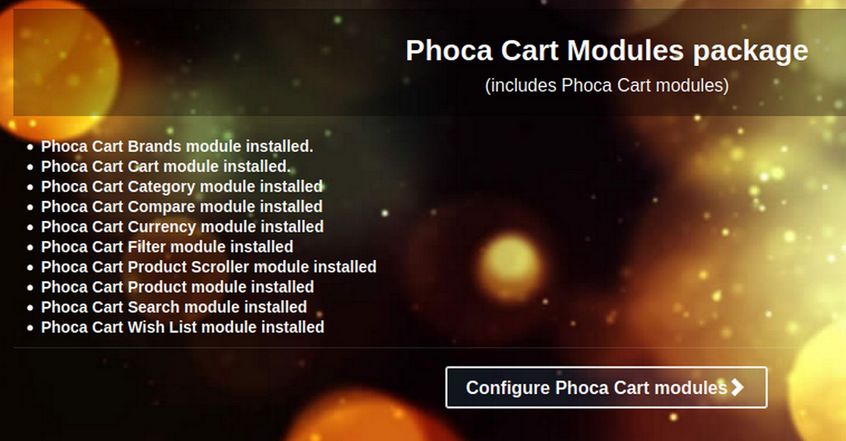
Next, before we configure Phoca cart, install the Phoca Cart Module package. This will install 10 Phoca Cart modules.
Then install the Phoca Cart Demo Data. The sample Product and Category images will be automatically copied into the Joomla Media Manager. This warning will appear:
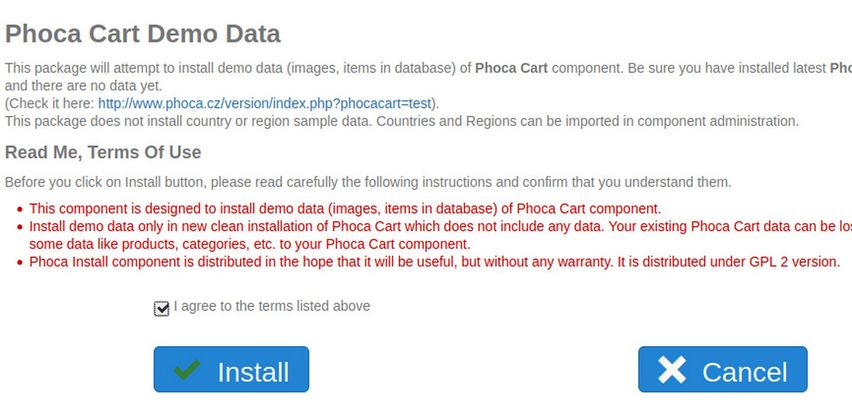
Check the Agree box. Then click Install. This warning will appear:

To uninstall the now empty Phoca Install folder, go to Extensions, Install/Uninstall-Components (click on the blue link above). Check the box to the left of the Phoca Install component. Then click Uninstall.
Create a Shop Menu Item
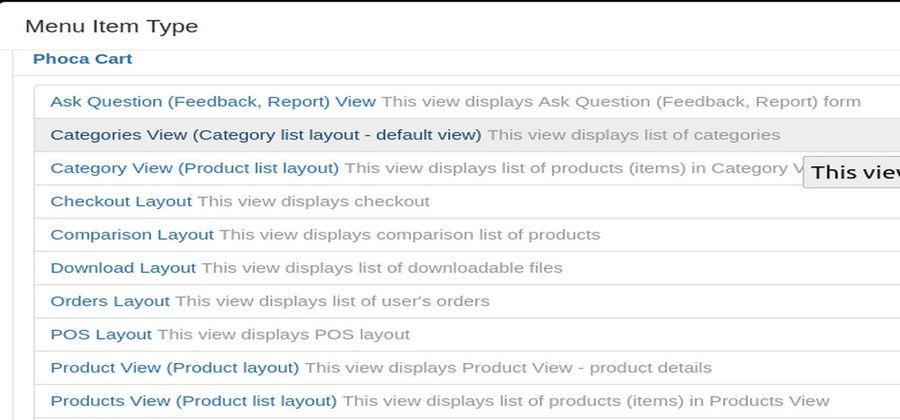
To see the cart with the Demo data, create a new Menu Item. Go to Menus – Main Menu – Add New Menu item. Click Select. For Joomla Menu Item type, select Phoca Cart – Categories View (Category List Layout default view). Here is an image of some of the Phoca Cart Menu Item types:
Type in a title such as Our Demo Store and save and close the new menu item. Then view the Shop page:
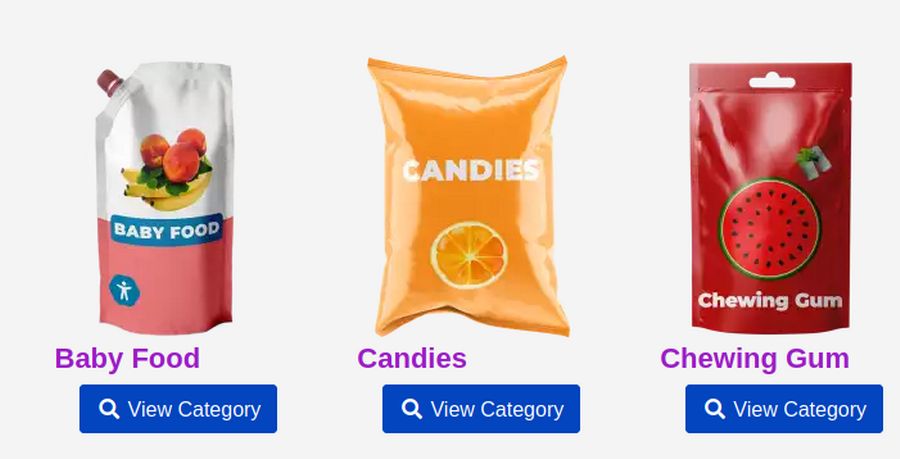
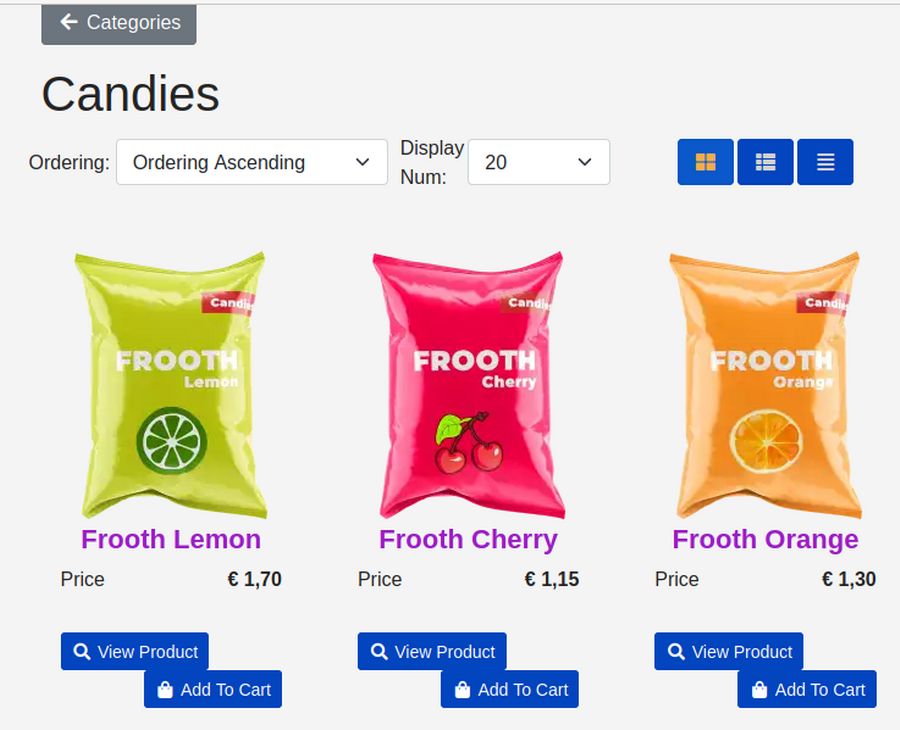
Click on the Candies category:
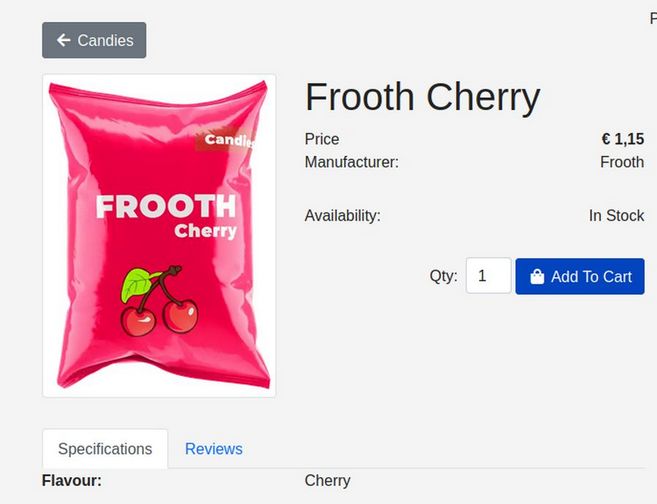
Click on View Product for Frooth Cherry:
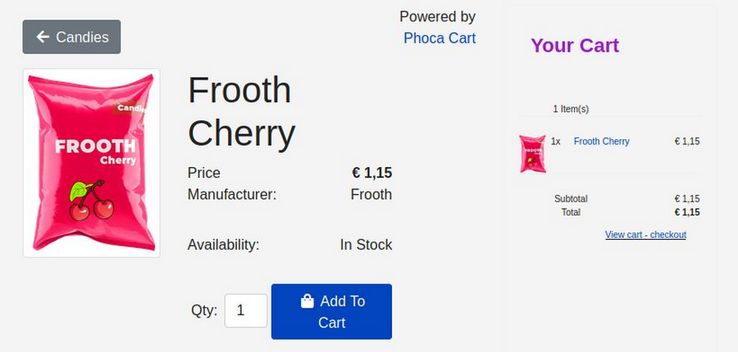
Click Add to Cart. Unfortunately, we can not see the cart because it is a module. It is either not active or not in a module position recognized by Helix.
Add the Phoca Cart “Your Cart” module
Go to Content, Site Modules. Scroll down to the Phoca Cart module and click on it to open it. Change the Status to Publish. Assign it to the Helix Right module position. Change the title from Phoca Cart Cart Module to just Your Cart. Change Display Image and Load Component media from No to Yes.
Assign the Cart to Only Appear on the Demo Store pages
For Menu Assignment, choose Only on Selected Pages. Then click None. Then check Our Demo Store. Then click Save and view site.
Click View Cart Checkout.
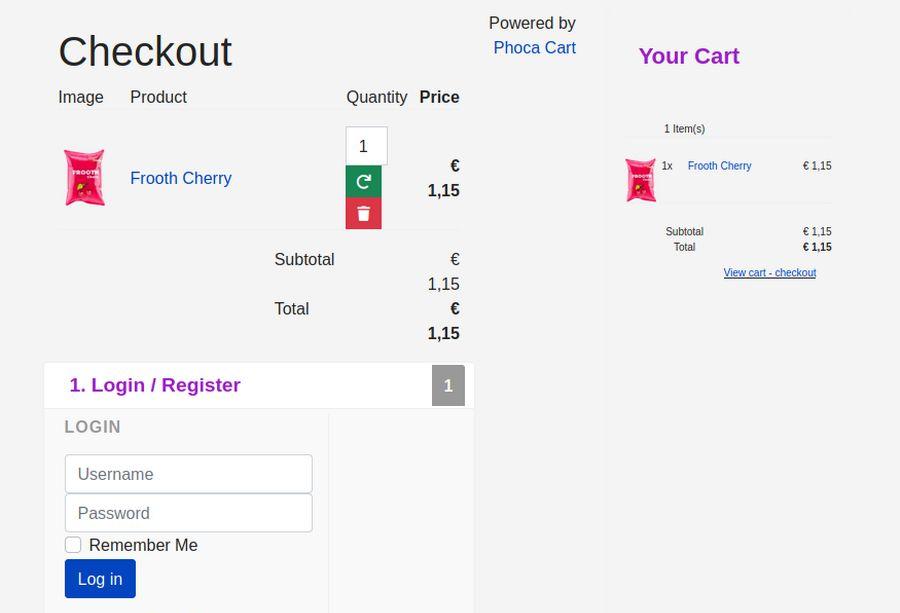
Customers are required to register to make a purchase. We will change this so customers can make purchases without registering.
Change Helix Layout so the Cart takes Less Room
By default, Helix sets the layout of the main component to 4-4-4. This means that when we assign the Shopping Cart to the right module position, it takes 4/12 or one third of the page width, leaving two thirds for the main component. Because we have previously reduced the page width to make it more readable, and because the Shopping Cart does not need one third of the page width, we should reduce the cart width by clicking on Templates, Styles and clicking the Helix template to edit it.
Then click Layout. To the right of Main Body, click on the four squares. Then change the layout of the Main Body row from 4-4-4 to 3-6-3.
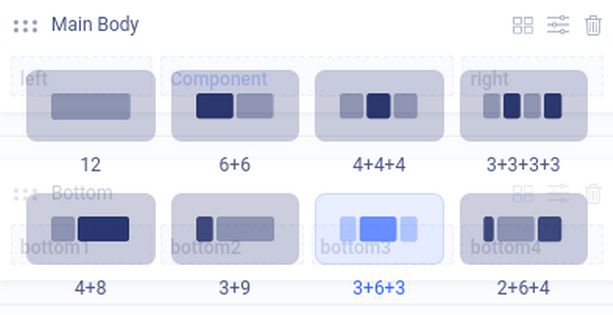
Then click Save and Close. Then reload the Shopping Cart to view the result. The cart should now only take one quarter of the page width rather than one third and the main component should take two thirds of the page width.
Phoca Cart Control Panel
Click on Components - Phoca Cart. If you did not install Sample Data, when you open Phoca Cart for the first time, a popup with Getting Started Wizard will be displayed. It is recommended to start the wizard to set up all necessary settings. Here is the Phoca Cart Control Panel with the Wizard in the upper right corner:

The Phoca Cart Control Panel can appear to be complex the first time you look at it. There are more than 40 menu icons! Click on the Options button in the upper right corner of the control panel to see even more settings that may need adjustment.
There are 9 tabs of options that we will review in the next section.
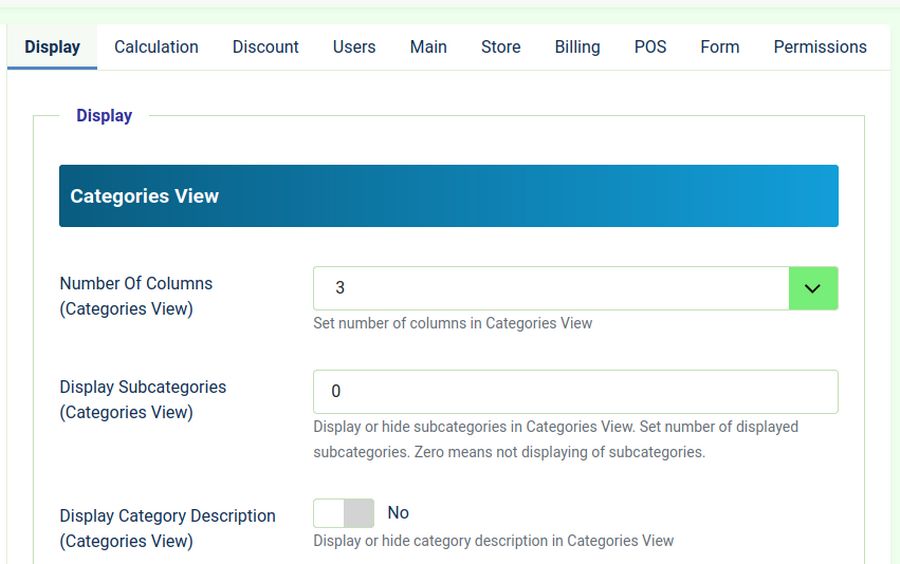
For now, just scroll down the Display tab page and you will see that the Display tab page has been divided into 10 sections with literally dozens of parameters that can be set. Thankfully, most of these settings can be left at their default values.
At the very bottom of the Display tab page is a section called Theme Options. Change Load Specific CSS to Helix. Since we are using the Helix template, this will help improve the appearance of our online store.
Next click on the Main tab. This is where you can set the height and width of Product and Category images and Thumbnails. Note that there are three sizes, Small, Medium and Large. Click Save and Close to close the Options screen (which is labeled as Phoca Cart Configurations). This returns us to the Phoca Cart Control Panel.
Click on the Phoca Cart Categories icon to see the Demo categories:
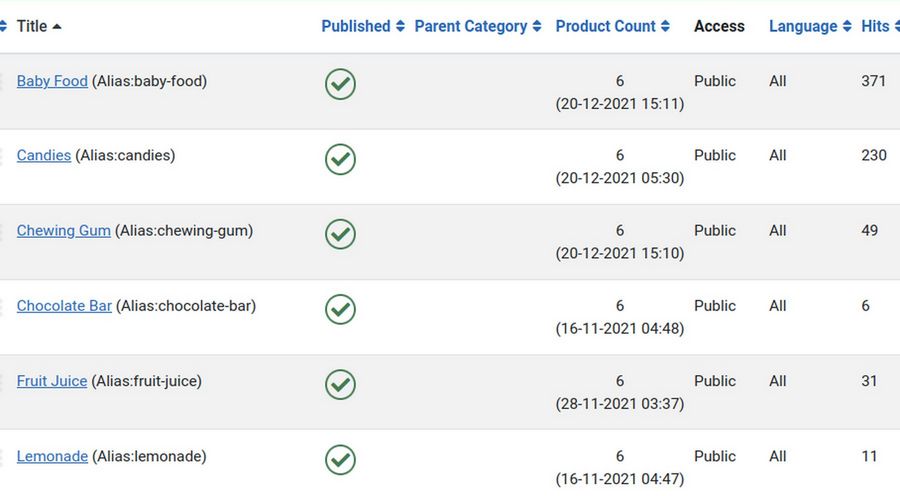
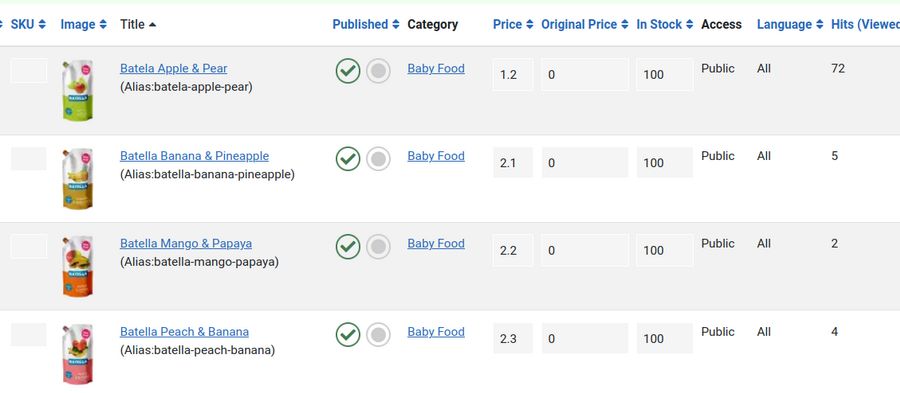
There are six categories with Candy and Baby Food being the most popular. Click on the Candies category to see how it was made:
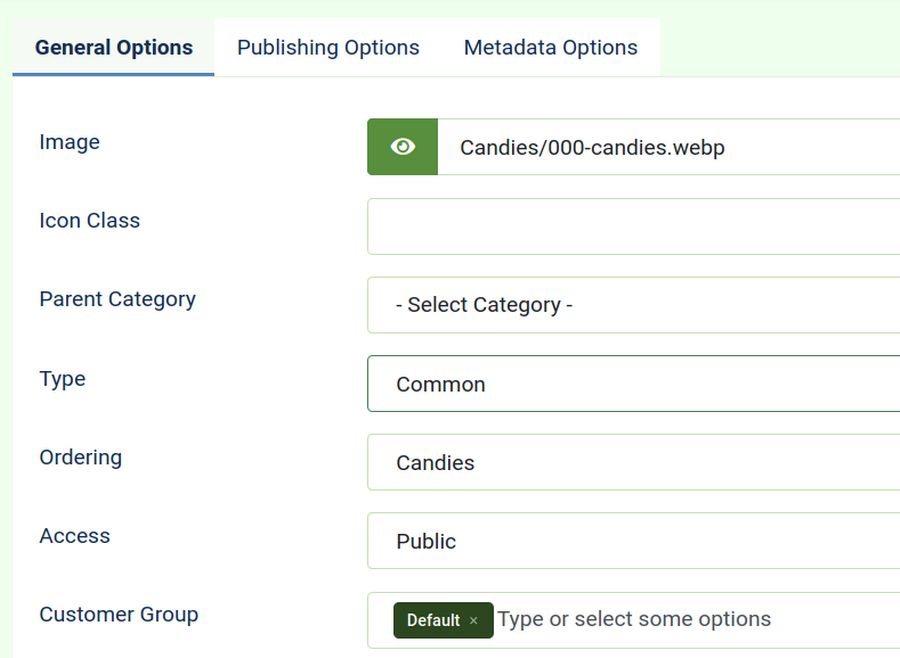
Each category can have an image, a parent category, an access level (such as only visible to registered users) and a customer group (a special group you could create). Scroll down to see that you could also write a description for each category. Categories are so important that we have written and entire article about them. For now, click Close to close this category.
Then click on Components, Phoca Cart Products:
There are a lot of products. SKU stands for Stock Keeping Unit number. This is a unique number you can assign to each product in your store. The Demo Content does not assign an SKU. But you should add this to help you track sales and order inventory.
The Product Table shows the category that each product is assigned to. The table also shows the current inventory for each product. Click Filter Options at the top of the page to see that you can filter and display products by category or by Manufacturer (what is also called a Vendor or Supplier).
Scroll down to the Frooth Cherry product and click on it to see how it was added.
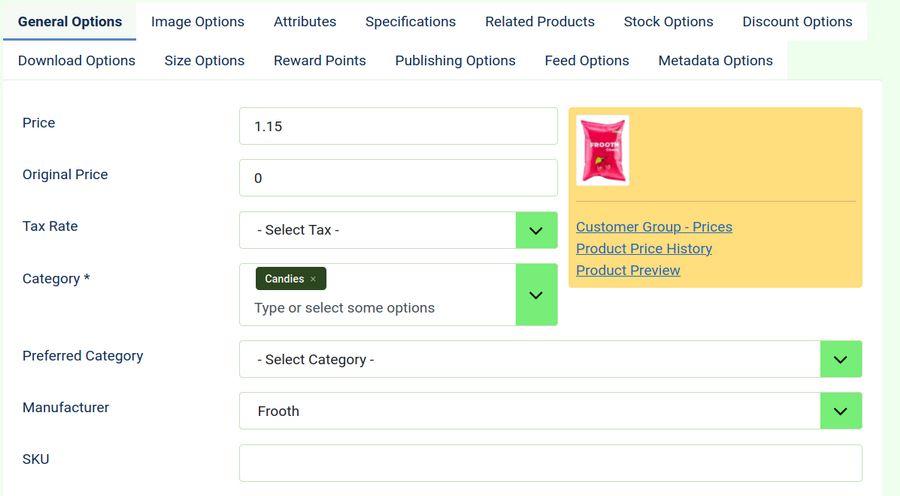
There are 13 tabs that can be filled out for each product. On the General Options tab, you can set the price, the tax rate, the category, the manufacturer and the SKU. Scroll down to see that you can also add a video and a description. As with Categories, we have also written a separate article about how to add products. These two articles come right after our next article which is about setting up your general store appearance options. For now, click Close to close this Product Edit screen.
Why I do not recommend doing the Phoca Cart Wizard
Click Components, Phoca Cart Control panel. Then click the Start Wizard button in the upper right corner. Then click Start Wizard again.
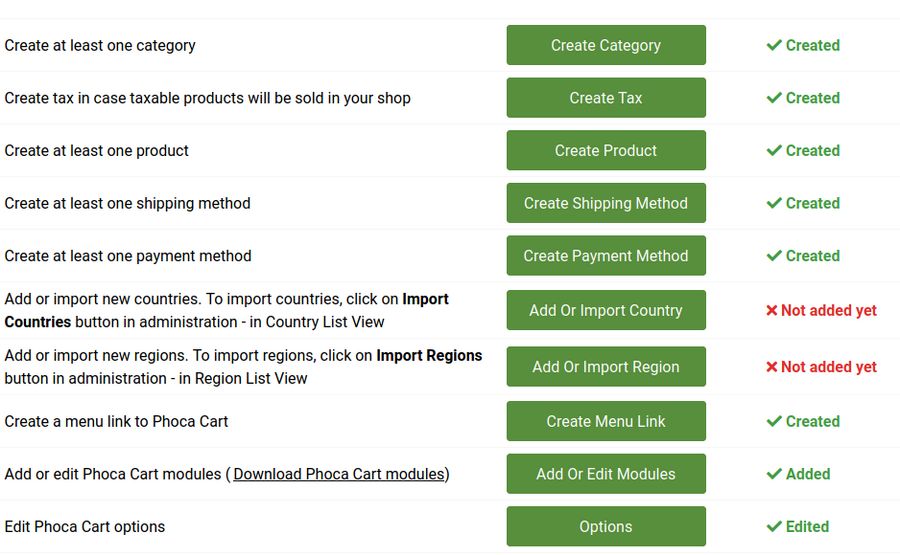
The wizard has 10 steps that take you to 10 areas in Phoca Cart. Unfortunately, there is not a lot of instruction provided on each of these areas and going to them without instructions can led one to feeling overwhelmed. We will eventually cover all of these areas and explain how to use many other powerful features offered by Phoca Cart. But we will hopefully do it in a way that builds your confidence rather than trying to cover too much too soon. For now, click Skip Wizard.
Summary
Phoca Cart uses web page building processes that are very similar to Joomla. As with Joomla, you begin by creating Categories and Sub-categories for your Products. Create these categories on your Home computer first with one new folder in your file manager for each category.
Then you create Products and assign them to categories. Phoca Cart Products are similar to Joomla articles in that you can begin by creating Product Descriptions and Product images using Libre Writer documents and placing these inside of your Product category folders in your File Manager.
Then create the Phoca Cart product categories on your website by going to Categories and clicking New. Then create your products on your website by going to Products and clicking New.
Both of these steps were taken care of for us when we installed the Phoca Cart sample content. But you will eventually need to replace the sample content with your own Product Categories and Products.
Creating a Phoca Cart Menu item is also similar to creating a Joomla Menu item. First you create Phoca Cart categories. Then create Phoca Cart Products. Then go to the Main Menu and click New. Then click on SELECT to select the Menu Item type. The only difference is that instead of selecting a Joomla Menu Item Type, you select a Phoca Cart Menu Item Type.
Hint: Rather than deleting the sample content, consider keeping the sample categories and products and simply unpublishing them – as they can help you learn how to use Phoca Cart Product Attributes. Often after you have created one Product with complex fields and attributes, you can simply clone a sample product and then relabel it to match your own products.
What’s Next?
This completes our tour of Phoca Cart. In the next section, we will review how to do the initial set up of your online store in Phoca Cart Configuration Options.