
Previously, we covered how to add categories and products. Once you have products, you can apply labels, tags, options, attributes and specifications to each product. Adding product labels, tags and specifications can greatly increase sales by providing customers with more information about your products. Labels and tags are also useful for creating additional categories of products based on changeable factors such as being temporarily on sale or temporarily featured or added to a favorites category in addition to being permanently placed in categories based on subjects you create like Clothing, Cars or assign such as dividing products based on the manufacturer of the product. In this section, we will review the differences between labels and tags and specifications and how to create and assign new labels, tags and specifications to products. Then in the next section, we will review how to create product options, attributes and fields and assign them to products.
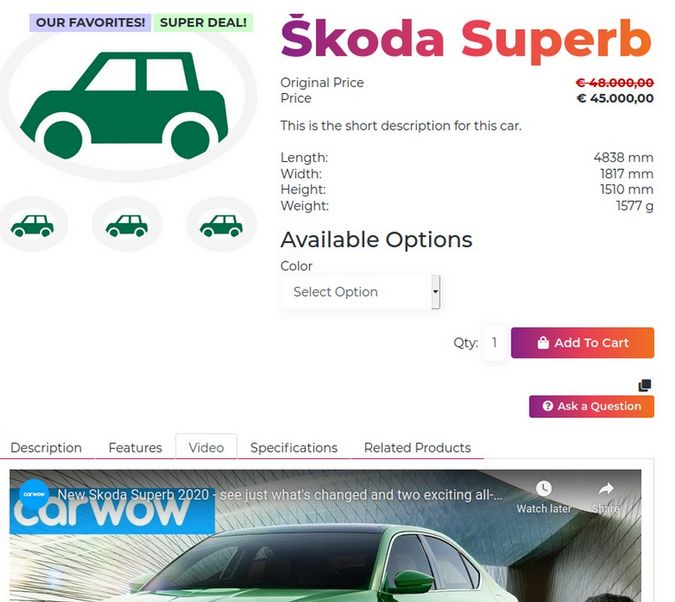
Here is an example of a Product page with Labels, Options and Additional Product Information:
Differences between Product Labels, Tags, Specifications, Options, Attributes, Fields and Parameters
Phoca Cart is unique among all of the shopping carts in its ability to help you easily add custom labels, tags, specifications, options, attributes, fields and parameters to products. Phoca Cart is such a powerful tool that beginners can become bewildered with all of the options they have in terms of providing information about products to their customers. It is important to understand that, if you only have a couple of products, you do not need to use any of these tools. However, if you have a growing online store with more than one thousand products, you may want to use all of these tools.
The difference between the three tools we discuss in this section and the tools we discuss in the next section is that product options, attributes and fields can affect your inventory or Stock Keeping Units (SKUs) while labels, tags and specifications do not affect your product inventory. In the next chapter, we will spend more time on how to control product inventory with Phoca Cart.
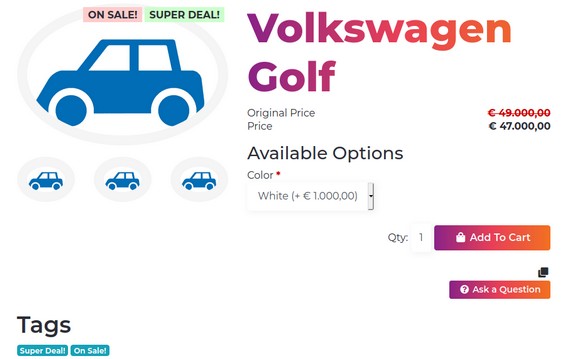
Product Labels and Tags are the first tool we will review. They are very useful for drawing attention to a particular group of products. Product Labels and Tags appear above the product image on Category pages. For example, Volkswagen Gulf below is shown with the tags Super Deal and On Sale:

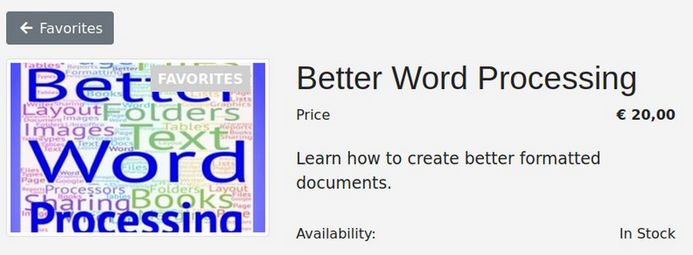
Click on this product and you will see that, on the Product page, the tags are displayed both above the image and below the Product.
Go back to the previous image and note that the Passat has two labels, Our Favorites and Holiday Special above the product image. But it has no tags below the product image.
How to Create Product Tags and Labels
An important feature of Product Tags and Labels is their ability to be linked to a Product Category. Therefore, before we create a Product Tag or Label, we should first create the product category we want to connect the tag or label to. But before we create a new Product Category, we should create an image for that product category. In Section 3.3, we created six categories. Two categories were for actual products (Books and Clothing). The other four categories were for Product tags and or labels.
Create a New Product Tag or Product Label
To create either Product Tags or Product Labels, from the Phoca Cart Control Panel, click on Tags. Then click New:
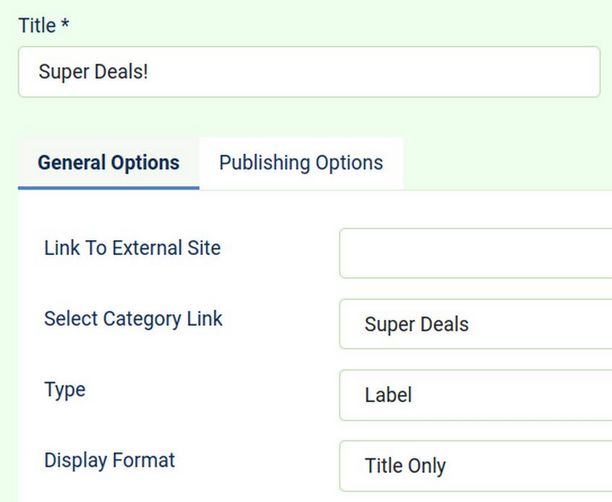
Give the tag a title and select the category we just created to form a connection between products we assign to this tag and the tag category.
Assign the Tag or Label
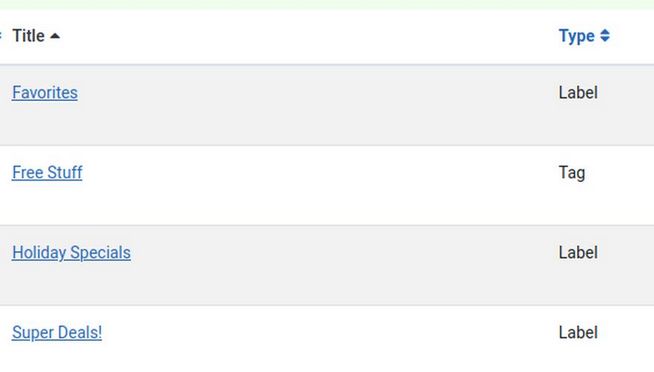
Type can be either Tag or Label. Tag will display tags below the bottom of the product on the Product page and be searchable with the Product Search tool. Labels will not display tag lines on the product page. They will only display a label above the product image and help link special products to special categories. For Display format, use Title Only unless you are using Icons for Tag images. Then give the tag a short one sentence description and click Save and Close. Here is our Tag Table showing one tag and three labels.
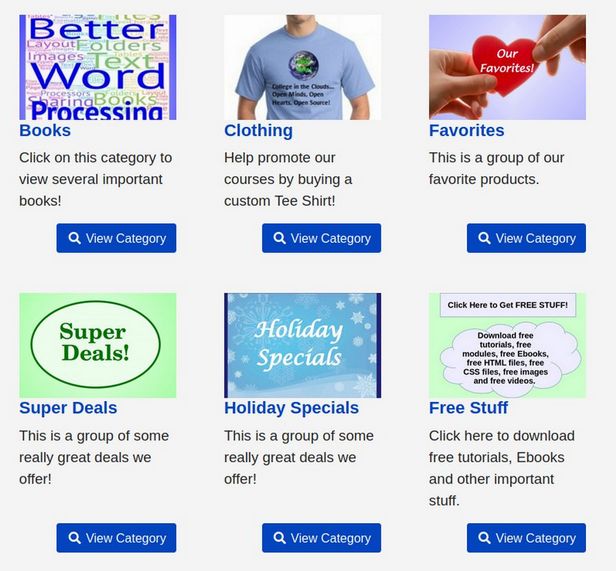
We have also created special categories for all four of these tags/labels. Here is what these special categories look like on the All Categories page:
Assign a Product to a Label Category AND a Matching Label
To assign a product to one or more of our special label or tag categories, click on the Product to open it. Then on the General Options tab, click on Category to bring up a list of categories. Then add the Favorites category to the Product. You can assign a product to as many categories as you want. However, the label or tag will not appear on the Product page unless you also click on the Publishing Options tab and add the Labels to this product: You do not want more than two or three special tags or labels assigned to any one product. Then click Save and Close and view the front end of your website to confirm that the label actually appears. To view the result, go to the front end and click on the Favorites category to view products assigned to this category.
Customize the Label Background Color
By default, the label background color of all new labels will be light gray. To change the background color, use the class name as shown below (classes have a dot at the beginning). Then go to Extensions, Templates, Templates, HelixTemplate details and copy and paste these into the end of your template custom.css file.
.ph-corner-icon-favorites {background-color: #00f;}
.ph-corner-icon-super-deals {background-color: #070;}
.ph-corner-icon-holiday-specials {background-color: #f00;}
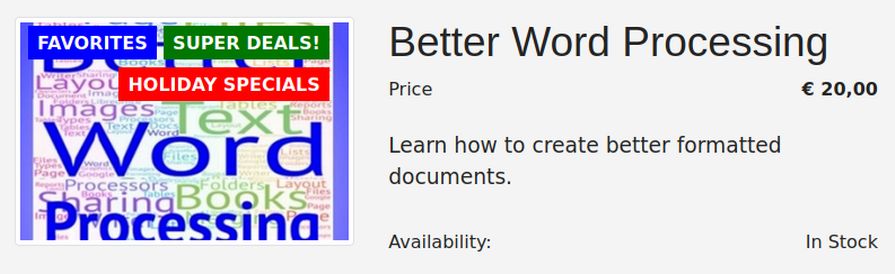
Here is the final result:
How to Add Additional Product Information
Phoca Cart allows you to add Additional Product Information to the bottom of any product page. You can show as many tabs as you want and have different tabs showing for different products.

The settings for the six tabs in the above Product Information section are located in the following areas:
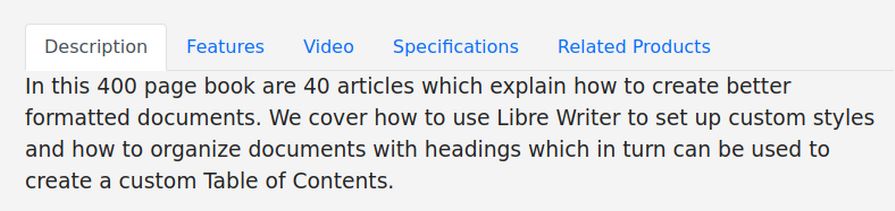
Description: This is the long description which is set on Products, General Options tab. The Long Description Editor is just below the Short Description Editor near the bottom of the page.
Features: Is also set on the Products, General Options tab. The Features Editor is just below the Long Description Editor.
Video: is also on the Products General Options tab just above the Short Description Editor. The video must be a full path URL link such as to a YouTube Video. It must include the https at the beginning of the URL.
Specifications: The key difference between specifications and product attributes and/or product options (both of which we will cover in the next article) is that Specifications merely describe a product. They should have no effect on Product Price and they should have no effect on product inventory.
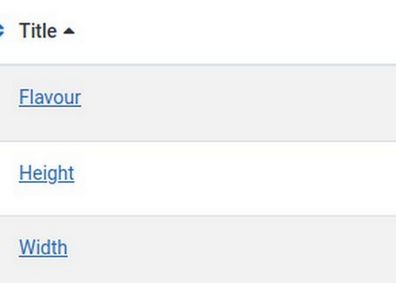
Setting up product specifications is a two step process. First, you must add Specifications from the Control Panel by going to Specifications. The Demo Data comes with a Specification called Flavor. Click New to add a new specification called Width. There are no parameters for Specifications. They are simply fields that provide a place to put values. Then click Save and Close. Then click New to add a new specification called Height. Here are the three Specifications Groups:
The second step is to add these specifications to individual products. Click on the book Better Word Processing in the Products area.
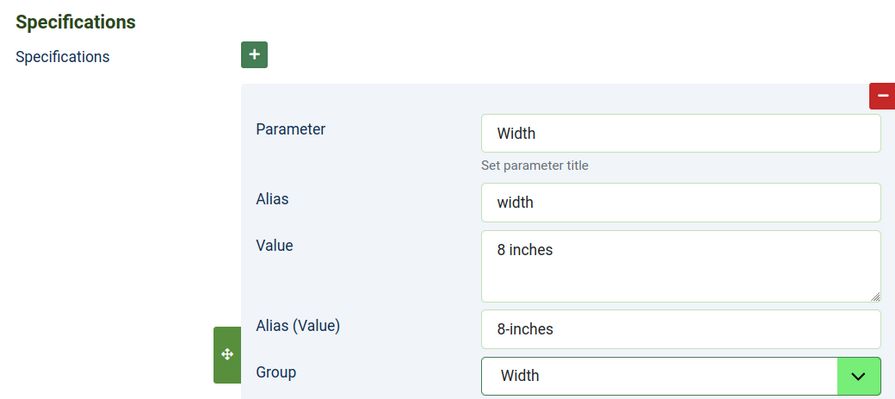
Then click on the Specifications tab. To add a new specification, click on the green Plus sign. Then add our new width and height specifications and give them vales of 8 inches and 10 inches:
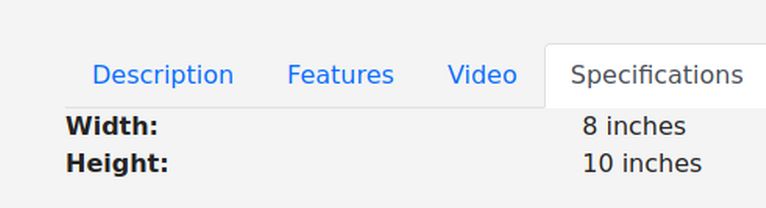
To see Specifications on the front end, go to the shop and click on the book specifications tab:
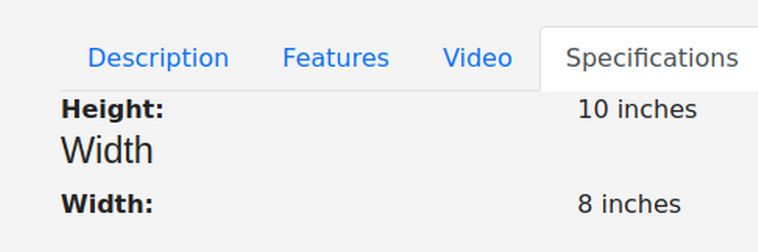
To get rid of the duplicate Width, do not assign Width to the Width group and do not assign Height to the Height group.
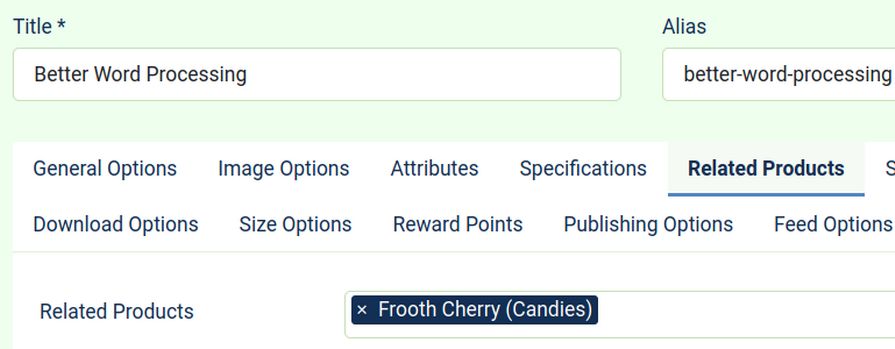
Related Products: Related Products are set on the Product page, Related Products tab:
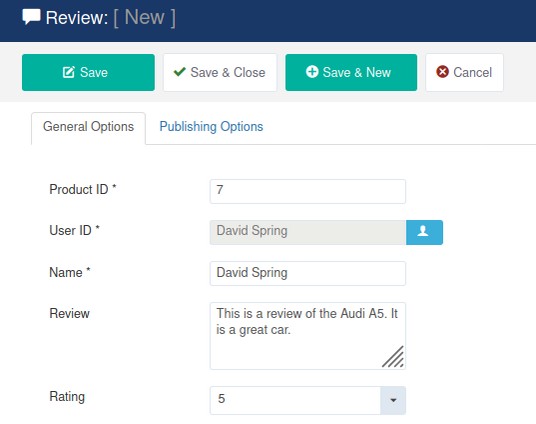
Reviews are unique in that they are not set on the Products page. Instead, they are generally created by customers on the front end. You can then review and approve them on the back end. You can also create reviews on the back end simply by creating a fake customer and then writing a review in the Reviews, New area.
To view reviews on the front end, we would normally go to the Product page and click on the Reviews tab. However, if you do not want to post Reviews or have people look at an empty Reviews tab, click on Options at the upper right corner of the Phoca Cart control panel. Click on the Users tab. Change Enable Review from Yes to No. Then click Save and View Site.
Problems with General Display Parameters
Go to the Phoca Cart Demo site:
https://www.phoca.cz/phocacart4demo/
Four icons appear below each product:
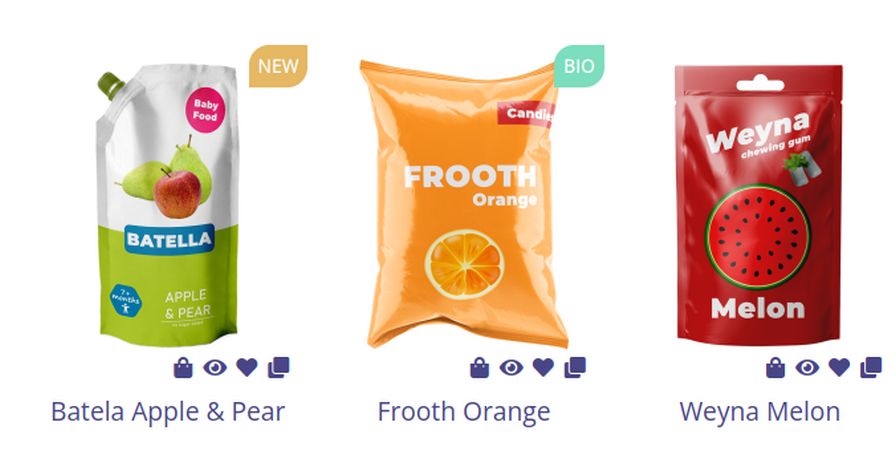
These four icons are called General Display Parameters. Clicking on the first icon will add the item to a shopping cart. The second icon will bring up the Product page in a pop up. The third icon will add the product to the customer’s wish list – but only if the customer is logged in. The fourth icon will add the product to a comparison table where it can be compared with other products added to the comparison table.
There are several problems with these icons. First, it is too easy for a customer to accidentally add a product to their shopping cart. This is especially a problem because some browsers fail to display the words Add to Cart when hovering over this icon. There is no popup asking if you really want to add this item to your cart. It just gets added. I therefore do not recommend displaying this icon.
The second icon is redundant because if the customer really wants to see the Product page, they can click on the big View Product button. I therefore do not recommend displaying the second icon.
The third icon is a problem because folks may not realize they need to be logged in and may not want to be logged in just to add something to a wish list. I therefore do not recommend displaying the third icon.
The fourth icon, Compare, can be very helpful for customers trying to decide between two similar products. However, it only works if there are actual specifications set for both products. This is rarely the case for a small online store with less than 1000 products and no staff available to set up this comparison system. I therefore do not recommend any of these four icons. Thankfully, all four icons are turned off by default in the Display General Options.
What’s Next?
In the next article, we will take a closer look on setting up product options such as sizes and colors.