
One way to build a community is to offer free events and invite the community to your event. It also helps if your website can help community members organize their own events. This requires installing an events calendar and registration system on your website. This system can also be used to promote other community events. In this article, we will add a free events organizer called ICagenda.
The first question we should address is why not simply use Google Calendar and create your own Google Events registration forms? The answer is that it gives you the ability of setting up different events visible to different groups of people through the Joomla Access Control Level (ACL) system. In addition, staying within your website allows the use of compatible tools all of which use the same Joomla registration system and the same Joomla database. If you are going to build your own online community, it is best to keep as much of it as possible within your own website registration and access system.
The Joomla extension directory has several events organizers. However there is only one non-commercial option that is able to keep track of the number of people who have signed up for an event and the number of spaces left available at the event. This free tool is called iCagenda.
https://extensions.joomla.org/extension/calendars-a-events/events/icagenda/
Here, we will install and review how to use ICagenda. Install this component with System, Install, Extensions.

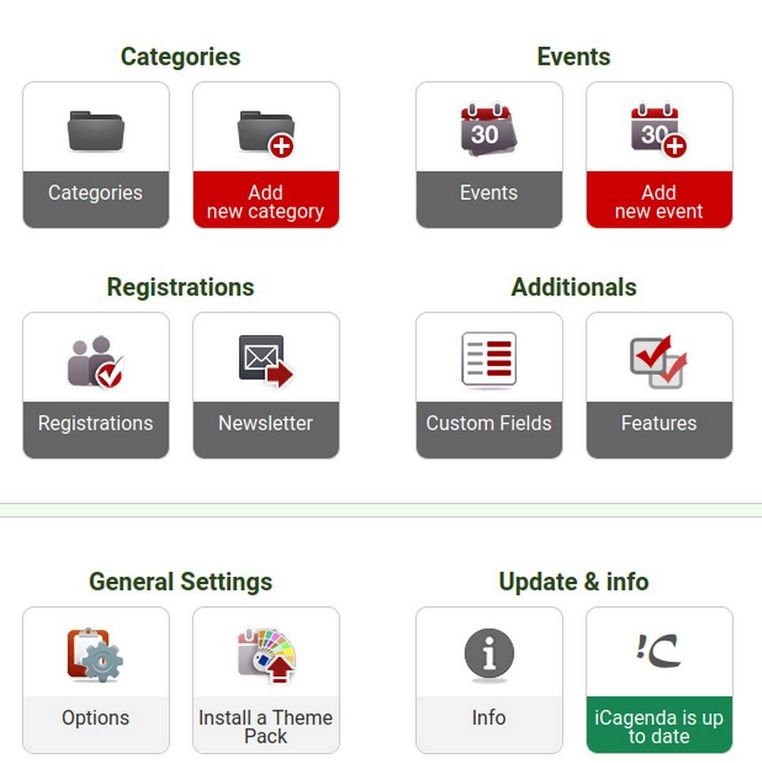
Everything comes enabled except the module box that the calendar will be displayed in. Go to Components, ICagenda. Dashboard. There are tools for category management, event creation, and a basic newsletter sender for those who sign up to events along with a section for customizing the posting of events and registering for them.
In the front end, there is a calendar module and two menu items – one for a list of events and the other leading to a page where members can create their own events.
Set Up Event Options
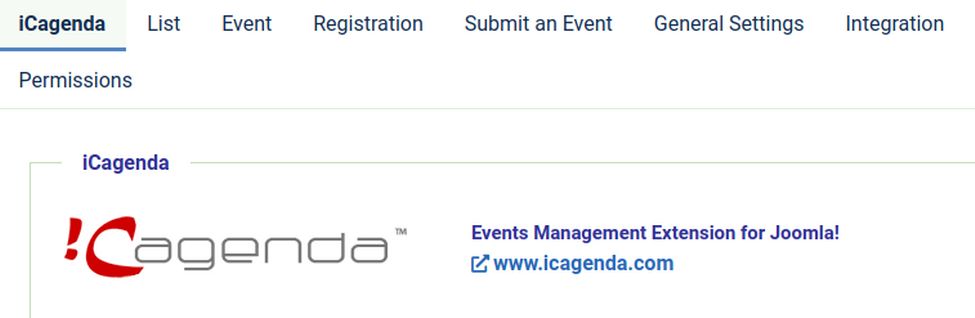
The first task after installing ICagenda is to set up our event options. Go to Components, ICagenda Control Panel. Go to General Settings and click on Options. There are several “settings” tabs to look at. These include List, Event, Registration, Submit an Event and General Settings and Integration.
Click on the List tab.
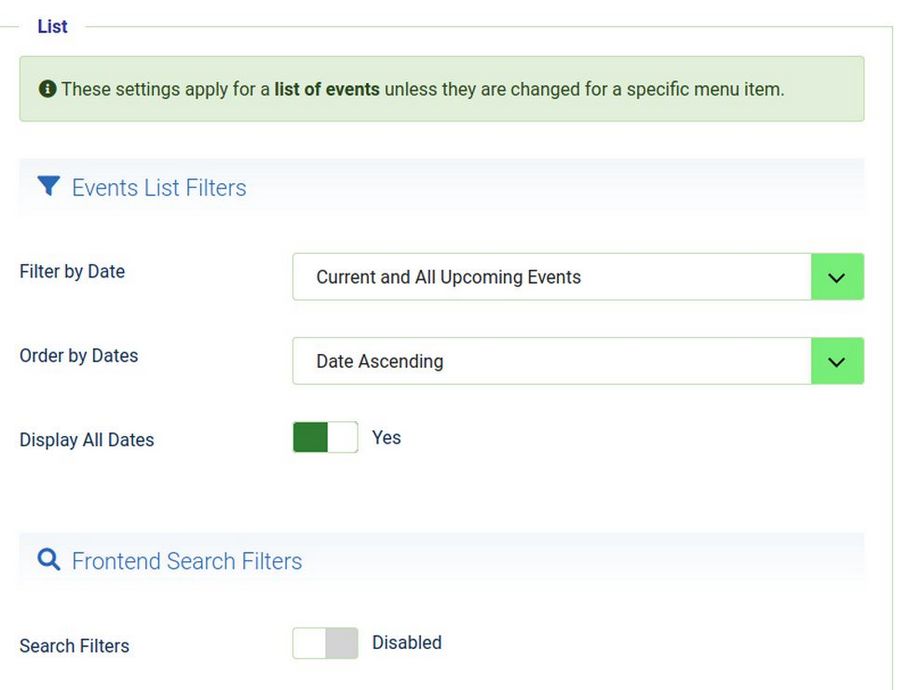
Change Front End Search Filter to Enabled. Change Category Information from No to Yes. Then check the Title.
For the Date Box, also check the Time. For Information in List of Events, hide the country. Then click Save.
Next click on the Event tab. Leave the list of participants Access to Public. Leave List of Participants as Hidden. Then click on the Registration tab: Leave Access to Registered. Change Max tickets to 20. Form change Button text to JOIN. Change Terms and Conditions to Article. We will write and then select the article later.
Then click the Submit an Events Tab: For “not logged in page” click on Custom Text and type in the following text:
“To submit an event, please log in by clicking on the log in menu item.”
For “not access page” click Custom Text and enter the following.
“To submit an event, please register by clicking on Create My Own Event menu item. Then log in by clicking on the log in menu item.”
Then add Managers to the Approval Permissions. Also hide Contacts phone number, Captcha and disable the terms. Change Slide Effect to No. Change List Display Options to Name. Then click Save.
Then click General Settings tab Change the time format to 12 Hours. Change the category Order to Category Order. Then in the Add This section, hide Events List and Events Details.
Then click on the Integrations tab. For routing, change Remove IDs from URLs to Yes. Then click Save and Close.
Create Event Categories
You could just keep all of your events in the same category. However, it is useful to help your team members who will be creating their own events to give them categories in which to place and organize their events – depending on the purpose and location of the event they are creating. We will create three categories of events… Meetings (which may occur weekly or monthly at homes in the local community), Classes that may meet weekly and focus on a particular topic and Presentations which may meet only once and occur at a local club or organization meeting.
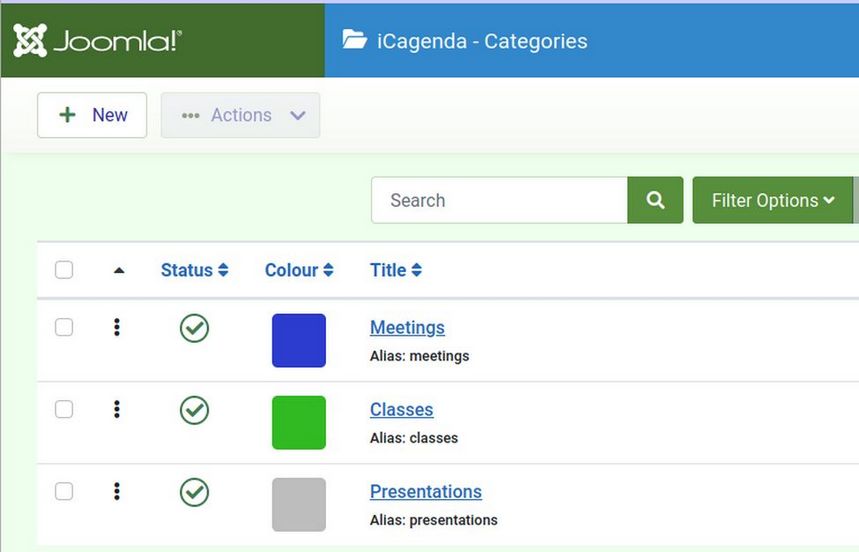
To create a new category, go to Categories, add a new category. Give the event category a name and assign it a color to be used in the Event Calendar.
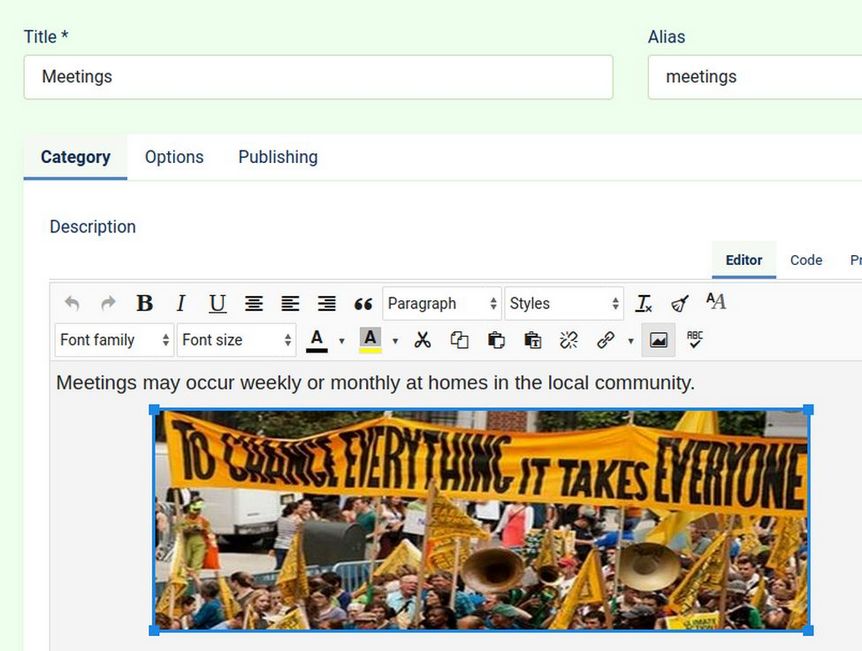
On the Category tab. Give your Event Category a description and add an image if you want. Then click on the Options tab and choose a color.
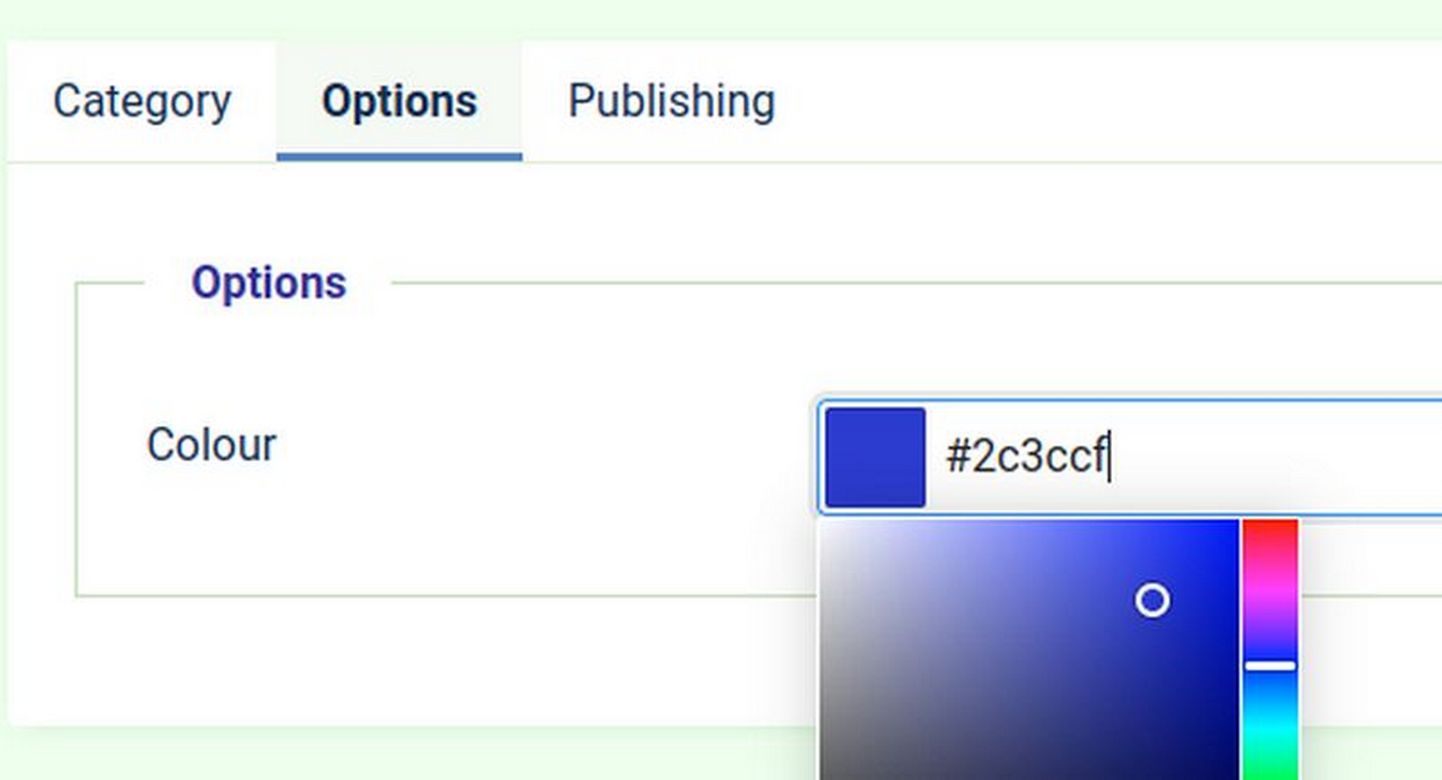
Then click Save and Close. Here are our three Event Categories in the Event Category Table:
Create Your First Event in the Back End of Your Website
There are at least three ways to a new create event. First, you as a Super Administrator can simply click on the Events icon. Then click New and add a new event. Second, you can allow registered members of your group to create events on the front end of your website which they can either be reviewed by you or automatically posted. There is a small problem to this second method in that there is no way on the front end of the website for the user to edit or delete their event once it is created. The solution to this problem is to give all or some registered users access to just the Event Page in the back end of your Joomla website where they can select and edit their event or even delete their event if it has been canceled. Alternately, if you do not want to give members access to the Event Table in the back end of your website, you can give them your email address or have them fill out a Contact Us form on the front side of your website requesting that their event be changed or modified – which you would then need to do for them.
We will begin by creating an event as an administrator. Click on the Events icon in the ICagenda Dashboard. Then click New.
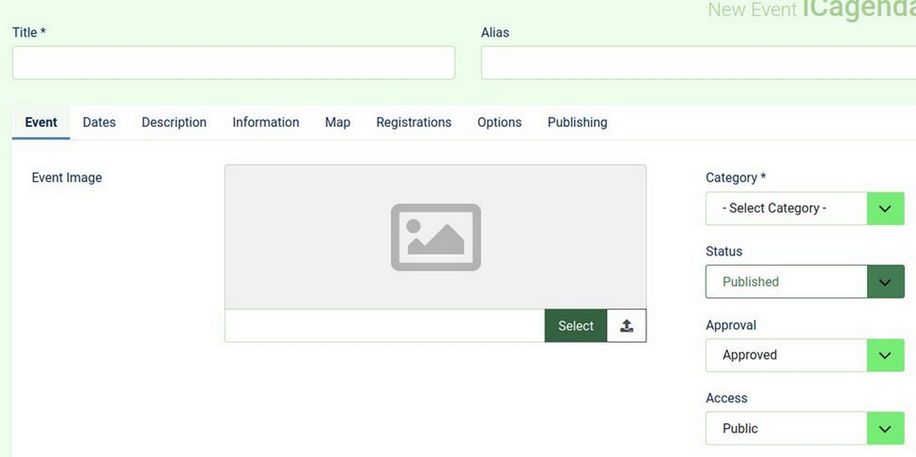
Give your event a Title, assign it to a category and load an image if you have one you would like to associate with this event. Also you can optionally assign the event to an “access level” where the event will only be viewed by folks with the access level you have assigned to it.
Then click on the Dates Tab:
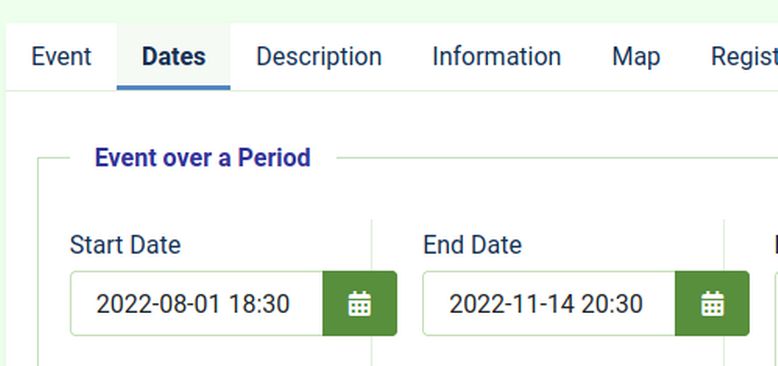
There are two Date Options. The first is Event over a Period and the second is Single Date. The problem with the Single Date option is that it does not allow you to list both a beginning and ending time. Therefore, you should almost always use the Event over a Period of time option even if the event starts and ends on the same day. This way event participates will know how long the event will be. To bring up a clickable calendar to select the date and time, just click anywhere in the Start Date box:
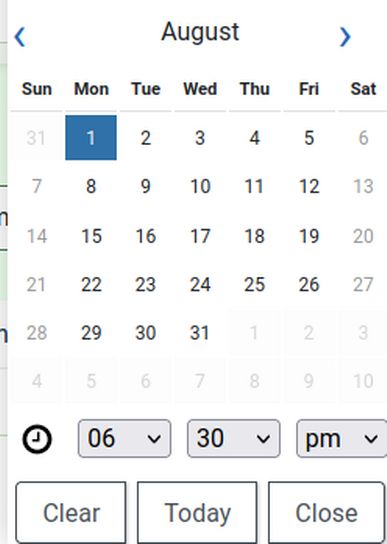
If the event is in a future month, click on right arrow to display the correct month. Then click on the day of the event. Then select the start time. Then click Close. Repeat for the End Date and Time (even if it is the same date).
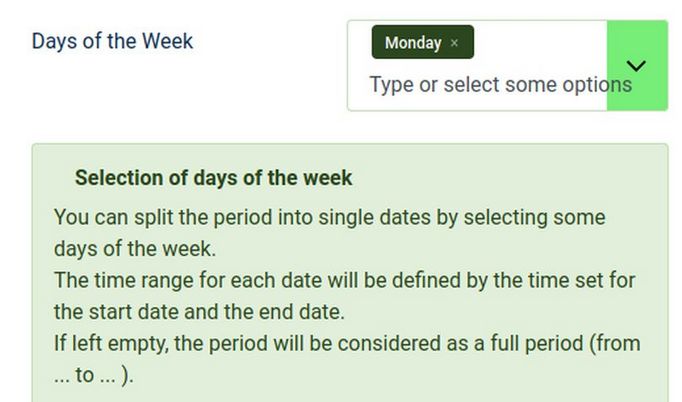
There is also a Days of the week box to the right of the Start Date box. Click in this box to bring up a list of the days of the week and select the day of the week that matches the date of the event.
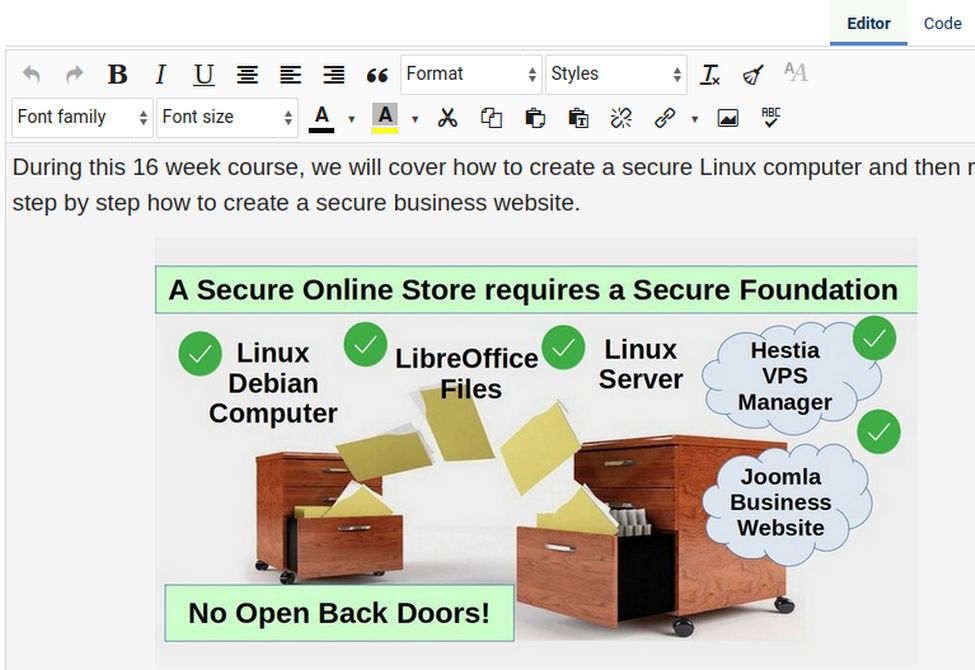
Then click Save. Then click on the Description tab. There are two types of descriptions. The Short Description has a word counter and is limited to just 100 characters (one or two short sentences). Below this is a Long Description box where you can add a more complete description and any images you would like:
Click Save. Then click on the Information tab.
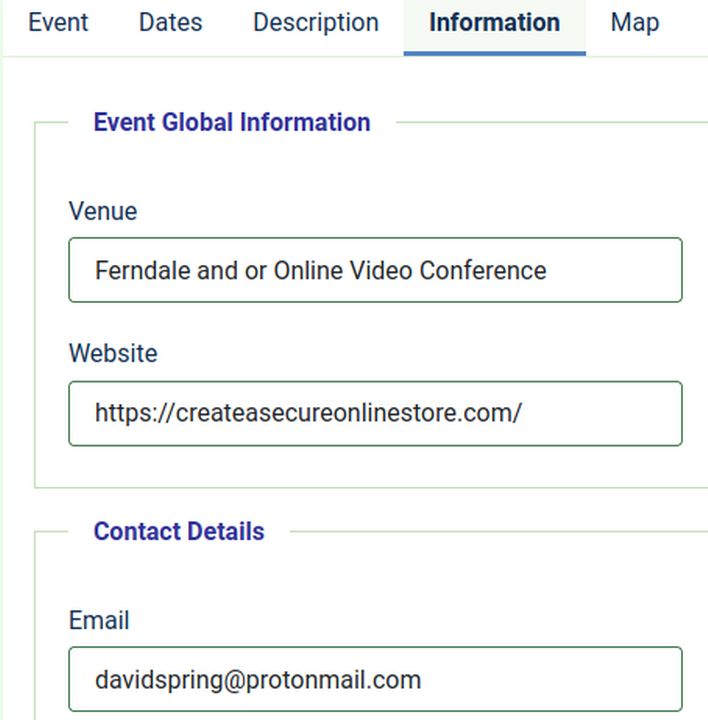
For Venue, just enter a description such as the name of the city where the event will be held. (in the next tab, we will add the exact address and the map location). You can also indicate if it is an online video conference.
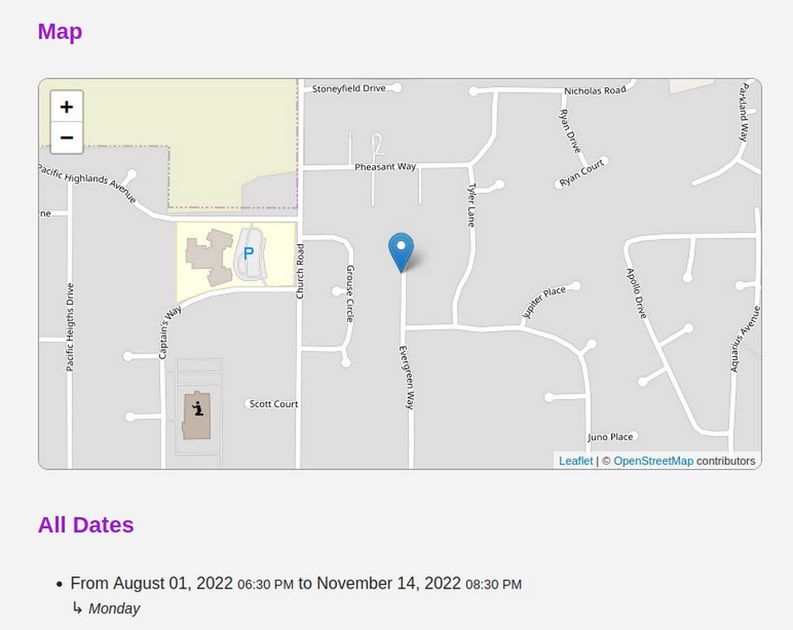
For Contact Details, put in your email address. The phone number and website are optional. You can also attach a PDF flier describing the event. Optionally, you can also add custom features and custom fields, assuming you made either of these. Then click Save. Then click on the Maps tab: Enter the street address of the event and Open Street Map will display a street map showing where the event is located.
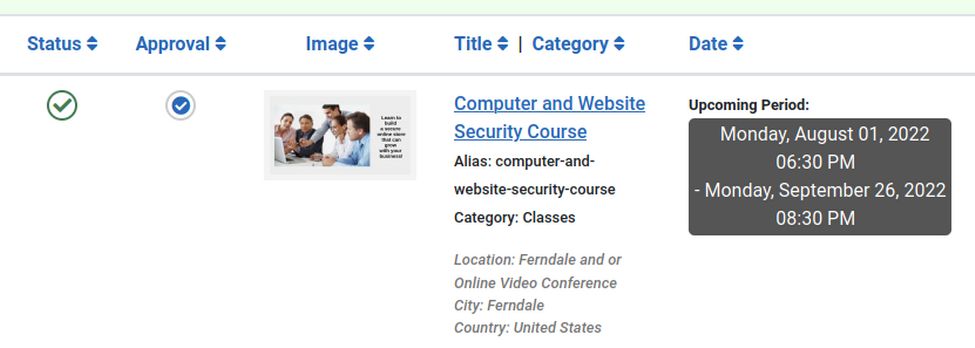
Then click on the Registrations Tab. Enter the number of tickets available and a value for the Register button, such as SIGN UP NOW. Change Gravitar Consent to Disabled. The link to the Registration page is where folks will be taken after they have signed up. You can create a separate article with more event information where folks would be taken to after signing up. Finally, click on Target, Open in a New Window. Then click Save and Close. Here is our first event in the Events Table:
If you had a lot of events, you can sort them in this table either by date or author.
Create Two New Menu Items for Event Viewing and Creation
To see how your members can also create an event, we first need to add a couple of menu items to our main menu. Click on the Main Menu. Then click New. Then click Select. For Menu Item Type, select ICagenda, List of Events. For Title, type in Attend Event.
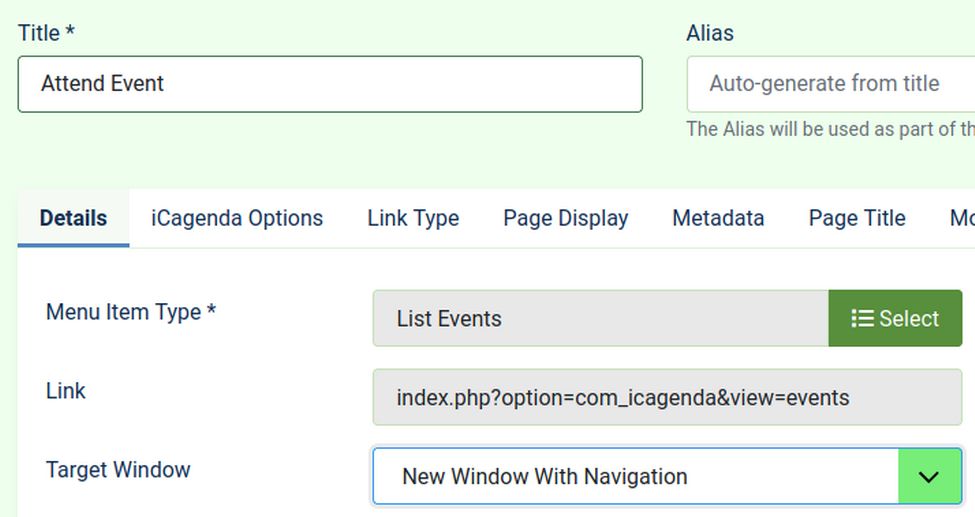
Then click on the ICagenda Options tab. Here you can choose which theme you will use. The IC Rounded theme is much nicer than the default them. Then choose the date format.
To add the second menu item, click Save and New, then click Select and then select the Submit an Event Option. Name the menu item, Create Your Own Event. Change the Access to Registered. Then click the ICagenda tab and set those options. Then click Save and Close.
Write an Event Terms and Conditions article
Go to Content, Articles New. Call the article Event Terms and Conditions. For Description, copy and paste: As space is limited, please sign up in advance and remember to attend this important event. Then go to ICagenda Dashboard and click Options. In the Registration tab, select the article we just made. Then click Save and Close.
View your Event in the Front End of your Website
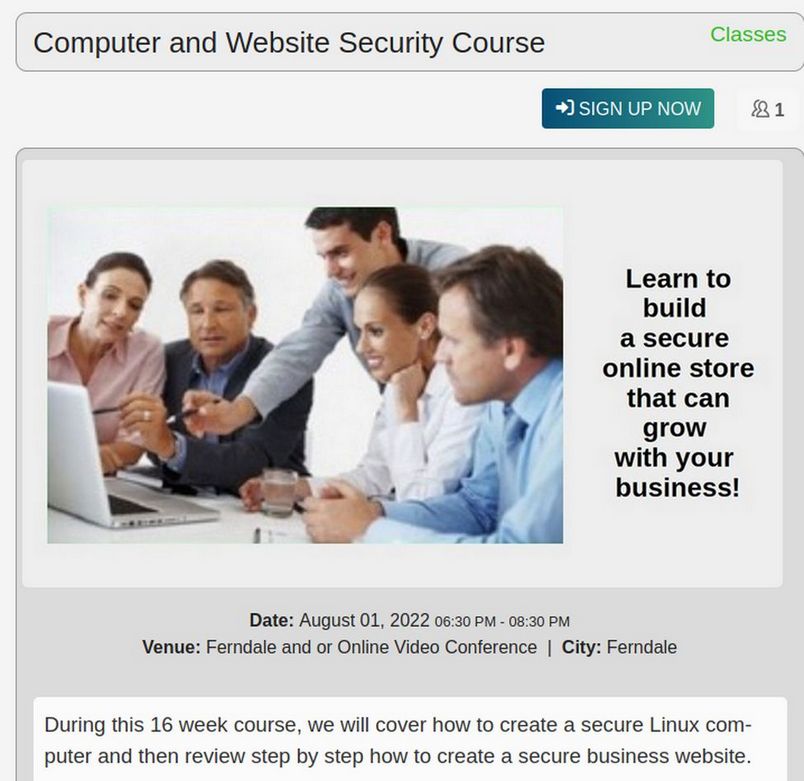
Once we have added the two new menu items, we can go to the front end of our website. First, to see what our event created in the back end of our website look like, click on the Attend an Event menu item:
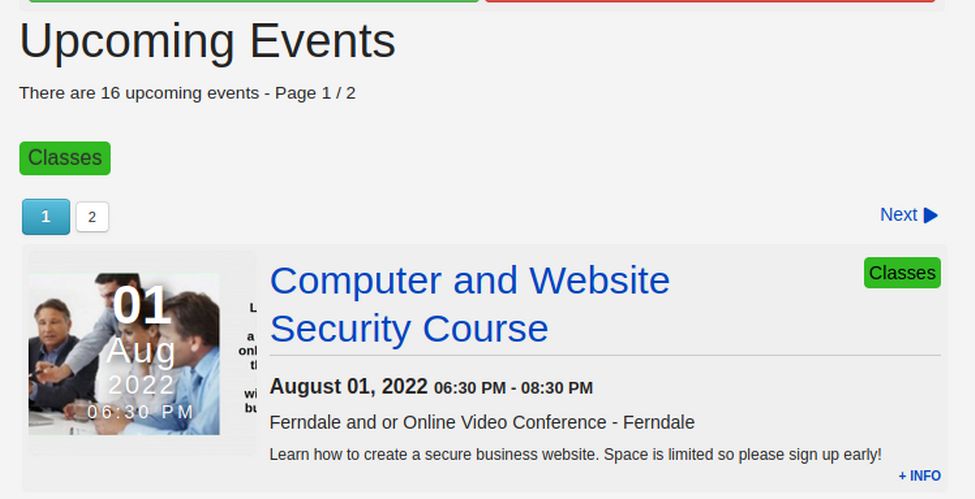
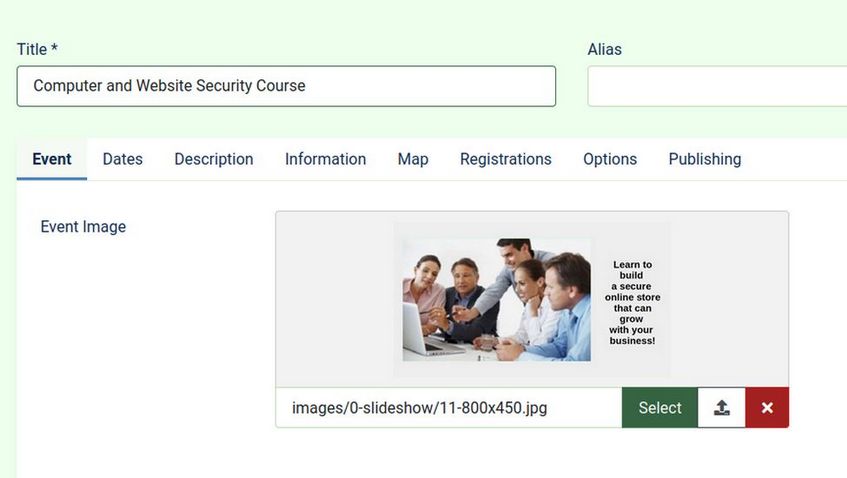
This is why it is useful to add some image to every event. Click on the Computer and Website Security Course title to go to the Event page:
Scroll down the page to see registration information:
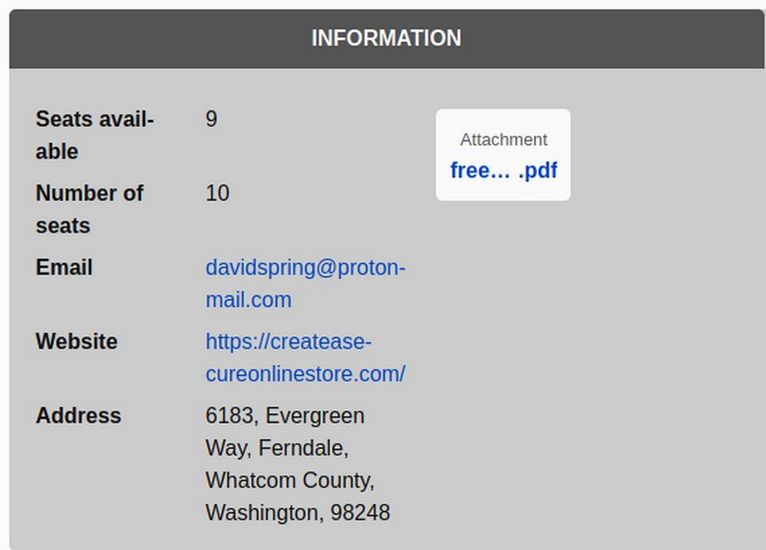
Click on the Attachment to open a downloadable flier about the event.

Below this box is the Open Street Map with the location of the event and the dates.
If one is logged in as a community member, it will also show a list of participants at the very bottom of the page.
Click Sign Up Now at the top of the page. This takes us to the Joomla Log in form. Click Do not have an account to open the Joomla Registration form. (note that we have written a separate article on how to customize this registration form. Also, we can customize the Event Sign up process by having the SIGN UP NOW link go to a custom article which explains how to sign up for one of our courses or events.
Click Sign up now and enter your own Member username and password.
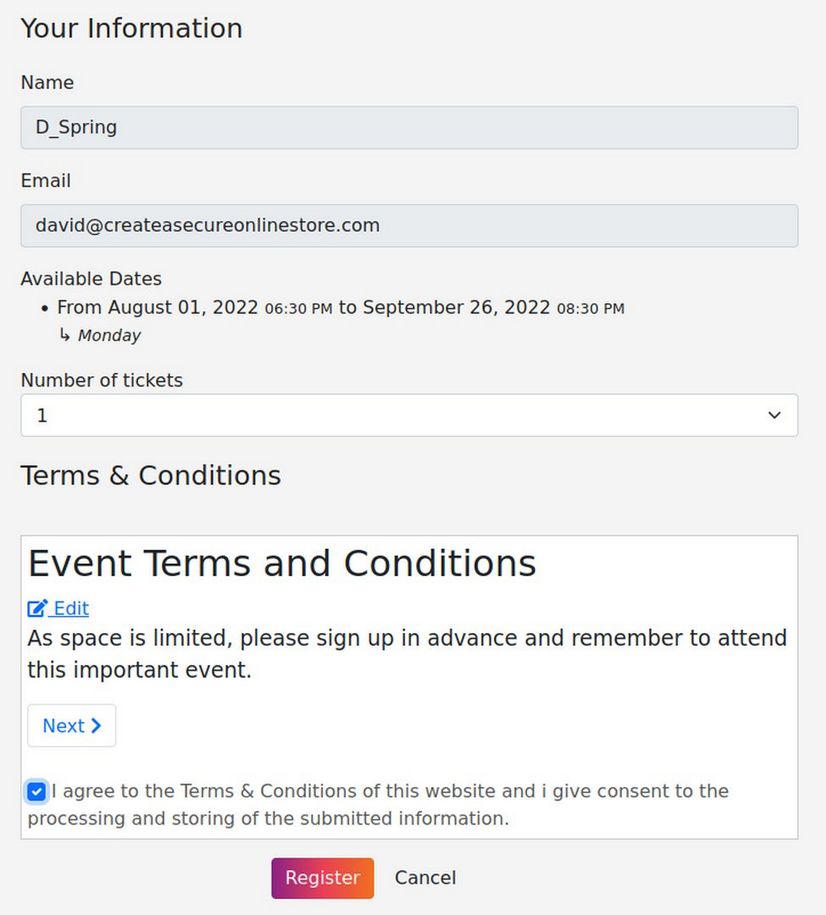
Check I Agree to Terms. Then click Register.
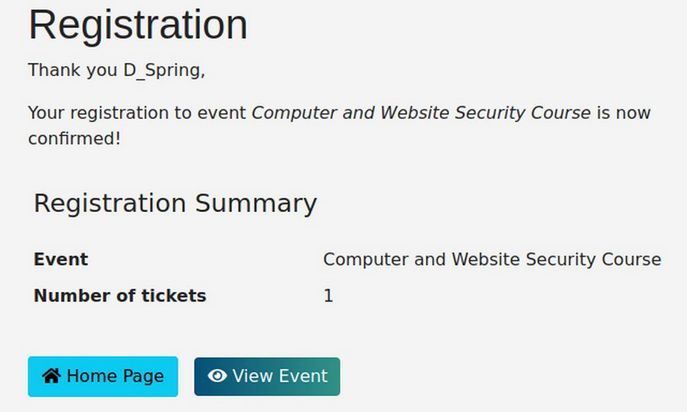
Click View Event to see your name on the List of Participants.
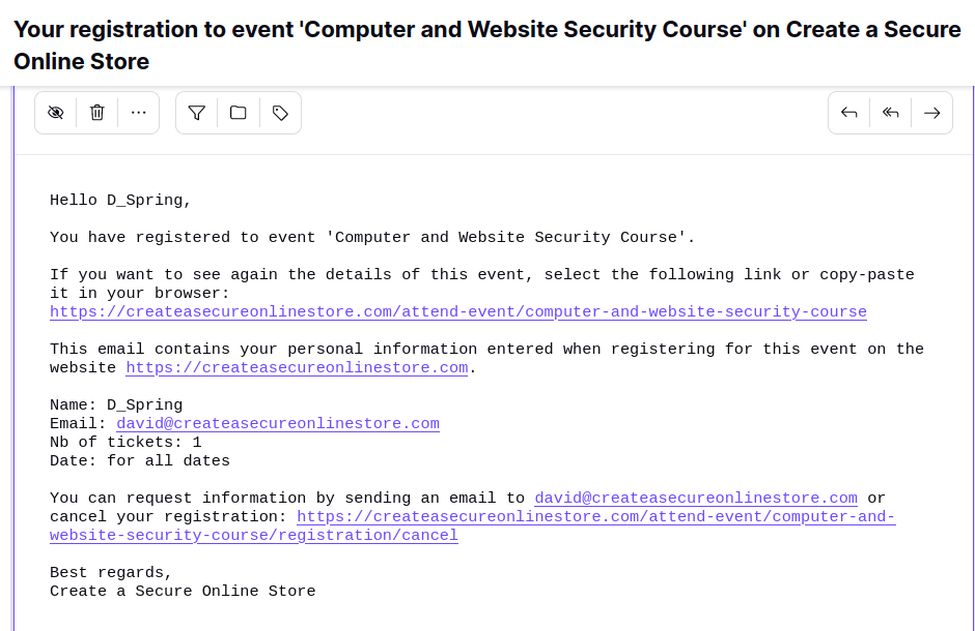
Automatic Emails Sent
After every event registration, two automatic emails will be sent. The first will be sent to the website administrator informing you that person signed up for the event. The second will be sent to the person who signed up with links to more information about the event:
Create an Event in the Front End of Our Website
Now that we know what the final event will look like, and while we are logged into the front end of your website, click on Create Your Own Event in the main menu.
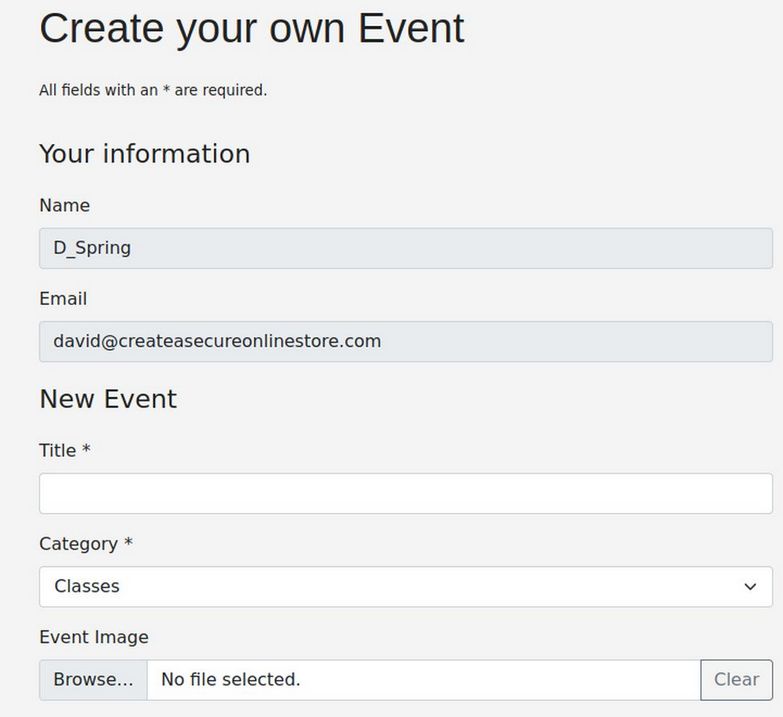
As one needs to be registered as a Community Member in order to create an event, your name and Email address will already be entered. So just give your event a title, assign it to a category and attach an image. Then scroll down the page to the Dates section. Once we mentioned earlier, you want to use the Event over a Period option rather than the Single Date option so that you can give your event a beginning time and an ending time. To set the date and time click on the Start Date box to bring up the Date and Time picker. Click on the date of the event. Then slide the bar to the right to select the time. If you want 6 pm, set the bar at 18. Then click the Purple Validate button. Repeat to set the ending time. Then scroll down the page to give your event a short and long description.
Then scroll down the page and enter a general description of the event location. Then add your Contact email address.
Then enter the address and number of tickets and click Submit. Then click on the Attend an Event Menu item to see if your event was posted. It is likely that your event did not post. If you are just a registered member of the community rather than an administrator, a message will appear saying that your event has been successfully submitted for approval. If you are an administrator, the message will appear saying your event has been posted.
Publish the ICagenda Events Calendar Module
There is an events calendar module that comes with ICagenda that you might want to publish – especially if you have a lot of events. Go to Modules ICagenda Calendar and click on it to open it. Change the name to Community Events Calendar. For Header text, type in “This is a calendar of our coming events. Meetings are in Blue, Classes are in Green and Presentations are in Purple. Click on an event to get more information about it.”
Set the Theme Pack for IC Rounded. Hide the Country. Hide the Intro Text. Hide the Registration Info. Hide the Venue. Hide the City. Set the background color for a light gray or blue, mulit-event class background for light purple and one event Presentation background for light green. Put in a published Helix template Module Position and assign it to only the Attend an Event Menu item. Then publish and click Save and Close. The go to the front end and click on the menu item to see the result.
Send Out a Reminder Email
To send out a simple email reminder of a coming event, you can click on the Components, ICagenda, Newsletter. Select the Event and the Date and the Subject and you can send an email reminder out to everyone who has signed up for this event.
What’s Next?
In the next article, we will review how to set up a community forum.