
One of the most common questions on the Phoca Cart forum is how to get emails automatically sent when a customer places an order. The problem is that by default, Phoca Cart is NOT set up to send emails. We need to take some steps to get these emails sent. In this article, we will review the steps needed so that your customers will get emails whenever the status of their order changes.
Overview of Phoca Cart Email Sending Process
To inform your customer every time the status of their order changes, go to Phoca Cart - Order Statuses. Then select and edit the status you want to add an email sent with.
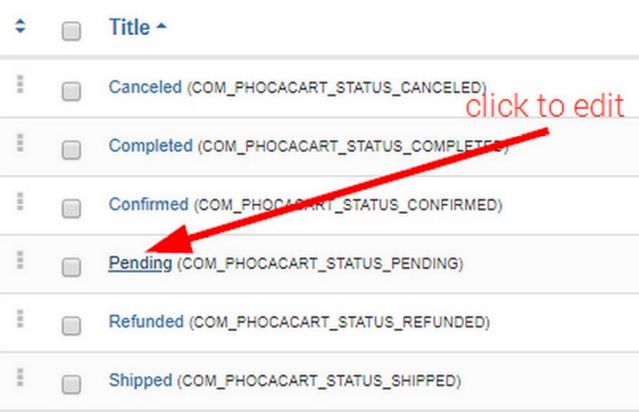
For our first example, we will set up an email to be sent right after the customer places an order and the order is entered into the system as Pending.
Click on Pending to edit this status.

The values at the top of the Order Status Edit screen are already filled in and should not be changed. If we want to allow downloads to be allowed right after the Order first occurs and the Pending status is created, we could change Download from No to Yes. But we will leave this set for No. Click on Email Options.
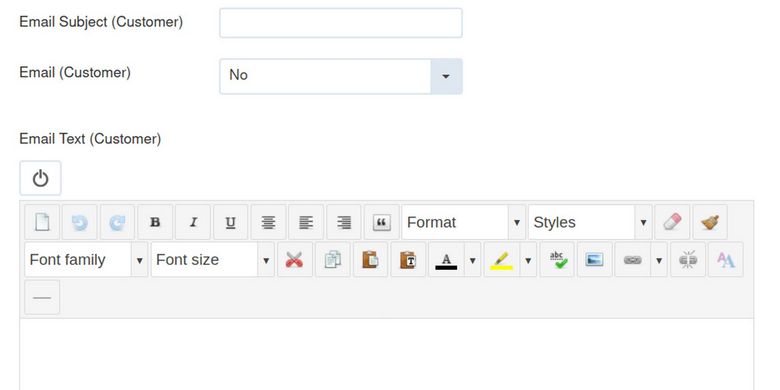
Here is the problem. By default, sending an email to the customer is set for No. There is also no subject line and no email content. Scroll down the page even further to see that there is a separate footer section that can be created for the Order Pending customer email.
Scroll down the page further to see that you can set up a separate email with different content to be sent to anyone you want. For example, you might have a shipping department and you want them to get a copy of all pending orders. You can send this Others email to as many people as you want. Just separate their email addresses with commas.
Below the Others email creation area is an area called Email Send where you can choose some options for what documents are sent in and as an attachment to your customer and Others email.

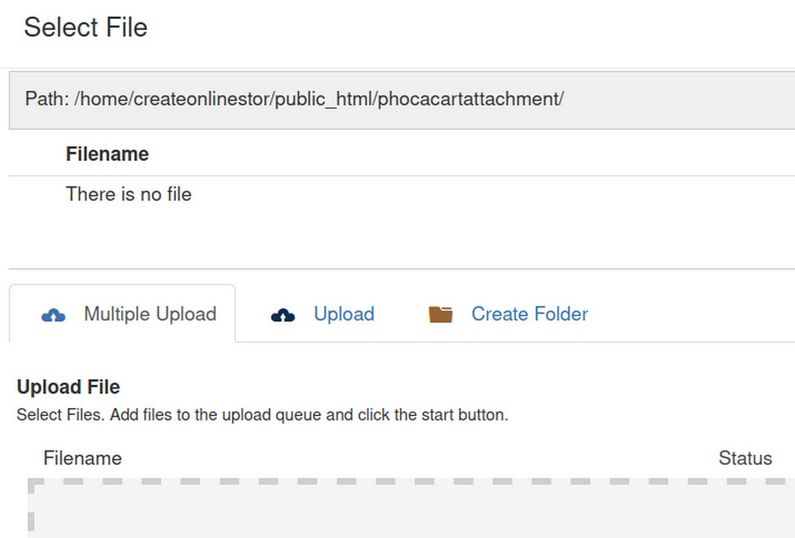
By default, no email will be sent. Use the drop down arrow to Order, Invoice or Delivery Date. We will change this value to Order. Then click on the green plus sign to choose an attachment for this email.

Click Select File. This brings up a file upload screen where we can add any file or PDF from our Home computer to be loaded into a special folder called Phoca Cart Attachments.
One option for creating PDFs of each order to send as an attachment is to install Phoca PDF and the Phoca PDF Phoca Cart plugin. This will display a PDF of each Order, Invoice and Note. Click on the Order PDF, then download it to your computer. Then upload it using the above screen if you want your customer to have a PDF copy of their order. As we do not have any custom files or PDFs made for this yet, we will skip adding any attachments. Now that we understand the process, let’s set up or first test email.
Set Up and Test the Pending Order Email
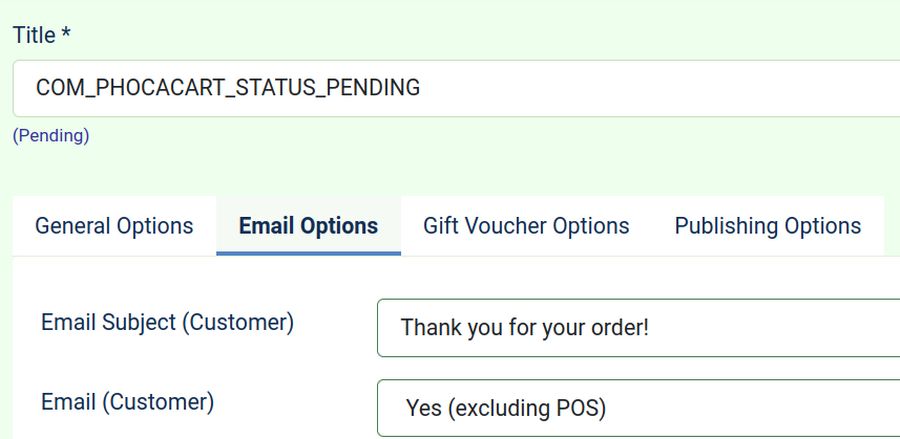
Change Email Customer from No to Yes (excluding POS). For the Email subject, type in Thank you for your order.
For starters, do not type anything into the email content area. We have set the email to send the order. Let’s see if this order form is sent inside of the email. Click Save and Close. Then assuming your online store website is live and on a real server, place a new test order.
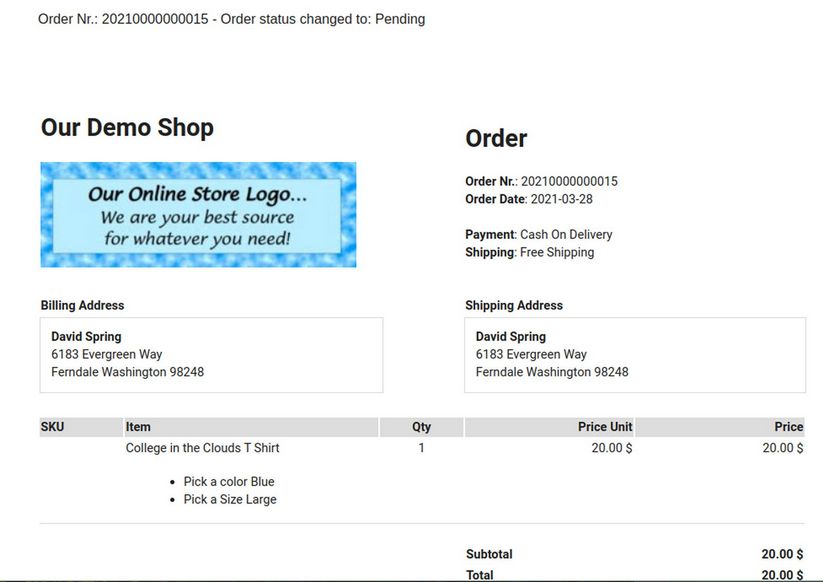
What we have learned from this test is that there is no need to add anything to the content area or footer area of the email if you simply want to send the Order itself. But we can make the email more friendly and personal by adding some text to the main content area. We will do this with our second email to the customer which we will set up to send to the customer automatically when the status changed from Pending to Confirmed.
Set Up and Test the Confirmed Order Email
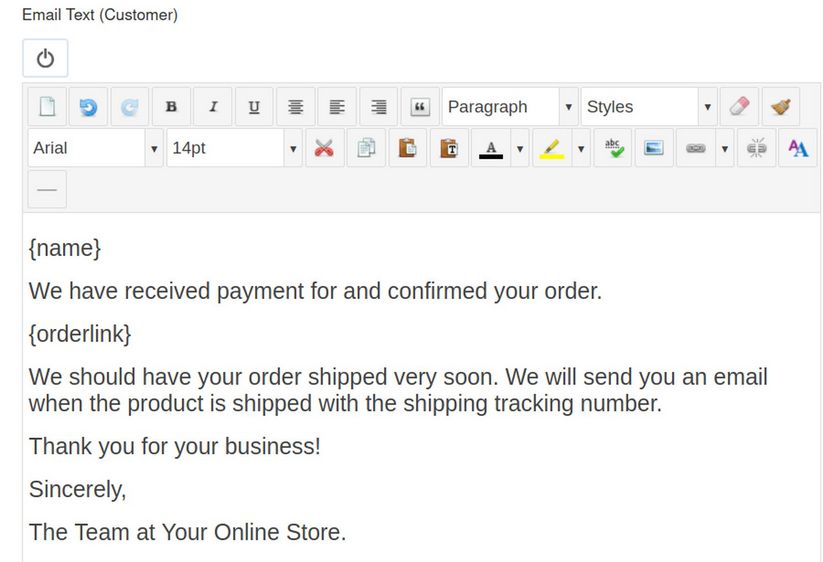
Go to Phoca Cart Order Statuses and click on Confirmed to Edit this status. The screen will look similar to the Pending Status Edit screen. Scroll down to Email Customer and change from No to Yes. For subject, type Your Order has been confirmed. Then copy and paste this text into the content box:
{name}
We have received payment for and confirmed your order.
{orderlink}
We should have your order shipped very soon. We will send you an email when the product is shipped with the shipping tracking number.
Thank you for your business!
Sincerely,
The Team at Your Online Store.
Here is what this email will look like inside the Content Workspace:
You can include many different preset field names and even make up your own field names (See our previous article on this). Then scroll down and change Email Send from Nothing to Order. Then click Save and Close.
Then click on Orders and click Edit Status for this test order. Change the Status from Pending to Confirmed. Then click Edit Status at the bottom of the screen.

The Success message should appear at the top of the screen. Close the screen. Then open the sent email:
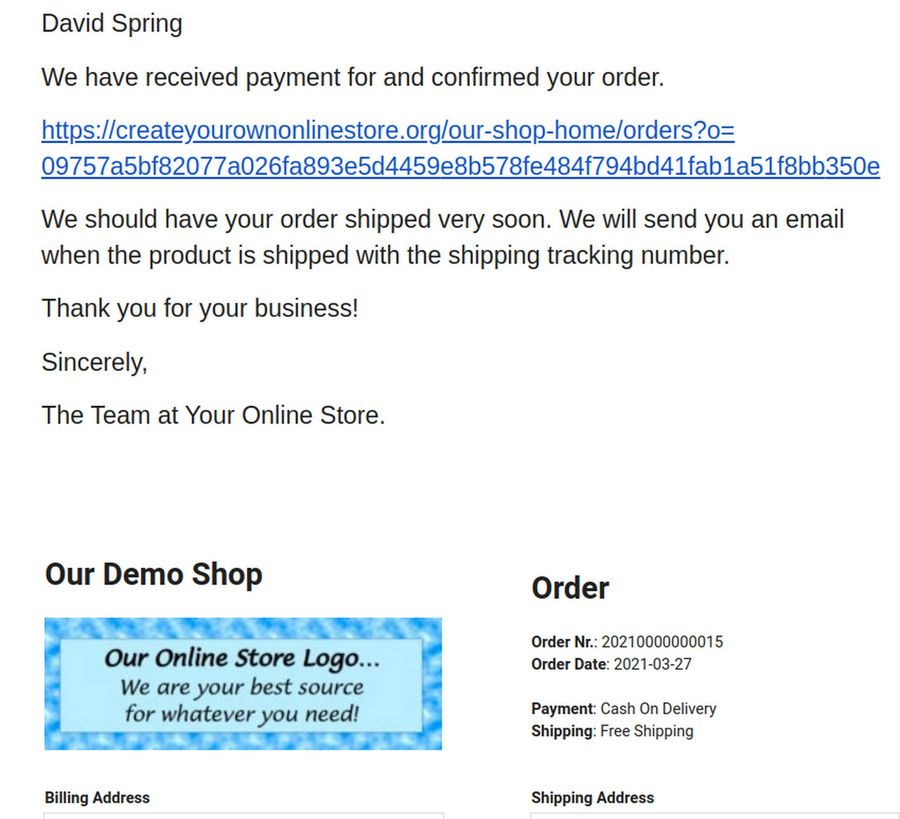
Click on the link. This takes us to the Orders section .
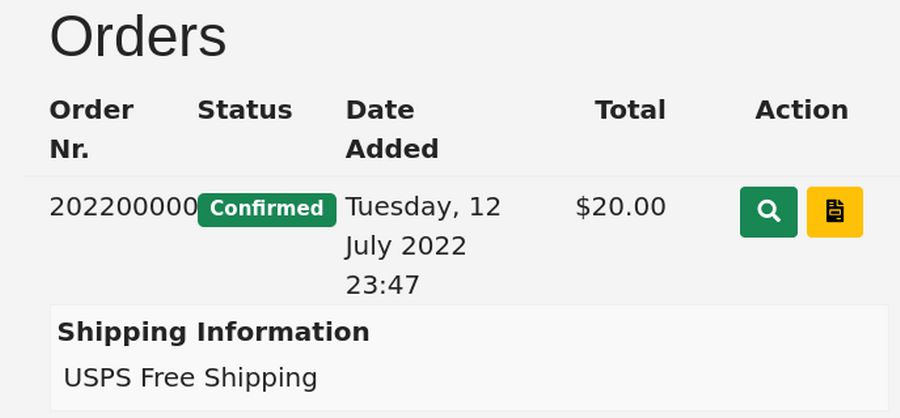
For Guests to be able to view their Orders, go to Options, Users, Order Guest Access and change it to Yes to allow Guests to view their orders.
Set Up and Test the Shipped Order Email
Next, we will set up an email to be sent when the product status changes to Shipped. Click on the Shipped Order Status to edit it. Type in an email subject such as . Then change the Email Customer box from No to Yes. Then fill in the main content of the email. Here is an example of an email to be set after the product has shipped:
{name}
Your order has been shipped. Here is the tracking information for this shipment.
{trackinglink}
{shippingtitle}
{dateshipped}
{trackingdescription}
If you have any questions about your order, feel free to email us
orders (at) Our Online Store (dot) com.
Then scroll down to Email Send and change it fro Nothing to Order. Then click Save and Close.
Verify the Order Shipped Email content
Change the status of an existing order from Confirmed to Shipped. Then click Edit Status at the bottom of the page. Then close the Order Status Edit screen and view the email sent. Sadly, because we have not added a Package Tracking number to this order, no tracking number was included. We can add this tracking number to the Comments section when we send the Order Shipped email.
Because emails are basically primitive web pages, there is much more that can be done to improve the appearance of your automated emails. We will cover some of this in a future article when we cover sending newsletters which are also emails.
What’s Next?
In the next section, we will review how to further customize the appearance and order process in Phoca Cart.